Unlock the Secret to Creamy, Homemade Hummus: A Culinary Journey from Scratch
Have you ever wondered if that store-bought Hummus could really compete with a homemade version? The answer, my friends, is a resounding no! Today, we’re diving deep into crafting the perfect batch of creamy, flavorful Hummus right in your own kitchen. Forget bland, forget pasty – we’re talking about a silken dip that will elevate your every snack and meal. Learning to prepare this vibrant spread at home is not just about saving money; it’s about controlling ingredients, customizing flavors, and experiencing the sheer satisfaction of creating something truly delicious from simple, wholesome ingredients like the humble chickpea. Get ready to transform your culinary repertoire and impress your taste buds with this authentic recipe.
Ingredients & Kitchen Tools
Gather your culinary arsenal! Here’s everything you’ll need to create your masterpiece:
Canned Chickpeas (Garbanzo Beans): 1 (15-ounce) can, drained and rinsed. The star of our show, providing the creamy base.*
Tahini: 1/4 cup. A sesame paste that adds a nutty depth and essential creaminess.*
Fresh Lemon Juice: 1/4 cup, from 1-2 lemons. Brightens the flavors and balances the richness.*
Garlic: 1-2 cloves, minced. For a pungent kick; adjust to your preference.*
Olive Oil: 2-3 tablespoons, plus more for drizzling. Adds richness and helps achieve a smooth texture.*
Cold Water or Ice Water: 2-4 tablespoons. The secret to a truly airy, fluffy texture.*
Ground Cumin: 1/2 teaspoon. A classic spice that complements the chickpea beautifully.*
Salt: 1/2 teaspoon, or to taste. Enhances all the flavors.*
Paprika (optional): For garnish. Adds color and a hint of smoky sweetness.*
Fresh Parsley or Cilantro (optional): For garnish. For a fresh, vibrant finish.*
Kitchen Tools:
- Food Processor: Essential for achieving that silky-smooth consistency.
- Measuring Cups and Spoons: For accurate ingredient proportions.
- Colander: For rinsing the chickpeas.
- Spatula: For scraping down the sides of the food processor.
- Serving Bowl: To present your glorious Hummus.
Prep Time & Cooking Schedule
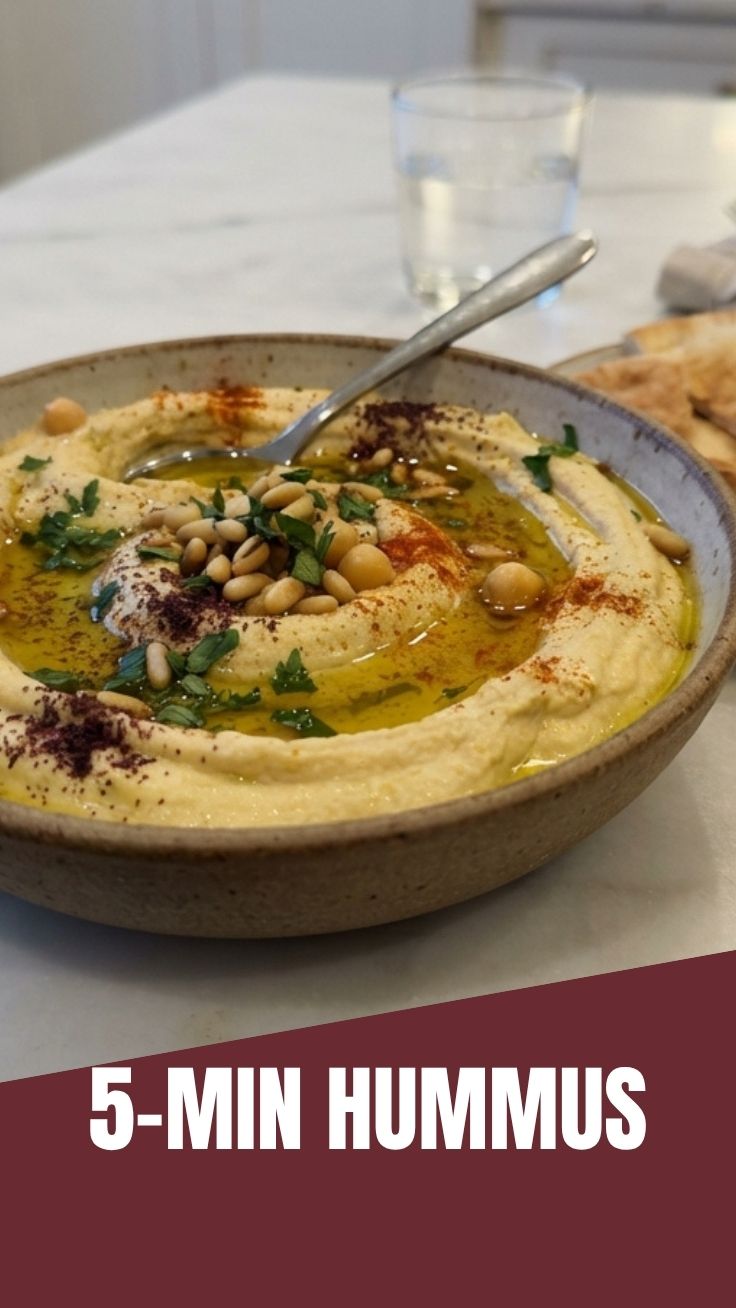
Good news for the time-conscious chef: homemade Hummus is incredibly quick to prepare!
- Prep Time: 10 minutes (primarily draining and rinsing chickpeas, mincing garlic, and juicing lemons).
- Cook Time: 0 minutes (no cooking required!).
- Processing Time: 5-7 minutes.
- Total Time: Approximately 15-20 minutes from start to a delightfully dippable finish.
This recipe is perfect for last-minute gatherings or a quick snack prep, fitting seamlessly into even the busiest schedules.
Step-by-Step Instructions
1. Prepare the Chickpeas: Drain and rinse the canned chickpeas thoroughly under cold water. For the absolute creamiest Hummus, you can optionally remove the skins from each chickpea, though this is time-consuming and not strictly necessary.
2. Combine Ingredients: In the bowl of your food processor, combine the rinsed chickpeas, tahini, lemon juice, minced garlic, olive oil, ground cumin, and salt.
3. Process to Perfection: Process the mixture for 1-2 minutes until a thick paste forms. Scrape down the sides of the bowl with a spatula.
4. Achieve Creaminess: With the food processor running, gradually add the cold water, one tablespoon at a time, until the Hummus reaches your desired silky-smooth consistency. This usually takes 2-4 tablespoons. Pro tip: Using ice water helps emulsify the mixture and yields a lighter, fluffier result.
5. Taste and Adjust: Taste the finished Hummus and adjust seasonings as needed. You might want more salt, lemon juice, or even a dash more cumin.
6. Serve and Garnish: Transfer the creamy Hummus to a serving bowl. Create a small well in the center and drizzle generously with extra virgin olive oil. Garnish with a sprinkle of paprika and fresh parsley or cilantro, if desired.
Nutritional Benefits & Advantages
This homemade Hummus isn’t just delicious; it’s a nutritional powerhouse! Chickpeas, the primary ingredient, are an excellent source of plant-based protein and dietary fiber, promoting satiety and aiding in digestive health. They also provide essential minerals like iron, folate, and manganese. Tahini contributes healthy fats and calcium, while olive oil adds monounsaturated fats, known for their heart-healthy benefits. Furthermore, making your own ensures you avoid unwanted additives, preservatives, and excessive sodium often found in commercial varieties. It’s a naturally gluten-free and dairy-free option, making it suitable for various dietary needs.
Tips, Variations & Cooking Advice
- Roasted Garlic Hummus: For a milder, sweeter garlic flavor, roast a head of garlic before adding it to the food processor.
- Spicy Kick: Add a pinch of cayenne pepper or a dash of your favorite hot sauce for some heat.
- Herbal Infusion: Incorporate fresh herbs like basil, mint, or dill for a vibrant twist.
- Sun-Dried Tomato: Blend in a few rehydrated sun-dried tomatoes for a sweet and tangy variation.
- Beetroot Hummus: Add a cooked beetroot for a stunning pink color and earthy sweetness.
- Texture Control: If you prefer a thinner Hummus, add a little more cold water. For a thicker dip, use less.
Common Mistakes to Avoid
- Not Rinsing Chickpeas: Skipping this step can lead to a metallic taste from the canning liquid. Always rinse well.
- Too Little Liquid: Your Hummus will be too thick and pasty. Don’t be afraid to add cold water until it’s smooth.
- Over-Processing: While you want it smooth, excessive processing can sometimes make it a bit gluey. Find that sweet spot of creamy perfection.
- Forgetting to Taste: Always taste and adjust seasonings. A little more salt or lemon can make all the difference.
Storage & Meal Prep Tips
Homemade Hummus stores beautifully. Transfer it to an airtight container and store it in the refrigerator for up to 5-7 days. A thin layer of olive oil drizzled on top before sealing the container can help prevent it from drying out and oxidizing. Hummus can also be frozen for up to 3 months. Thaw overnight in the refrigerator, then give it a good stir and add a splash of water or olive oil if needed to restore its creamy texture. It’s an excellent component for meal prep, perfect for dipping veggies, spreading on sandwiches, or adding to grain bowls.
Conclusion
There you have it – the ultimate guide to crafting irresistible, homemade Hummus! From the simple act of rinsing a chickpea to achieving that perfect, velvety texture, this recipe proves that the best flavors often come from the simplest ingredients and a little bit of care. We encourage you to try this recipe, experiment with the variations, and savor the rich, satisfying taste of your own creation. Share your homemade Hummus creations with us in the comments below, or explore our other Mediterranean-inspired recipes for more culinary adventures!
FAQs
Q1: Do I have to remove the skins from the chickpeas?
A1: While removing the skins can lead to an even smoother, creamier Hummus, it’s optional. Canned chickpeas are usually soft enough to yield a good texture even with skins on.
Q2: What can I use if I don’t have tahini?
A2: Tahini is crucial for authentic flavor and texture, but in a pinch, you can try blending in a tablespoon or two of a neutral nut butter (like cashew butter) for some richness, though the flavor profile will differ significantly.
Q3: My Hummus is too thick/thin. How can I fix it?
A3: If it’s too thick, gradually add more cold water (or even a tiny bit more olive oil) while processing until it reaches your desired consistency. If it’s too thin, you can add a few more chickpeas or a tablespoon of tahini and re-process.
Q4: Can I use dried chickpeas instead of canned?
A4: Absolutely! Soak dried chickpeas overnight, then cook them until very tender. This often results in an even creamier Hummus as they are softer.
Q5: How long does homemade Hummus last?
A5: Stored in an airtight container in the refrigerator, your homemade Hummus will stay fresh for 5-7 days.