Unlock the Secret to the Ultimate Homemade Queso Dip: A Creamy, Dreamy Delight!
Ever wondered how to replicate that irresistible, velvety Queso Dip you crave from your favorite Mexican restaurant right in your own kitchen? The good news is, it’s not only possible but surprisingly straightforward to create a truly spectacular Queso Dip that will elevate any gathering or family meal. Forget bland, store-bought versions; mastering this homemade cheese dip recipe means unlocking a world of flavor, customization, and pure, unadulterated cheesy bliss. This isn’t just about melting cheese; it’s about crafting a perfectly balanced, addictive appetizer that’s worth every spoonful. Get ready to impress your taste buds and your guests with this comprehensive guide to the ultimate homemade cheese dip.
Ingredients & Kitchen Tools
Crafting the perfect Queso Dip requires a thoughtful selection of ingredients and the right tools. Here’s what you’ll need:
- 1 tbsp unsalted butter: Provides a rich base and helps sauté aromatics.
- 1/2 cup finely diced white onion: Adds a subtle sweetness and aromatic depth.
- 1 jalapeño, seeded and finely minced: For a touch of heat; adjust to your spice preference. Remove seeds for less heat.
- 1 clove garlic, minced: Enhances the savory profile.
- 1 (10 oz) can diced tomatoes with green chilies (e.g., Ro-Tel), undrained: The secret weapon for classic Tex-Mex flavor and a bit of liquid.
- 1 cup whole milk: Creates the creamy consistency; full-fat is best for richness.
- 8 oz cream cheese, softened and cubed: The ultimate emulsifier and thickener for a silky smooth texture.
1 lb processed cheese, e.g., Velveeta, cubed: Melts beautifully and provides that classic cheese dip consistency. Substitution: For a more natural option, use a blend of Monterey Jack and sharp cheddar, but be aware it may require a bit more attention to prevent clumping.*
- 1/2 tsp chili powder: Adds a warm, earthy spice.
- 1/4 tsp ground cumin: Essential for authentic Tex-Mex flavor.
- Salt and freshly ground black pepper to taste: Seasoning is key!
- Optional garnishes: Fresh cilantro, diced tomatoes, extra jalapeño slices, a dollop of sour cream or guacamole.
Kitchen Tools:
- Medium-sized heavy-bottomed saucepan or Dutch oven: For even heat distribution to prevent scorching.
- Whisk: Essential for thoroughly combining ingredients and achieving a smooth texture.
- Spatula: For stirring and scraping the sides of the pan.
- Cutting board and sharp knife: For preparing your aromatics.
- Measuring cups and spoons: For accurate ingredient quantities.
Prep Time & Cooking Schedule
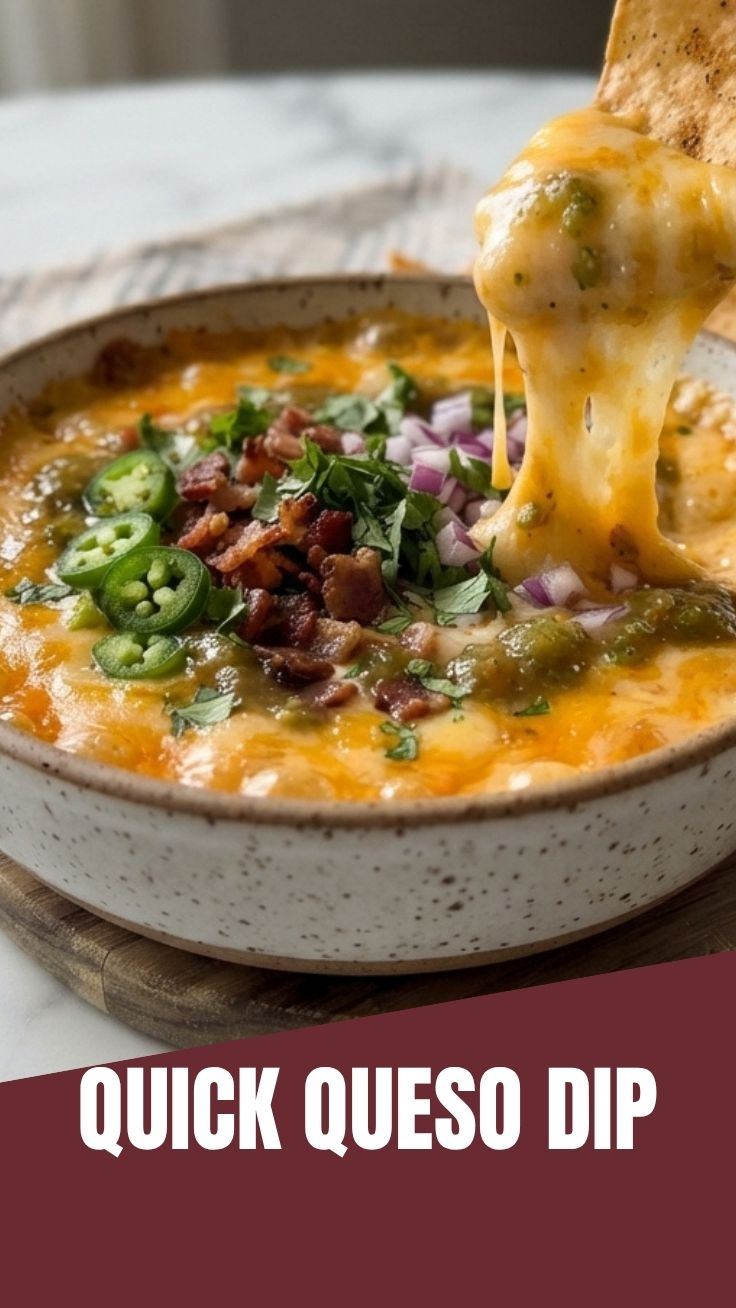
This recipe is designed for maximum flavor with minimal fuss, making it perfect for last-minute gatherings or a cozy night in.
- Prep Time: 15 minutes (chopping vegetables, cubing cheese)
- Cook Time: 20-25 minutes (simmering and melting)
- Resting Time: 5 minutes (allows flavors to meld and consistency to thicken slightly)
- Total Time: Approximately 40-45 minutes
This quick turnaround means you can whip up a batch of delicious Queso Dip without hours of planning. Prepare your ingredients ahead of time (mise en place) to make the cooking process even smoother.
Step-by-Step Instructions
Follow these steps carefully to achieve a perfectly smooth and flavorful Queso Dip:
1. Sauté Aromatics: In your heavy-bottomed saucepan or Dutch oven, melt the butter over medium heat. Add the diced white onion and minced jalapeño. Sauté for 5-7 minutes until the onions are softened and translucent. Stir in the minced garlic and cook for another minute until fragrant, being careful not to burn it.
2. Build the Base: Pour in the undrained can of diced tomatoes with green chilies. Bring the mixture to a gentle simmer, stirring occasionally. This helps release the flavors of the aromatics and tomatoes.
3. Introduce Dairy and Cheese: Reduce the heat to low. Slowly whisk in the whole milk, ensuring it’s fully incorporated. Add the softened cream cheese cubes and the cubed processed cheese (like Velveeta). Continue to stir constantly with your whisk or spatula. This is crucial for preventing the cheese from clumping and ensuring a silky-smooth cheese dip. As the cheese melts, it will thicken the mixture.
4. Season and Simmer: Once all the cheese is melted and the dip is smooth, stir in the chili powder and ground cumin. Season with salt and freshly ground black pepper to taste. Continue to simmer on low heat for another 5-10 minutes, stirring frequently, to allow the flavors to meld beautifully and for the Queso Dip to reach its optimal creamy consistency.
5. Serve: Remove from heat and let it rest for 5 minutes. Transfer to a serving bowl or a small slow cooker on the “warm” setting. Garnish with fresh cilantro, diced tomatoes, or extra jalapeño slices if desired. Serve immediately with tortilla chips, vegetable sticks, or as a topping for tacos and nachos.
Nutritional Benefits & Advantages
While often seen as an indulgence, homemade Queso Dip can offer some surprising benefits. The dairy components provide a good source of calcium and protein, essential for bone health and muscle repair. Using fresh vegetables like onions and jalapeños adds vitamins and antioxidants. By making it at home, you control the quality of ingredients, reducing preservatives and excessive sodium often found in store-bought options. Plus, the sheer joy of a delicious homemade meal contributes positively to mental well-being!
Tips, Variations & Cooking Advice
- Spicier Kick: Leave some seeds in the jalapeño or add a pinch of cayenne pepper or a dash of hot sauce.
- Smoky Flavor: Add a pinch of smoked paprika for a deeper, smoky note.
- Meat Lover’s Queso: Brown 1/2 lb ground beef or chorizo, drain the fat, and stir it into the dip before serving.
- Vegetarian Additions: Sautéed bell peppers, corn, or black beans can be stirred in for added texture and nutrition.
- Dairy-Free Version: Use plant-based milks (unsweetened, unflavored almond or soy) and dairy-free cream cheese and cheddar alternatives. Note that the texture may vary.
- Slow Cooker Method: After sautéing aromatics, combine all ingredients in a slow cooker and cook on low for 1.5-2 hours, stirring occasionally until smooth. Keep on “warm” for serving.
- Preventing Skin: If the dip sits for a while, a thin skin may form. A quick whisk will usually smooth it out. For longer holding, a thin layer of milk stirred in can help, or keep it covered on low heat.
Common Mistakes to Avoid
- High Heat: Cooking on too high heat will cause the cheese to separate, become grainy, or stick to the bottom of the pan. Always use low to medium-low heat.
- Not Stirring Enough: Insufficient stirring can lead to clumps of cheese or a burnt bottom. Consistent stirring is key, especially when melting the cheese.
- Adding Cold Milk Directly to Hot Cheese: This can shock the mixture and cause clumping. Ensure milk is at room temperature or slightly warmed before adding, or add slowly while whisking.
- Skipping Processed Cheese (if aiming for classic texture): While natural cheeses are delicious, processed cheese like Velveeta provides an unparalleled smooth, consistent texture that’s difficult to replicate with natural cheeses alone without stabilizers. If using natural cheeses, grate them finely and add a tablespoon of cornstarch (mixed with a little cold milk) to help prevent separation.
- Over-seasoning: It’s easier to add more salt or spice than to remove it. Season gradually and taste as you go.
Storage & Meal Prep Tips
Homemade Queso Dip stores wonderfully, making it a great option for meal prep or enjoying leftovers.
- Refrigeration: Store cooled Queso Dip in an airtight container in the refrigerator for up to 3-4 days.
- Freezing: While possible, freezing Queso Dip can sometimes alter the texture, making it slightly grainier upon reheating. If you must freeze, allow it to thaw completely in the refrigerator before reheating.
- Reheating: Reheat gently on the stovetop over low heat, stirring frequently, or in the microwave in 30-second intervals, stirring between each to prevent separation. You may need to add a splash of milk to restore its original creamy consistency.
- Make Ahead: You can prepare the dip a day in advance and reheat it just before serving. This makes party planning a breeze!
Conclusion
There you have it – the definitive guide to crafting the ultimate homemade Queso Dip. From its rich, creamy texture to its perfectly balanced Tex-Mex flavors, this recipe for cheese dip is a guaranteed crowd-pleaser. We’ve walked through every step, ensuring you have all the knowledge and tips to create a truly spectacular Queso Dip that will become a staple in your culinary repertoire. Don’t just take our word for it; give this recipe a try, share your delicious results with us in the comments, and discover the joy of making a classic cheese dip from scratch!
FAQs
Q1: Can I use different types of cheese?
A1: Yes, you can experiment! A blend of sharp cheddar, Monterey Jack, and a touch of Colby or even Pepper Jack can work well. However, for the signature smooth texture, incorporating some processed cheese or using a stabilizer like cornstarch is often recommended.
Q2: My queso turned out grainy. What went wrong?
A2: Graininess is usually a sign of too high heat or insufficient stirring, causing the cheese proteins to seize up. Always cook on low heat and stir continuously while the cheese melts.
Q3: How can I make this dip healthier?
A3: To make it slightly healthier, you can use low-fat milk and cream cheese (though full-fat offers better texture). You can also load it with extra vegetables like spinach, corn, or bell peppers.
Q4: Can I make this in a microwave?
A4: While technically possible, using a stovetop or slow cooker is recommended for a smoother, more evenly melted dip. If using a microwave, heat in short bursts (30-60 seconds), stirring thoroughly between each burst to prevent overheating and separation.
Q5: What are the best dippers for this queso?
A5: Classic tortilla chips are a must! Other great options include warm tortillas, vegetable sticks (carrots, celery, bell peppers), pita bread, or even pretzels. It also makes an amazing sauce for nachos, burritos, and enchiladas.