Unleash Your Inner Chef: Master the Art of Homemade Teriyaki Chicken
Ever wonder how those succulent, glossy chicken dishes from your favorite Asian restaurants get that irresistible flavor? Today, we’re diving deep into crafting the perfect homemade Teriyaki Chicken – a dish that’s not just delicious, but incredibly rewarding to prepare in your own kitchen. Beyond the joy of cooking, making this beloved recipe at home allows for complete control over ingredients, ensuring fresh, wholesome flavors free from artificial additives. It’s also a fantastic way to explore the rich culinary traditions of Japanese recipes without leaving your home.
Ingredients & Kitchen Tools
Crafting authentic Teriyaki Chicken requires a few key players. Here’s what you’ll need:
- 1.5 lbs Boneless, Skinless Chicken Thighs or Breasts: Thighs offer juicier results, while breasts are leaner.
- 1/2 cup Soy Sauce (low sodium recommended): The base of our teriyaki sauce, providing umami and saltiness.
- 1/4 cup Mirin: Japanese sweet rice wine, essential for authentic flavor and glaze.
- 2 tablespoons Sake (optional): Another Japanese rice wine, adds depth and tenderizes the chicken.
- 2 tablespoons Brown Sugar (packed): Balances the savory notes with a touch of sweetness, contributing to the glaze.
- 1 tablespoon Fresh Ginger (grated): Pungent and aromatic, a staple in Asian cuisine.
- 2 cloves Garlic (minced): Adds a robust, aromatic foundation.
- 1 tablespoon Cornstarch (mixed with 2 tablespoons water): Our secret weapon for thickening the sauce to a perfect glaze.
- 1 tablespoon Sesame Oil: Adds a nutty aroma at the end.
- Sesame Seeds (for garnish): Adds texture and visual appeal.
- Green Onions (chopped, for garnish): Fresh, zesty topping.
Kitchen Tools:
- Large Skillet or Wok: For searing the chicken and simmering the sauce.
- Whisk: To combine sauce ingredients smoothly.
- Measuring Cups and Spoons: For accurate ingredient ratios.
- Sharp Knife and Cutting Board: For prepping chicken and aromatics.
- Meat Thermometer (optional): For ensuring chicken is cooked through.
- Small Bowl: For thickening slurry.
Prep Time & Cooking Schedule
- Prep Time: 15 minutes
- Marinating Time (optional): 30 minutes to 2 hours (for enhanced flavor and tenderness)
- Cook Time: 20-25 minutes
- Total Time: Approximately 40-60 minutes (excluding marinating)
This recipe is designed for efficiency, making it perfect for weeknight dinners. While marinating is optional, even a short soak can significantly deepen the flavor profile of your chicken.
Step-by-Step Instructions
1. Prepare the Chicken: Pat your chicken thighs or breasts dry with paper towels and cut them into 1-inch pieces. This ensures even cooking.
2. Whisk the Teriyaki Sauce: In a medium bowl, combine soy sauce, mirin, sake (if using), brown sugar, grated ginger, and minced garlic. Whisk thoroughly until the sugar is dissolved.
3. Marinate (Optional but Recommended): Place the chicken in the sauce, ensuring all pieces are coated. Cover and refrigerate for at least 30 minutes, or up to 2 hours. This infusion of flavor is key to a remarkable Teriyaki Chicken.
4. Cook the Chicken: Heat 1 tablespoon of cooking oil in a large skillet or wok over medium-high heat. Remove chicken from the marinade (reserve the marinade!), and sear in batches until browned on all sides and cooked through. This usually takes 5-7 minutes per batch. Don’t overcrowd the pan; this prevents steaming and encourages browning. Once cooked, remove the chicken and set aside.
5. Simmer the Sauce: Pour the reserved marinade into the skillet. Bring to a boil, then reduce heat to a simmer. Cook for 3-5 minutes, allowing any alcohol to cook off and flavors to meld.
6. Thicken the Sauce: Whisk the cornstarch slurry (cornstarch mixed with water) and slowly pour it into the simmering sauce, stirring constantly. Continue to cook and stir until the sauce thickens to a glossy, syrupy consistency. For perfectly authentic Japanese recipes, this glaze is crucial.
7. Combine and Finish: Return the cooked chicken to the pan and toss to coat completely in the thick teriyaki glaze. Remove from heat and stir in the sesame oil.
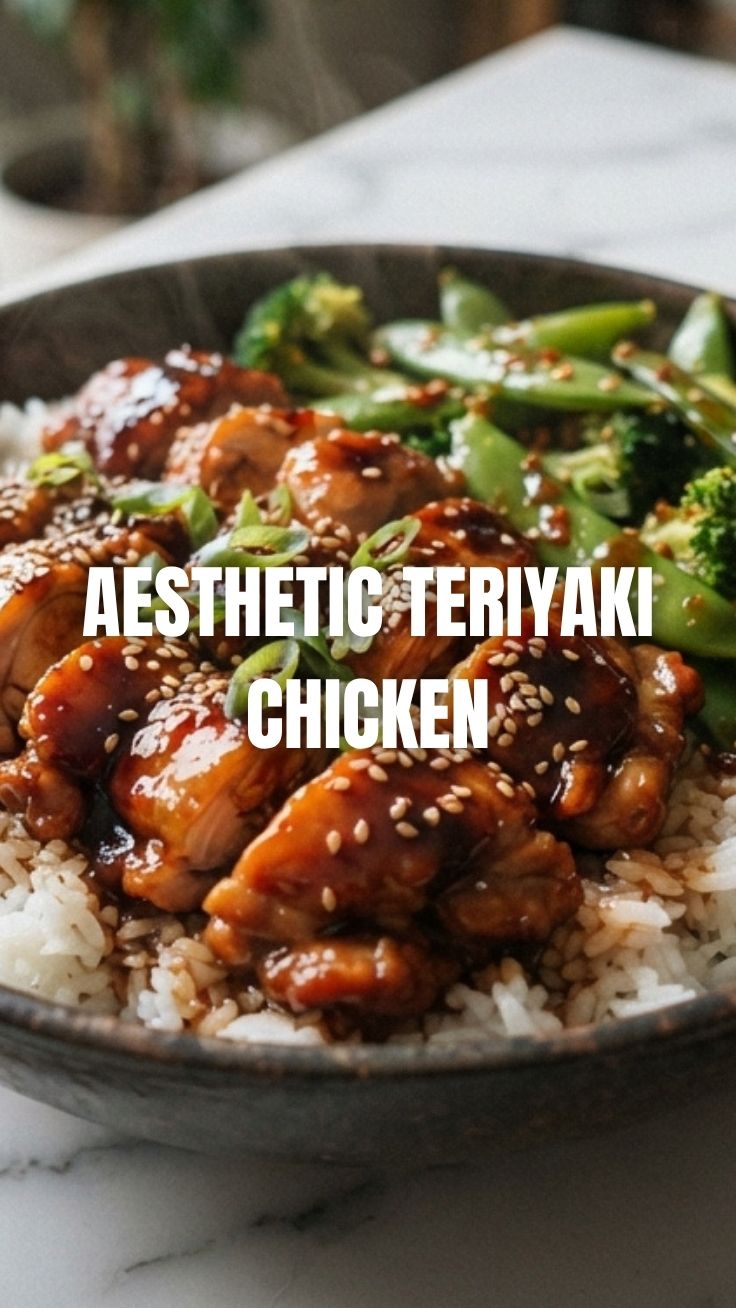
8. Serve: Garnish with sesame seeds and chopped green onions. Serve immediately over rice with a side of steamed vegetables.
Nutritional Benefits & Advantages
This homemade Teriyaki Chicken offers a wealth of nutritional benefits. Chicken is an excellent source of lean protein, essential for muscle repair and growth. Ginger and garlic are packed with antioxidants and have anti-inflammatory properties. By making it at home, you can control the amount of sugar and sodium, making it a healthier alternative to many restaurant versions. Using low-sodium soy sauce and reducing brown sugar allows for a delicious yet mindful meal.
Tips, Variations & Cooking Advice
- Spice it Up: Add a pinch of red pepper flakes to the sauce for a spicy kick.
- Vegetarian Option: Swap chicken for firm tofu, pressed and cubed, then pan-fried until golden before coating in sauce.
- Add Vegetables: Stir-fry broccoli florets, bell peppers, or snap peas with the chicken for a one-pan meal.
- Gluten-Free: Use tamari instead of soy sauce and ensure all other ingredients are gluten-free.
- Grilling: Skewer chicken pieces and grill until cooked, then toss with the prepared teriyaki sauce.
Common Mistakes to Avoid
- Overcrowding the Pan: This lowers the pan temperature, steaming the chicken instead of searing it, leading to less appealing browning. Cook in batches if necessary.
- Skipping the Cornstarch Slurry: The slurry is essential for achieving that characteristic thick, glossy teriyaki glaze. Don’t add cornstarch directly to hot liquid, or it will clump.
- Overcooking the Chicken: Chicken breasts, especially, can dry out if overcooked. A meat thermometer should read 165°F (74°C).
- Not Tasting and Adjusting: Always taste your sauce before and after thickening. Adjust sweetness, saltiness, or ginger/garlic to your preference.
Storage & Meal Prep Tips
Leftover Teriyaki Chicken can be stored in an airtight container in the refrigerator for up to 3-4 days. It’s excellent for meal prep! For longer storage, you can freeze it for up to 2-3 months. Thaw overnight in the refrigerator and reheat gently in a skillet or microwave until warmed through. Add a splash of water or broth if the sauce seems too thick upon reheating.
Conclusion
Mastering homemade Teriyaki Chicken is a culinary triumph that’s both satisfying and delicious. With quality ingredients and a little patience, you can recreate this restaurant-quality dish in your own kitchen. We hope this guide helps you confidently explore the exciting world of Japanese recipes. Give this recipe a try and share your results – we’d love to hear how your teriyaki adventure turns out!
FAQs
Q1: Can I use pre-made teriyaki sauce?
A1: While convenient, homemade sauce offers superior flavor and allows you to control ingredients. If using pre-made, simmer with fresh ginger and garlic to enhance taste.
Q2: How do I prevent the chicken from sticking to the pan?
A2: Ensure your pan is adequately heated before adding oil, and use enough oil to coat the bottom. Don’t overcrowd the pan, and ensure the chicken is patted dry.
Q3: Can I substitute mirin?
A3: White wine, dry sherry, or even rice vinegar mixed with a pinch of sugar can be used as a substitute, but the flavor won’t be exactly the same as authentic mirin.
Q4: My sauce didn’t thicken. What went wrong?
A4: You likely didn’t use enough cornstarch, or the sauce didn’t reach a boil after adding the slurry. Ensure the cornstarch is fully dissolved in cold water before adding to the hot sauce, and allow it to simmer for a few minutes.
Q5: What are good side dishes for Teriyaki Chicken?
A5: Steamed white or brown rice, stir-fried vegetables (like broccoli, bok choy, or snap peas), or a simple cucumber salad are excellent complements.