Master Homemade Sesame Chicken: Your Ultimate Guide to Authentic Flavor
Have you ever craved that perfect balance of sweet, savory, and slightly tangy from your favorite Chinese Takeout, only to be disappointed by store-bought versions? Today, we’re diving deep into crafting an irresistible Sesame Chicken right in your own kitchen! Preparing this beloved dish at home not only guarantees freshness and quality ingredients but also allows you to customize it to your exact preferences, transforming a simple meal into a delightful culinary experience. Get ready to elevate your weeknight dinners and impress your taste buds with this comprehensive guide to homemade Sesame Chicken.
Ingredients & Kitchen Tools
Here’s everything you’ll need to create your culinary masterpiece:
- For the Chicken:
* 1.5 lbs Boneless, Skinless Chicken Thighs or Breasts: Thighs offer more flavor and tend to stay juicier; breasts are leaner. Cut into 1-inch pieces.
* 1 Large Egg: For a crispy coating.
* 1/4 cup Cornstarch: The secret to that beautifully crisp exterior.
* 1/4 cup All-Purpose Flour: Adds to the coating’s texture.
* Salt & Black Pepper: To season the chicken.
* Vegetable Oil (or Peanut Oil): For frying, preferably one with a high smoke point.
- For the Sesame Sauce:
* 1/2 cup Soy Sauce (low sodium preferred): The base of our umami-rich sauce.
* 1/4 cup Honey: For sweetness and a glossy finish.
* 2 tbsp Rice Vinegar: Adds a delightful tang.
* 1 tbsp Sesame Oil (toasted): Essential for that signature nutty aroma.
* 1 tbsp Brown Sugar: Deepens the sweetness.
* 1 tsp Grated Fresh Ginger: Pungent and aromatic.
* 2 cloves Garlic, minced: Adds depth of flavor.
* 1 tbsp Cornstarch (slurry): Mixed with 2 tbsp cold water for thickening.
- For Garnish & Serving:
* Sesame Seeds (toasted): For visual appeal and crunch.
* Green Onions, sliced: Fresh, vibrant garnish.
* Cooked Rice (Jasmine or Basmati): The perfect accompaniment.
* Steamed Broccoli: For a balanced meal.
Kitchen Tools:
- Large Mixing Bowls: For coating chicken and mixing sauce.
- Whisk: For sauce and egg mixture.
- Heavy-Bottomed Pot or Dutch Oven: Ideal for deep-frying, maintaining even temperature.
- Tongs: For handling chicken safely.
- Slotted Spoon or Spider Skimmer: To remove fried chicken.
- Wire Rack: For draining excess oil.
- Small Saucepan: For simmering the sauce.
Prep Time & Cooking Schedule
- Prep Time: 20 minutes (includes chopping chicken and measuring ingredients).
- Marinating Time: Not required, but you can marinate the chicken in a little soy sauce for 15-20 minutes for extra flavor.
- Cook Time: 25-30 minutes (frying chicken in batches, simmering sauce).
- Total Time: Approximately 45-50 minutes.
This recipe is designed for a relatively quick weeknight meal, especially if you have your ingredients prepped. Frying in batches is key to maintaining oil temperature and achieving crispy chicken.
Step-by-Step Instructions
1. Prepare the Chicken: Pat the chicken pieces dry with paper towels. Season lightly with salt and pepper. In a shallow dish, whisk the egg. In another dish, combine the cornstarch and flour. Dip each chicken piece into the egg, ensuring it’s fully coated, then dredge it in the flour/cornstarch mixture, pressing gently to adhere. Lay coated chicken on a wire rack.
2. Heat the Oil: Pour vegetable oil into a heavy-bottomed pot or Dutch oven, enough to submerge the chicken halfway (about 2-3 inches). Heat over medium-high heat to 350-375°F (175-190°C). Use a thermometer for accuracy, or test by dropping a pinch of flour – it should sizzle immediately.
3. Fry the Chicken: Fry the chicken in batches, being careful not to overcrowd the pot. Overcrowding lowers the oil temperature and results in soggy chicken. Fry for 4-6 minutes per batch, or until golden brown and cooked through. Remove with a slotted spoon and place on a fresh wire rack set over paper towels to drain excess oil. This ensures your Sesame Chicken achieves optimal crispiness, just like from your favorite establishment.
4. Make the Sesame Sauce: While the chicken fries, whisk together the soy sauce, honey, rice vinegar, toasted sesame oil, brown sugar, grated ginger, and minced garlic in a small saucepan. Bring to a gentle simmer over medium heat.
5. Thicken the Sauce: In a small bowl, whisk 1 tablespoon of cornstarch with 2 tablespoons of cold water until smooth (this is your cornstarch slurry). Gradually whisk the slurry into the simmering sauce. Continue to simmer and whisk gently for 1-2 minutes until the sauce thickens to your desired consistency. It should be thick enough to coat the back of a spoon. If you prefer a thinner sauce, use less slurry; for thicker, add a little extra.
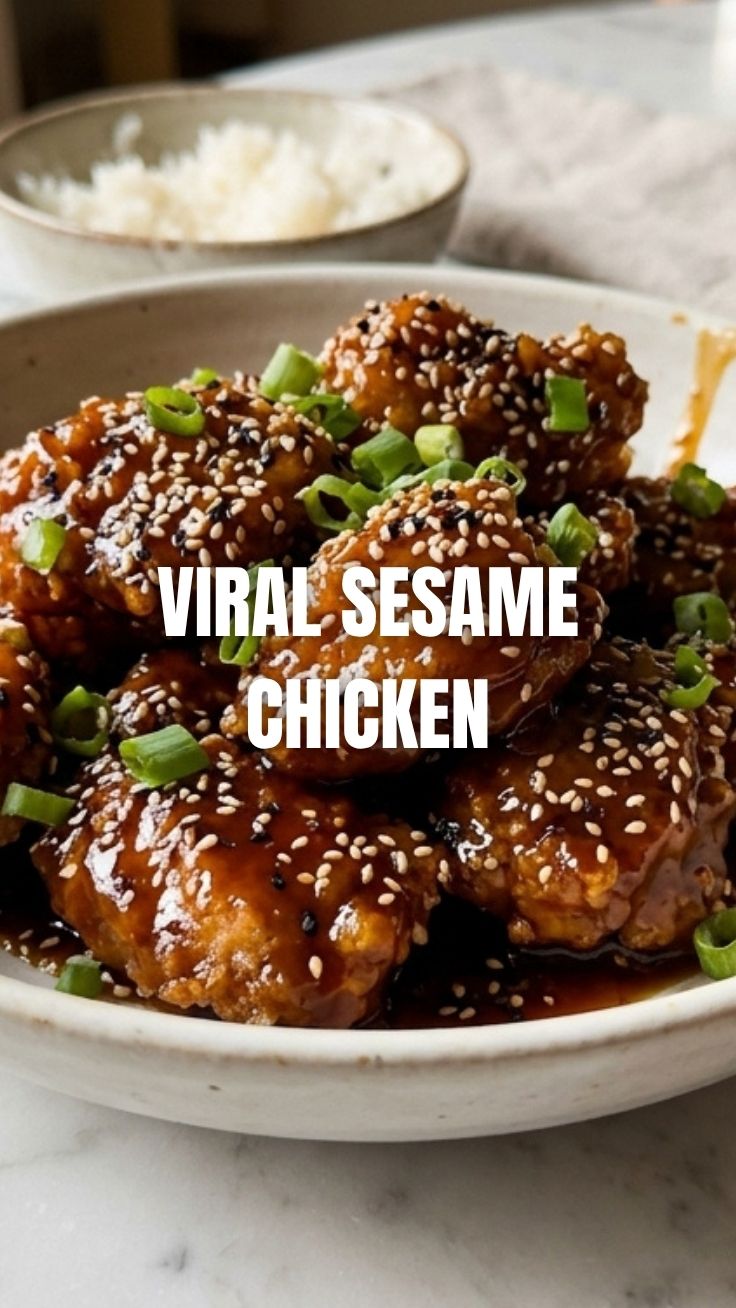
6. Combine and Serve: Once all the chicken is fried, add it to the saucepan with the thickened sesame sauce. Toss gently to coat every piece evenly. Garnish generously with toasted sesame seeds and sliced green onions. Serve immediately over hot cooked rice, alongside steamed broccoli, for a truly satisfying and authentic Chinese Takeout experience at home.
Nutritional Benefits & Advantages
Homemade Sesame Chicken offers several advantages over its restaurant counterpart. By preparing it yourself, you control the amount of sugar, sodium, and oil, making it a potentially healthier option. Chicken is an excellent source of lean protein, essential for muscle repair and growth. Sesame seeds provide healthy fats, fiber, and important minerals like calcium and iron. Incorporating broccoli adds vital vitamins (C and K) and dietary fiber, turning a traditionally indulgent dish into a more balanced and nutritious meal.
Tips, Variations & Cooking Advice
- Flavor Boost: For an extra layer of flavor, marinate the chicken in 1 tablespoon of soy sauce and 1/2 teaspoon of grated ginger for 15-20 minutes before coating and frying.
- Spice it Up: Add a pinch of red pepper flakes to the sauce for a subtle kick, or a dash of Sriracha for more intense heat.
- Gluten-Free Version: Use tamari instead of soy sauce and a gluten-free all-purpose flour blend for the coating. Ensure all other ingredients are certified gluten-free.
- Air Fryer Option: For a lighter version, spray coated chicken pieces with oil and air fry at 375°F (190°C) for 10-15 minutes, flipping halfway, until golden and crispy.
- Vegetarian Alternative: Substitute chicken with extra-firm tofu, pressed and cubed, then follow the same breading and frying steps.
Common Mistakes to Avoid
- Overcrowding the Frying Pan: This is the most common mistake. It lowers the oil temperature, leading to greasy, less crispy chicken. Fry in small batches.
- Not Patting Chicken Dry: Moisture prevents the coating from adhering properly and can cause oil to splatter.
- Skipping the Cornstarch Slurry: The slurry is crucial for thickening the sauce. Adding plain cornstarch directly will result in lumps.
- Overcooking the Sauce: Simmering the sauce for too long after adding the slurry can make it overly thick or gummy.
- Not Draining Excess Oil: Place fried chicken on a wire rack set over paper towels to allow air circulation and prevent sogginess.
Storage & Meal Prep Tips
Leftover Sesame Chicken can be stored in an airtight container in the refrigerator for up to 3-4 days. To reheat, the best method for maintaining some crispness is in an air fryer or oven at 350°F (175°C) for 10-15 minutes, or until heated through. Microwaving is quicker but will make the coating softer. This dish is excellent for meal prep; simply store the chicken and sauce separately and combine just before serving for best texture.
Conclusion
Mastering homemade Sesame Chicken is a rewarding culinary achievement that brings restaurant-quality flavors directly to your dining table. By following this detailed guide, you can confidently recreate that perfect sweet and savory balance, surpassing typical Chinese Takeout expectations. So, gather your ingredients, fire up the stove, and prepare to delight in a truly satisfying Sesame Chicken experience. We encourage you to try this recipe and share your delicious creations!
FAQs
Q1: Can I make this dish ahead of time?
A1: You can prep most components ahead. The sauce can be made and stored in the fridge for up to 3 days. The chicken can be breaded a few hours in advance and kept refrigerated, then fried just before serving for the best crispiness.
Q2: What’s the best way to get crispy chicken?
A2: Pat the chicken very dry, use a combination of cornstarch and flour for the coating, and fry in batches to maintain a high oil temperature (350-375°F or 175-190°C). Draining on a wire rack also helps.
Q3: Can I use different parts of the chicken?
A3: Yes, boneless, skinless chicken thighs are often preferred for their juiciness and flavor, but chicken breasts also work well if cut into uniform pieces.
Q4: My sauce isn’t thickening. What went wrong?
A4: Ensure your cornstarch slurry is smooth and that you’re adding it to a simmering sauce. If it’s still too thin, mix a little more cornstarch with cold water and slowly whisk it in, letting it simmer for another minute.
Q5: How can I reduce the sodium content?
A5: Use low-sodium soy sauce. You can also reduce the overall amount of soy sauce and compensate with a bit more rice vinegar or a pinch of salt to taste, but be mindful of flavor balance.