Celebrate Freedom with a Slice of Deliciousness: Your Ultimate Guide to Juneteenth Red Velvet Cake
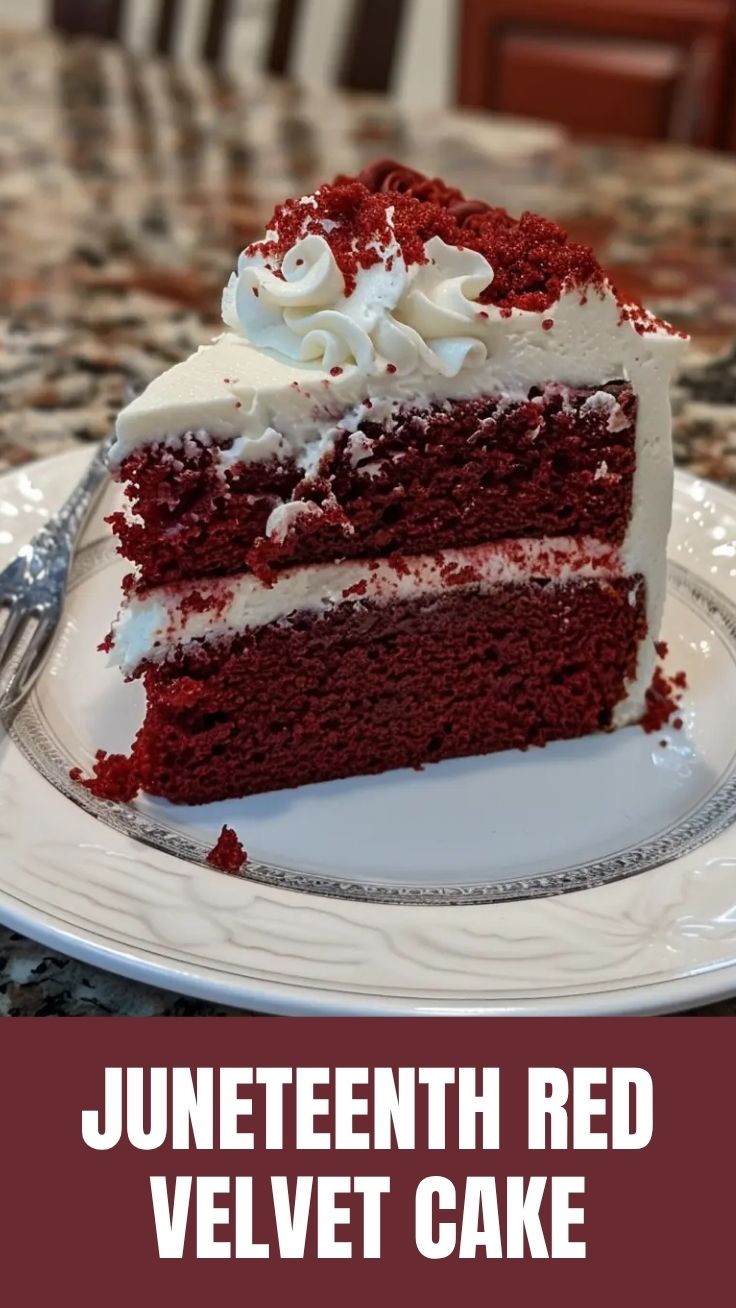
What better way to honor Juneteenth than with a dessert that embodies both vibrancy and heritage? Imagine a stunning, ruby-hued cake, moist and tender, and topped with a luxurious cream cheese frosting. Learning how to create this magnificent Juneteenth Red Velvet Cake at home offers more than just a delicious treat; it’s an act of culinary celebration, a tangible connection to history, and a chance to share joy with loved ones. Skip the store-bought versions and dive into the satisfying process of baking your own masterpiece, perfect for enhancing your spread of Juneteenth celebration desserts. This guide will walk you through every step, ensuring your cake is not only visually stunning but also incredibly flavorful.
Ingredients & Kitchen Tools
Crafting the perfect Red Velvet Cake requires a few specific ingredients and tools. Here’s what you’ll need:
Wet Ingredients:
- 2 ½ cups All-Purpose Flour: Provides the cake structure.
- 1 ½ teaspoons Baking Soda: Leavening agent for rise.
- 1 teaspoon Salt: Balances sweetness and enhances flavor.
- 2 tablespoons Unsweetened Cocoa Powder: Essential for that subtle chocolatey depth and key to the velvet texture.
- 1 cup (2 sticks) Unsalted Butter, softened: Adds richness and moisture. If using salted butter, reduce added salt by ½ teaspoon.
- 2 cups Granulated Sugar: Sweetens the cake and aids in tenderness.
- 2 large Eggs: Binds ingredients and adds richness.
- 1 teaspoon Vanilla Extract: Enhances all flavors.
- 1 cup Buttermilk: Reacts with baking soda for a tender crumb. If you don’t have buttermilk, add 1 tablespoon of white vinegar or lemon juice to regular milk and let it sit for 5 minutes.
- 2 ounces Red Food Coloring (liquid or gel): The iconic hue. Gel food coloring provides a more vibrant color with less liquid.
- 1 tablespoon White Vinegar: Reacts with baking soda and buttermilk for superior lift and velvet texture.
Cream Cheese Frosting:
- 16 ounces Cream Cheese, softened: The star of the frosting; ensure it’s at room temperature for a smooth consistency.
- 1 cup (2 sticks) Unsalted Butter, softened: Adds richness and structure to the frosting.
- 6-8 cups Powdered Sugar (Confectioners’ Sugar): Sweetens and thickens the frosting. Adjust to desired sweetness and consistency.
- 2 teaspoons Vanilla Extract: Enhances the frosting’s flavor.
- Pinch of Salt: Balances the sweetness.
Kitchen Tools:
- Three 8-inch Round Cake Pans: Essential for layered cakes. Grease and flour them thoroughly or line with parchment paper.
- Large Mixing Bowls: For wet and dry ingredients.
- Electric Mixer (stand or hand-held): For creaming butter and sugar, and whipping frosting.
- Whisk: To combine dry ingredients.
- Rubber Spatula: For scraping down bowls and folding ingredients.
- Measuring Cups and Spoons: For accurate ingredient portions.
- Wire Cooling Rack: For cooling the baked cake layers evenly.
Prep Time & Cooking Schedule
- Prep Time: 30 minutes
- Cook Time: 28-32 minutes (per batch of cakes)
- Cooling Time: 1-2 hours (crucial before frosting)
- Total Time (approximate): 2.5 – 3 hours (excluding chilling the frosted cake)
This schedule allows for efficient baking. Start by gathering and measuring all your ingredients (“mise en place”) to streamline the process. The cooling time is non-negotiable; attempting to frost warm cakes will lead to a melty mess.
Step-by-Step Instructions
1. Prepare Your Pans: Preheat oven to 350°F (175°C). Grease and flour three 8-inch round cake pans, or line the bottoms with parchment paper and grease the sides. This ensures easy cake release.
2. Combine Dry Ingredients: In a large bowl, whisk together the all-purpose flour, baking soda, salt, and cocoa powder. Set aside.
3. Cream Wet Ingredients: In a separate large bowl, using an electric mixer, cream together the softened butter and granulated sugar until light and fluffy (about 3-5 minutes).
4. Add Eggs and Vanilla: Beat in the eggs one at a time, mixing well after each addition. Stir in the vanilla extract.
5. Achieve That Iconic Color: In a small bowl, combine the buttermilk, red food coloring, and white vinegar. This ensures the color is evenly distributed.
6. Alternate Wet and Dry: Gradually add the dry ingredients to the wet ingredients in three additions, alternating with the buttermilk mixture in two additions. Begin and end with the dry ingredients. Mix on low speed until just combined – avoid overmixing. The batter should be a beautiful, vibrant red, forming your stunning Juneteenth Red Velvet Cake base.
7. Bake the Layers: Divide the batter evenly among the three prepared cake pans. Bake for 28-32 minutes, or until a wooden skewer inserted into the center comes out clean.
8. Cool Completely: Let the cakes cool in their pans for 10-15 minutes before inverting them onto a wire rack to cool completely. This prevents crumbling when handling and preparing them for your broader spread of Juneteenth celebration desserts.
9. Prepare Cream Cheese Frosting: While the cakes cool, beat the softened cream cheese and butter together in a large bowl with an electric mixer until smooth. Gradually add the powdered sugar, a cup at a time, mixing until fully incorporated and smooth. Stir in the vanilla extract and salt. If the frosting is too thick, add a tablespoon of milk; if too thin, add more powdered sugar.
10. Assemble and Frost: Once the cake layers are completely cool, level them if necessary with a serrated knife. Place one layer on your serving plate, spread with a generous amount of frosting. Repeat with the remaining layers. Frost the top and sides of the cake.
Nutritional Benefits & Advantages
While a celebratory cake, Red Velvet does offer some modest nutritional highlights. The cocoa powder provides antioxidants, and the use of buttermilk contributes a bit of protein and calcium. When made at home, you have control over ingredient quality, opting for real vanilla extract and less highly processed components compared to store-bought versions. The moderate portion of this visually appealing dessert can be a delightfully satisfying part of a balanced celebration meal.
Tips, Variations & Cooking Advice
- For Deeper Color: Gel food coloring yields a more intense red with less liquid, preventing thinning of the batter.
- Flavor Boost: Add ½ teaspoon of almond extract to the batter for a subtle, complementary nutty note.
- Buttermilk Substitute: If you don’t have buttermilk, combine 1 cup of regular milk with 1 tablespoon of lemon juice or white vinegar and let it sit for 5-10 minutes until it curdles slightly.
- Gluten-Free: Substitute the all-purpose flour with a high-quality 1:1 gluten-free baking flour blend.
- Chocolate Drizzle: Enhance the presentation and flavor by drizzling melted dark chocolate over the frosted cake.
Common Mistakes to Avoid
- Overmixing the Batter: This develops too much gluten, resulting in a tough, dry cake. Mix until just combined.
- Warm Cake Layers: Frosting warm cake layers will cause the frosting to melt and slide off. Ensure layers are completely cool.
- Not Greasing/Flouring Pans Properly: Your cake will stick, leading to frustration. Be thorough!
- Using Cold Cream Cheese/Butter for Frosting: This leads to lumpy, unspreadable frosting. Ensure both are at room temperature.
Storage & Meal Prep Tips
Store leftover Juneteenth Red Velvet Cake in an airtight container in the refrigerator for up to 3-5 days due to the cream cheese frosting. For longer storage, individual slices or the whole unfrosted cake layers can be wrapped tightly in plastic wrap and then foil, then frozen for up to 2-3 months. Thaw frozen cake layers in the refrigerator overnight before frosting. Frosted cake can be frozen for a shorter period (up to 1 month), but the texture of the frosting may be slightly altered upon thawing.
Conclusion
Creating your own Juneteenth Red Velvet Cake is a deeply rewarding experience, offering not just a stunning centerpiece for your celebration but also a personal connection to a rich cultural holiday. The joy of baking it yourself, from layering the vibrant cake to spreading that luscious cream cheese frosting, makes every slice taste even sweeter. This recipe ensures a moist, flavorful cake that will undoubtedly be a highlight among your array of Juneteenth celebration desserts. We encourage you to try this recipe and share your beautiful creations with us!
FAQs
Q1: Why is buttermilk important in Red Velvet Cake?
A1: Buttermilk is acidic, which reacts with the baking soda to create carbon dioxide, resulting in a light, tender crumb. It also contributes to the cake’s signature tanginess and moisture.
Q2: Can I reduce the amount of red food coloring?
A2: Yes, you can adjust the food coloring to your preference. Less coloring will result in a more brownish-red cake, as the cocoa powder will be more prominent.
Q3: My cream cheese frosting is too runny. What can I do?
A3: This often happens if the cream cheese or butter were too warm, or not enough powdered sugar was added. Try adding more powdered sugar, 1/2 cup at a time, until the desired consistency is reached. You can also refrigerate the frosting for 15-30 minutes to firm it up.
Q4: How can I prevent my cake layers from sticking to the pan?
A4: Thoroughly grease the pans with butter or cooking spray, then dust with flour, tapping out any excess. Alternatively, use parchment paper circles cut to fit the bottom of the pans, then grease the sides.
Q5: Can I make this cake into cupcakes?
A5: Absolutely! This recipe can yield about 24 cupcakes. Bake them for 18-22 minutes at 350°F (175°C), or until a wooden skewer comes out clean.