Sizzle and Savor: Unlock the Secret to Perfect Homemade Garlic Butter Shrimp
Ever wondered how restaurants achieve that perfectly succulent, unbelievably flavorful Garlic Butter Shrimp that melts in your mouth? The good news is, you don’t need a professional chef in your kitchen to recreate that magic! Preparing this exquisite dish at home is not only incredibly rewarding but also allows you to control the quality of your ingredients and tailor the flavors to your exact preference. Forget expensive takeout; with this comprehensive guide, you’ll master the art of crafting a vibrant and irresistible garlic butter sauce that elevates simple shrimp into a gourmet experience.
Ingredients & Kitchen Tools
Gathering your mise en place is the first step to culinary success. Here’s what you’ll need:
Shrimp: 1 ½ pounds large, raw shrimp (peeled, deveined, tails on or off – your preference). Fresh or frozen (thawed completely) provides the best texture.*
Butter: ½ cup unsalted butter, divided. Unsalted allows you to control the seasoning precisely.*
Garlic: 6-8 cloves garlic, minced. The star of the show. Freshly minced offers superior flavor.*
Lemon: 1 large lemon, half for juice, half for wedges. Brightens the dish and cuts through richness.*
Fresh Parsley: ¼ cup fresh parsley, chopped. Adds freshness and a pop of color.*
Dry White Wine or Chicken Broth: ¼ cup (optional). Adds depth and deglazes the pan.*
Red Pepper Flakes: ½ teaspoon (optional). For a subtle kick.*
Salt & Black Pepper: To taste. Essential for perfectly seasoned food.*
Olive Oil: 1 tablespoon. For initial searing of the shrimp.*
Kitchen Tools:
Large Skillet or Pan: A 10-12 inch non-stick or cast-iron skillet works best. Ensures even cooking and easy cleanup.*
- Tongs: For easy turning and handling of shrimp.
- Measuring Spoons & Cups: For accurate ingredient quantities.
- Cutting Board & Knife: For prepping garlic, parsley, and lemon.
- Small Bowl: For mixing seasonings if desired.
Prep Time & Cooking Schedule
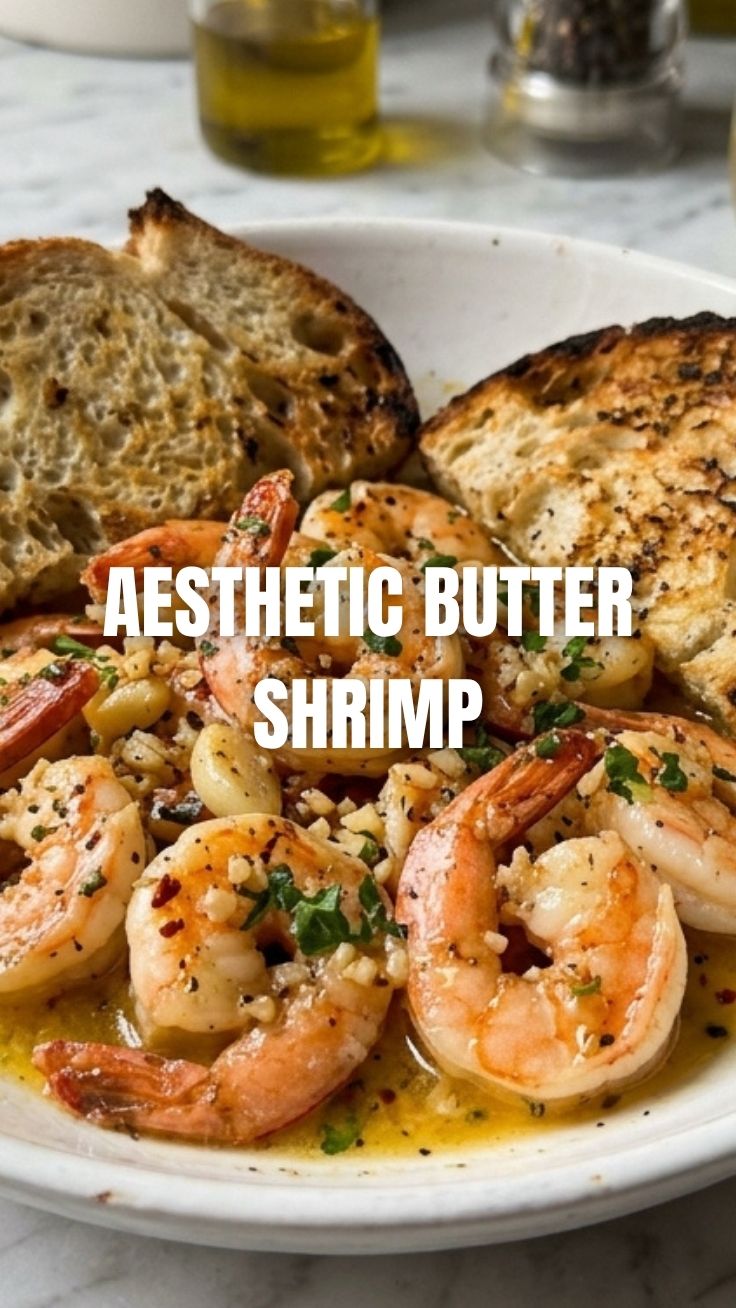
This recipe is designed for maximum flavor with minimal fuss, making it perfect for a weeknight meal or an impress-your-guests dinner.
- Prep Time: 15 minutes (Includes thawing shrimp, mincing garlic, chopping parsley, and juicing lemon.)
- Cook Time: 8-10 minutes (Shrimp cooks very quickly!)
- Total Time: Approximately 25 minutes
This swift cooking schedule means you can have a gourmet meal on the table in under half an hour. Ensure all your ingredients are prepped and ready before you start cooking, as the process moves quite fast.
Step-by-Step Instructions
1. Prepare the Shrimp: If using frozen shrimp, ensure they are fully thawed and patted dry with paper towels. Season the shrimp with a pinch of salt and black pepper. This initial seasoning is crucial for building flavor.
2. Sauté the Shrimp: Heat 1 tablespoon of olive oil and 2 tablespoons of butter in a large skillet over medium-high heat until the butter melts and just begins to foam. Add the seasoned shrimp in a single layer (cook in batches if necessary to avoid overcrowding, which steams rather than sears). Cook for 1-2 minutes per side until pink and opaque. Overcooking will make the shrimp rubbery, so keep a close eye on them! Remove the cooked shrimp from the pan and set aside.
3. Craft the garlic butter sauce: Reduced the heat to medium. Add the remaining ¼ cup of butter to the same skillet. Once melted, add the minced garlic and red pepper flakes (if using). Sauté for 30-60 seconds until fragrant, being careful not to burn the garlic – burnt garlic turns bitter.
4. Deglaze (Optional) & Finish the Sauce: If using, pour in the white wine or chicken broth and let it simmer for 1-2 minutes, scraping up any browned bits from the bottom of the pan. This adds immense depth of flavor to your garlic butter sauce.
5. Combine and Serve: Return the cooked Garlic Butter Shrimp to the skillet with the sauce. Squeeze in the fresh lemon juice and toss gently to coat the shrimp thoroughly. Stir in the fresh parsley. Taste and adjust seasoning with additional salt and pepper if needed.
6. Garnish: Serve immediately with lemon wedges for an extra burst of freshness.
Nutritional Benefits & Advantages
Shrimp is a powerhouse of lean protein, making it an excellent choice for muscle building and satiety. It’s also low in calories and fat, while being rich in essential nutrients like selenium, vitamin B12, iron, and phosphorus. Garlic, beyond its incredible flavor, boasts impressive antioxidant properties and is known for its immune-boosting benefits. The healthy fats from butter (in moderation) contribute to overall nutrient absorption. This dish offers a balanced meal that is both delicious and contributes positively to a healthy diet.
Tips Variations & Cooking Advice
- Spice It Up: Add more red pepper flakes, or a pinch of cayenne pepper for a spicier kick.
- Herb Variations: While parsley is classic, experiment with fresh chives or a hint of fresh dill for different aromatic profiles.
- Creamy Sauce: For an extra rich and creamy sauce, stir in a tablespoon or two of heavy cream at the end, just before adding the parsley.
- Serve With: This dish pairs beautifully with pasta, crusty bread to soak up the sauce, rice, or a simple side salad.
- Low-Carb: Serve it over zucchini noodles or cauliflower rice for a delicious low-carb option.
Common Mistakes to Avoid
- Overcrowding the Pan: This is the number one culprit for rubbery shrimp. Cook in batches if your skillet isn’t large enough to accommodate all the shrimp in a single layer.
- Overcooking the Shrimp: Shrimp cooks incredibly fast! As soon as they turn pink and opaque, they’re done. A minute too long can turn them tough.
- Burning the Garlic: Garlic can go from perfectly fragrant to bitter and acrid in seconds. Keep a close eye on it and lower the heat if necessary.
- Not Patting Shrimp Dry: Wet shrimp will steam instead of sear, preventing that lovely golden crust and deep flavor.
Storage & Meal Prep Tips
Leftover Garlic Butter Shrimp can be stored in an airtight container in the refrigerator for up to 2-3 days. While delicious, shrimp is best enjoyed fresh. To reheat, gently warm in a skillet over low heat for a few minutes until just heated through, being careful not to overcook. You can add a splash of broth or water to prevent drying out. Freezing cooked shrimp is generally not recommended as it can significantly alter the texture upon thawing.
Conclusion
Mastering homemade Garlic Butter Shrimp is a culinary triumph that’s surprisingly easy to achieve. This recipe delivers a perfectly cooked main dish enveloped in an irresistible garlic butter sauce, proving that gourmet flavors are well within reach for any home cook. We encourage you to try this recipe, experiment with the variations, and delight in the fantastic results. Share your culinary creations with us, and explore our other delicious seafood recipes for more inspiration!
FAQs
Q: Can I use pre-cooked shrimp for this recipe?
A: While you can, pre-cooked shrimp is often tough and lacks the fresh flavor. We highly recommend using raw shrimp for the best results. If you must use pre-cooked, add it only at the very end to warm through briefly, to avoid further cooking.
Q: What can I substitute for white wine?
A: Chicken or vegetable broth are excellent non-alcoholic substitutions that will still add depth to the sauce.
Q: My shrimp turned out rubbery. What did I do wrong?
A: Most likely, the shrimp were either overcooked or the pan was overcrowded, leading to steaming instead of searing. Ensure a single layer and cook for a very short time until just pink and opaque.
Q: How can I make this dish spicier?
A: Increase the amount of red pepper flakes, or add a pinch of cayenne pepper along with the garlic for a more pronounced heat.
Q: What are the best sides to serve with garlic butter shrimp?
A: Excellent choices include pasta (linguine or spaghetti), white or brown rice, crusty French bread, a fresh green salad, steamed asparagus, or quick sautéed spinach.