Unlocking the Secrets to the Perfect Homemade Blueberry Pie
Ever wondered why some homemade pies taste like a dream, while others fall flat? The secret often lies in understanding the nuances of baking a perfect Blueberry Pie from scratch. Forget those store-bought imitations; preparing this iconic dessert at home offers unparalleled freshness and a flavor profile that’s simply unmatched. This comprehensive guide will equip you with the knowledge and techniques to bake a show-stopping dessert, ensuring every bite is a burst of juicy blueberries and flaky crust. Beyond just the allure of a delicious pie, mastering this recipe opens doors to exploring a world of delightful blueberry recipes, transforming your kitchen into a haven of sweet aromas.
Ingredients & Kitchen Tools
Crafting the perfect Blueberry Pie requires a careful selection of ingredients and the right tools at your disposal.
- Fresh or Frozen Blueberries (6 cups): If using frozen, do not thaw; this prevents a watery pie.
- Granulated Sugar (3/4 cup): Balances the tartness of the blueberries. Adjust to your desired sweetness.
- All-Purpose Flour (1/4 cup): Acts as a thickener for the filling. Cornstarch or tapioca starch can be used for a gluten-free option.
- Lemon Juice (1 tablespoon): Brightens the blueberry flavor and prevents excessive sweetness.
- Lemon Zest (1 teaspoon): Adds an aromatic lift to the filling.
- Unsalted Butter (2 tablespoons): Cut into small pieces, dotted over the filling for richness.
- Pie Crust (2 disks, homemade or store-bought): One for the bottom, one for the top. We recommend an all-butter crust for the best flavor and flakiness.
- Egg Wash (1 egg yolk + 1 tablespoon milk): For a golden-brown, glossy crust.
- Coarse Sugar (optional): For sprinkling on the top crust, adding sparkle and crunch.
Kitchen Tools:
- 9-inch Pie Plate: Standard size for most pie recipes.
- Large Mixing Bowl: For tossing the blueberry filling ingredients.
- Rolling Pin: For rolling out the pie crust.
- Pastry Brush: For applying egg wash.
- Paring Knife or Pastry Wheel: For creating venting slits in the top crust.
- Measuring Cups and Spoons: For accurate ingredient quantities.
Prep Time & Cooking Schedule
Achieving a perfectly baked Blueberry Pie involves careful time management.
- Prep Time: 30 minutes (This includes preparing the filling and assembling the pie, assuming you have pre-made pie crusts.)
- Chill Time: 30 minutes (Crucial for the assembled pie to prevent shrinking and ensure a crisp crust.)
- Cook Time: 50-60 minutes (Until the crust is golden brown and the filling is bubbly.)
- Resting Time: 2-3 hours (Absolutely essential! This allows the filling to set properly, preventing a runny pie when sliced.)
Plan to start your pie baking well in advance of when you intend to serve it, allowing ample time for chilling and, most importantly, for the pie to cool and set.
Step-by-Step Instructions
Follow these detailed steps to bake your perfect Blueberry Pie:
1. Prepare Pie Crusts: If using homemade crust, ensure it’s chilled and ready. Roll out one disk and carefully place it into your 9-inch pie plate. Trim the edges, leaving about a 1/2-inch overhang. Flute the edges or crimp them with a fork. Place the prepared pie shell back in the refrigerator while you prepare the filling.
2. Make the Filling: In a large mixing bowl, gently combine the blueberries, granulated sugar, all-purpose flour, lemon juice, and lemon zest. Toss carefully to avoid crushing the berries.
3. Assemble the Pie: Pour the blueberry filling into the chilled pie crust. Dot the top of the filling with the small pieces of unsalted butter.
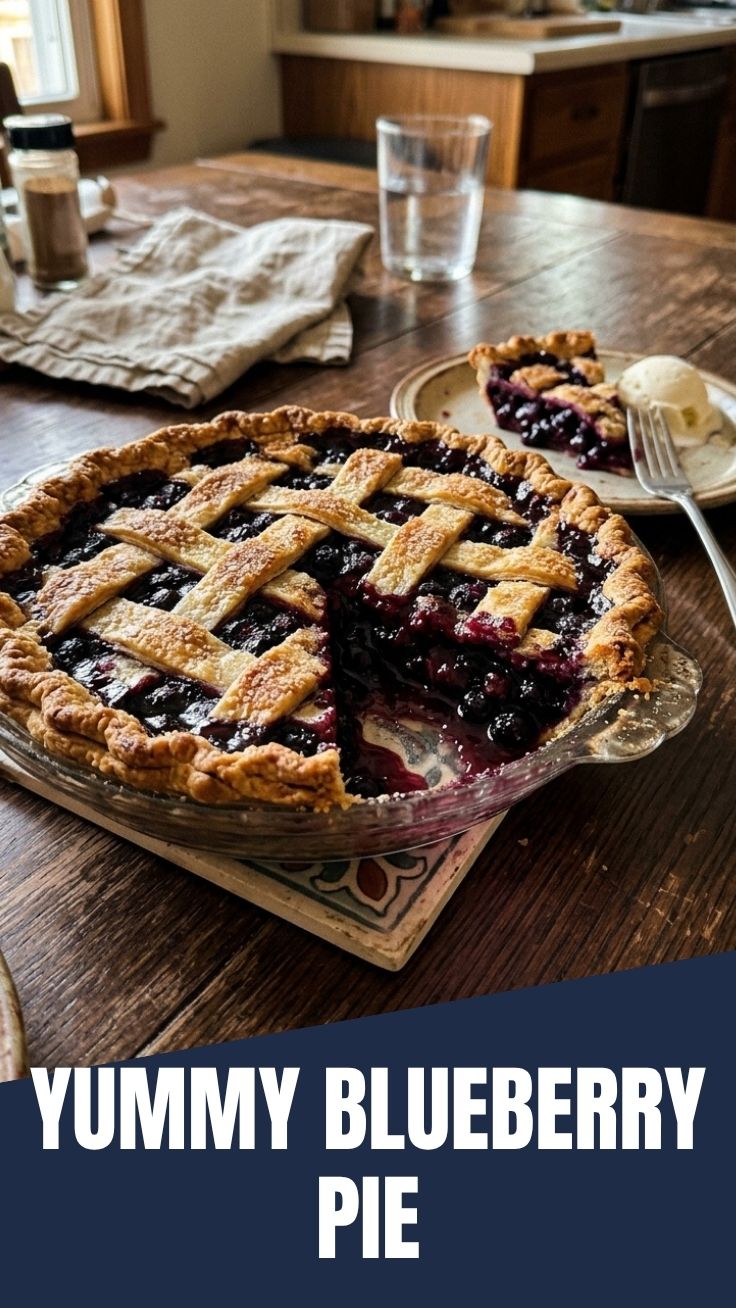
4. Add Top Crust: Roll out the second pie crust disk. You can either place it whole over the filling, cutting several slits in the top for steam to escape, or create a lattice top for a more decorative finish. Seal the edges of the top crust to the bottom crust, trimming any excess. Crimp or flute the edges once more.
5. Chill and Preheat: Place the assembled pie back in the refrigerator for at least 30 minutes. Meanwhile, preheat your oven to 400°F (200°C).
6. Egg Wash & Bake: In a small bowl, whisk together the egg yolk and milk for the egg wash. Brush the top crust generously with the egg wash and, if desired, sprinkle with coarse sugar. Place the pie on a baking sheet (to catch any overflow) and bake for 20 minutes at 400°F (200°C).
7. Reduce Temperature & Continue Baking: Reduce the oven temperature to 375°F (190°C) and continue to bake for another 30-40 minutes, or until the crust is deeply golden brown and the filling is bubbling thickly. If the crust begins to brown too quickly, loosely tent the pie with aluminum foil.
8. Cool Completely: This is perhaps the most crucial step! Once baked, transfer the pie to a wire rack and allow it to cool completely for at least 2-3 hours before slicing and serving. This ensures the filling sets properly and prevents a runny texture. This careful process is key to a truly successful Blueberry Pie, and mastering it will enhance your enjoyment of other delightful blueberry recipes.
Nutritional Benefits & Advantages
Blueberries are nutritional powerhouses! This pie, while a treat, offers some notable advantages. Blueberries are rich in antioxidants, particularly anthocyanins, which may help reduce inflammation and oxidative stress. They are also a good source of Vitamin C, Vitamin K, and dietary fiber, promoting digestive health. While sugar and butter are part of the recipe, enjoying this Blueberry Pie in moderation provides these beneficial compounds.
Tips, Variations & Cooking Advice
- Spice it up: Add a pinch of cinnamon or nutmeg to the blueberry filling for extra warmth.
- Thickeners: If you prefer a very firm filling, increase the flour to 1/3 cup or use 2-3 tablespoons of tapioca or cornstarch.
- Gluten-Free: Use a gluten-free pie crust and swap all-purpose flour for cornstarch or tapioca starch in the filling.
- Dairy-Free: Use a dairy-free pie crust and a plant-based butter alternative for dotting the filling.
- Mini Pies: Use a muffin tin to make individual mini blueberry pies. Adjust baking time accordingly.
- Serve Warm: While it needs to set, a slightly warm slice of pie with a scoop of vanilla bean ice cream is divine. Reheat gently in the oven for a few minutes.
Common Mistakes to Avoid
- Not Chilling the Crust: A warm crust will shrink in the oven, leading to a tough, misshapen pie. Always chill your dough.
- Not Chilling the Assembled Pie: Skipping this step can lead to a soggy bottom crust and a pie that loses its shape.
- Undercooking: An undercooked pie will have a pale crust and a runny filling. Look for deeply golden crust and vigorously bubbling filling.
- Cutting Too Soon: Patience is key! Cutting into a hot pie before it’s set will result in a messy, runny slice.
- Overfilling: Too much filling can cause spillage and a messy oven. Stick to the recommended quantities.
Storage & Meal Prep Tips
Leftover Blueberry Pie can be stored at room temperature, covered loosely with foil or plastic wrap, for up to 2 days. For longer storage, refrigerate for up to 4-5 days. To reheat, place individual slices in a microwave for 30-60 seconds, or warm the entire pie in a 300°F (150°C) oven for 15-20 minutes until just warmed through. Freezing is also an option: wrap the cooled pie tightly in plastic wrap and then foil. It will keep for up to 3 months. Thaw overnight in the refrigerator before reheating.
Conclusion
Creating a homemade Blueberry Pie is a rewarding culinary journey that results in a truly delicious dessert. By following these detailed steps, understanding the nuances of ingredient preparation, and allowing ample cooling time, you’ll achieve a flaky crust and a perfectly set, bursting-with-flavor filling every single time. Don’t be afraid to experiment and make this recipe your own while exploring other delightful blueberry recipes. We encourage you to try this recipe, share your baking successes, and savor the taste of a truly exceptional homemade treat.
FAQs
Q1: Can I use frozen blueberries without thawing them?
A1: Yes, it is highly recommended to use frozen blueberries directly without thawing. Thawing them releases too much liquid, which can lead to a watery pie filling.
Q2: My pie crust is browning too quickly, what should I do?
A2: If your crust is browning faster than the filling is cooking, loosely tent the pie with aluminum foil during baking to protect the edges.
Q3: How do I prevent a soggy bottom crust?
A3: Ensure your pie crust is well-chilled before baking, use a baking sheet positioned on the lowest rack of your oven to provide more direct heat to the bottom, and avoid overfilling the pie.
Q4: Can I make this pie ahead of time?
A4: Yes, you can assemble the pie up to 24 hours in advance and keep it refrigerated. Add about 10-15 minutes to the baking time if baking from cold.
Q5: What’s the best way to get a perfectly set filling?
A5: The key to a perfectly set filling is patience. Allow the pie to cool completely for at least 2-3 hours at room temperature after baking. The filling continues to thicken as it cools.