The Golden Standard: Unlocking the Secret to Perfect Blondies at Home
Are you tired of bland, uninspired desserts? Do you crave a chewy, buttery treat that’s both comforting and supremely satisfying? Then prepare to embark on a culinary adventure as we unlock the secrets to crafting the most irresistible Blondies right in your own kitchen! Forget those often-disappointing store-bought versions; preparing these luscious golden squares at home empowers you to control every delicious detail, from the richness of the butter to the perfect hint of vanilla. Beyond the sheer joy of creating something delectable with your own hands, this recipe promises the kind of warmth and satisfaction that only homemade treats can deliver. And for those who adore the deep, caramelized notes of their darker cousins, think of these as the sun-kissed, equally delightful blonde brownies, offering a different but equally captivating flavor profile.
Ingredients & Kitchen Tools
Gather your culinary arsenal for this delightful baking project:
- 1 ½ cups all-purpose flour: The structural backbone of our blondies.
- ½ tsp baking powder: Provides a slight lift, contributing to that perfect tenderness.
- ¼ tsp salt: Enhances all the other flavors. Don’t skip it!
- ½ cup (1 stick) unsalted butter, melted: The foundation of that rich, buttery flavor. Brown butter optional for an extra layer of nutty depth.
- 1 cup packed light brown sugar: Lends moisture and a deep, molasses-like sweetness.
- ½ cup granulated sugar: Balances the sweetness and contributes to a chewy texture.
- 1 large egg + 1 egg yolk: The extra yolk adds richness and chewiness.
- 1 tsp vanilla extract: Essential for enhancing the classic blondie flavor.
- 1 cup chocolate chips (milk, semi-sweet, or white): Your choice! We love a mix for varied texture and sweetness.
- Optional add-ins: ½ cup chopped nuts (pecans, walnuts), ½ cup toffee bits, or even a swirl of Biscoff spread for specialized Blondies.
- 8×8 inch baking pan: The ideal size for thick, chewy squares.
- Parchment paper: For easy removal and cleanup.
- Mixing bowls: One large, one medium.
- Whisk & rubber spatula: For combining ingredients.
- Measuring cups & spoons: Precision is key in baking.
Prep Time & Cooking Schedule
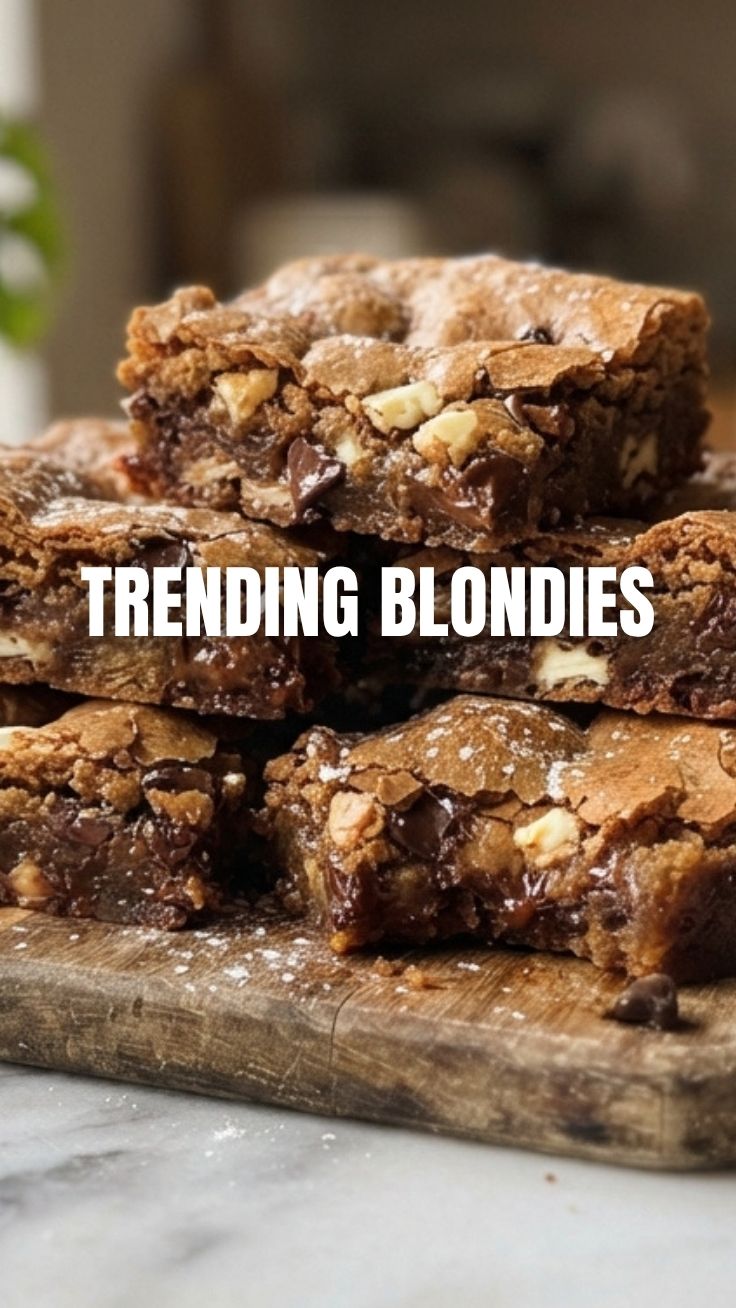
Our golden journey begins with a brief preparation and cooking schedule tailored for busy home bakers.
- Prep Time: 15 minutes. This includes gathering ingredients, measuring, and lining your pan.
- Cook Time: 25-30 minutes. Baking time can vary slightly depending on your oven.
- Resting Time: 30 minutes to 1 hour. Crucial for perfectly set, sliceable blondies. Don’t be tempted to cut them too soon, or they might crumble! This resting period allows the internal structure to firm up, resulting in a superior texture.
Step-by-Step Instructions
1. Preheat & Prepare: Preheat your oven to 350°F (175°C). Line an 8×8 inch baking pan with parchment paper, leaving an overhang on two sides to create “handles” for easy removal. This little trick prevents sticking and makes cleanup a breeze.
2. Combine Dry Ingredients: In a medium bowl, whisk together the flour, baking powder, and salt. Set aside.
3. Melt Butter & Sugars: In a large, microwave-safe bowl or saucepan, melt the butter. If browning the butter, cook until fragrant and nutty-brown bits appear at the bottom. Remove from heat and stir in both brown sugar and granulated sugar until well combined. The residual heat from the butter will help dissolve the sugars slightly.
4. Add Wet Ingredients: Let the sugar-butter mixture cool for a few minutes (you don’t want to scramble your eggs!). Then, whisk in the egg, egg yolk, and vanilla extract until smooth and fully incorporated. The mixture should be glossy.
5. Combine Wet and Dry: Gradually add the dry ingredient mixture to the wet mixture, mixing with a rubber spatula until just combined. Be careful not to overmix, as this can develop the gluten too much and lead to tough blondies. A few streaks of flour are okay; they’ll disappear during baking.
6. Fold in Chocolate Chips: Gently fold in your chosen chocolate chips or other optional add-ins.
7. Bake: Pour the batter into your prepared baking pan and spread evenly. Bake for 25-30 minutes, or until the edges are golden brown and a toothpick inserted into the center comes out with moist crumbs, but not wet batter. The center might still look slightly soft; this is good, as it ensures a chewy interior. These delightful Blondies should be beautifully set.
8. Cool & Slice: Allow the blondies to cool completely in the pan on a wire rack—ideally for at least 30 minutes to an hour. This cooling period is absolutely essential for achieving that perfect chewy texture and an easy, clean slice. Cutting them too soon can result in a gooey mess, whereas patiently waiting will reward you with perfectly structured blonde brownies that hold their shape beautifully.
Nutritional Benefits & Advantages
While Blondies are undoubtedly an indulgent treat, they can offer some surprising benefits when made from scratch. Using real butter provides healthy fats (in moderation), and the natural sweetness from brown sugar is less processed than high-fructose corn syrup. Choosing whole wheat flour for a portion of the all-purpose flour can boost fiber content, while adding nuts introduces healthy fats, protein, and antioxidants. Opting for dark chocolate chips also brings in a powerful dose of antioxidants. Plus, the sheer joy and stress relief of baking are benefits in themselves!
Tips, Variations & Cooking Advice
- Brown Butter Bliss: For an elevated flavor, brown your butter before adding the sugars. The nutty aroma and deeper flavor it imparts will transform your blondies.
- Flavor Twists: Swirl in a tablespoon of peanut butter or almond butter into the batter before baking for a nutty infusion. Add a pinch of cinnamon or cardamom for a warm, spicy note.
- Texture Play: For extra chewiness, add another egg yolk and slightly reduce the flour by a tablespoon. For a cakier blondie, increase the flour by 2 tablespoons and bake a few minutes longer.
- Dietary Adaptations:
* Gluten-Free: Substitute the all-purpose flour with a 1:1 gluten-free baking blend that contains xanthan gum.
* Dairy-Free: Use a good quality plant-based butter substitute and dairy-free chocolate chips.
- High-Altitude Baking: Increase liquid (add 1-2 tbsp milk) and reduce baking powder by ¼ tsp. Bake at the same temperature but monitor closely as baking times might differ.
Common Mistakes to Avoid
- Overmixing the Batter: This develops gluten, leading to tough, cake-like blondies instead of soft and chewy ones. Mix until just combined.
- Overbaking: A dry blondie is a sad blondie. Look for set edges and a slightly gooey center. When in doubt, underbake slightly.
- Cutting Too Soon: Patience is a virtue here. Allowing the blondies to cool completely ensures clean, perfectly textured slices.
- Using Cold Ingredients: Ensure your egg is at room temperature for better emulsion and a smoother batter.
Storage & Meal Prep Tips
Leftover Blondies store beautifully!
- Room Temperature: Store in an airtight container at room temperature for up to 3-4 days. For optimal freshness, place a slice of bread in the container to help keep them moist.
- Refrigeration: While not strictly necessary, you can refrigerate them for up to a week, especially in warmer climates. They tend to firm up a bit more when chilled.
- Freezing: For longer storage, wrap individual blondie squares tightly in plastic wrap, then place them in a freezer-safe bag or container. They can be frozen for up to 3 months. Thaw at room temperature or warm gently in the microwave for a few seconds.
Conclusion
There you have it – your comprehensive guide to baking truly spectacular Blondies. From the perfectly balanced sweetness to that irresistible chew, these golden squares are more than just a dessert; they’re a testament to the joy of homemade baking. We hope this recipe empowers you to confidently create a treat that will delight everyone who tries it. So go ahead, whip up a batch of these glorious chewy confections, embrace the simplicity of a classic, and savor every bite of your homemade blonde brownies. Don’t forget to share your baking successes and any delightful variations you discover in the comments below! Happy baking!
FAQs
Q1: Can I make these blondies ahead of time for a party?
A1: Absolutely! Blondies are an excellent make-ahead dessert. Bake them a day or two in advance, cool completely, and store them at room temperature in an airtight container.
Q2: My blondies turned out a bit dry. What went wrong?
A2: Dry blondies are usually a sign of overbaking. Ovens can vary, so keep an eye on them. The edges should be golden brown, and the center should still look slightly moist. A toothpick inserted should come out with moist crumbs, not liquid batter.
Q3: Can I substitute the brown sugar with all granulated sugar?
A3: While possible, it’s not recommended. Brown sugar contributes significantly to the blondies’ characteristic chewy texture and deeper, molasses-like flavor. Using only white sugar will result in a crispier, less complex blondie.
Q4: What’s the best way to get clean slices?
A4: Ensure the blondies are completely cool before slicing. For extra clean cuts, place the cooled pan in the refrigerator for about 15-20 minutes, then use a sharp, warm knife (you can run it under hot water and wipe dry) to slice.
Q5: Can I add nuts or other mix-ins to the blondies?
A5: Yes! Blondies are very versatile. Chopped walnuts, pecans, almonds, toffee bits, or even dried cranberries make excellent additions. Just ensure total mix-in volume doesn’t exceed 1 cup to maintain batter consistency.