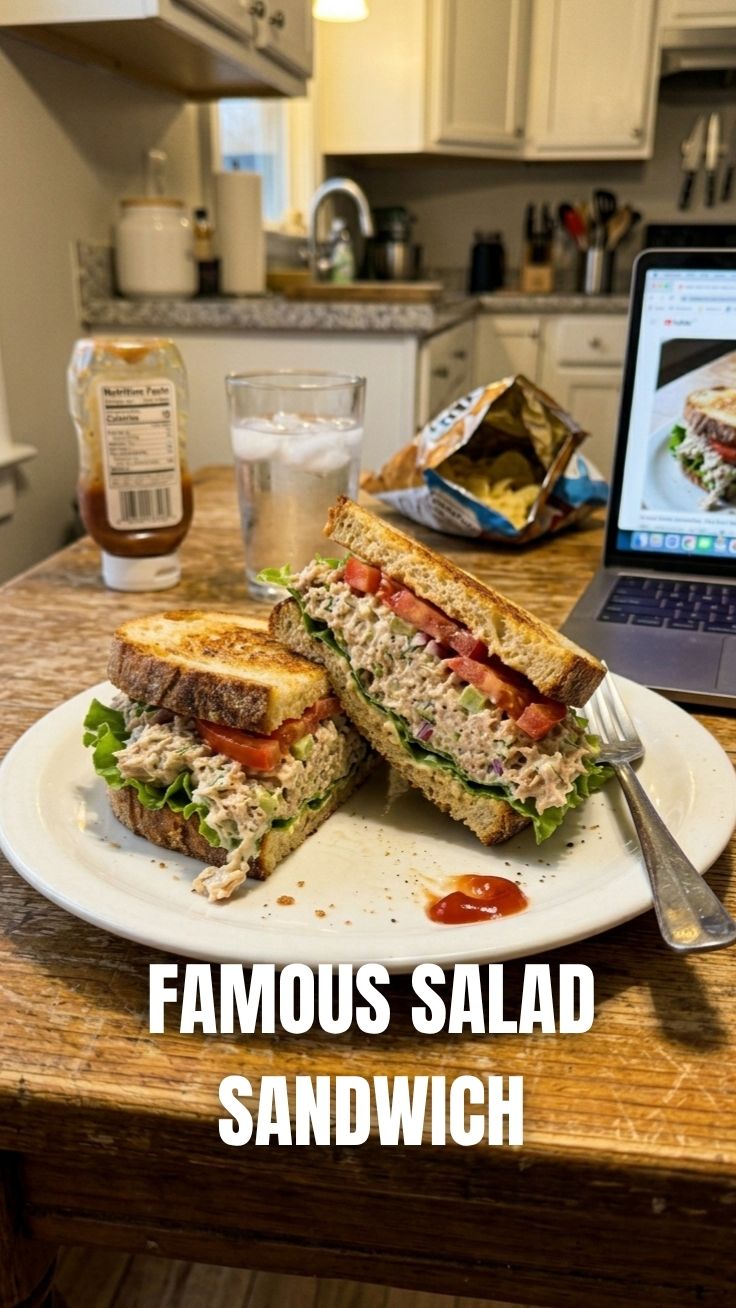
Master the Perfect Tuna Salad Sandwich: Your Guide to a Quick & Delicious Meal
Tired of the same old lunch routine? Do you crave a dish that’s both satisfying and incredibly easy to prepare? Look no further than the timeless Tuna Salad Sandwich. This classic comfort food isn’t just about convenience; it’s about unlocking a world of fresh flavors and wholesome goodness right in your kitchen. Why settle for store-bought, often lackluster versions when you can craft a personalized and utterly delicious tuna salad recipe that perfectly suits your palate? Making your own offers unparalleled control over ingredients, ensuring a healthier and tastier experience every time.
Ingredients & Kitchen Tools
Crafting the perfect Tuna Salad Sandwich requires a few essential ingredients and basic kitchen tools. Here’s a comprehensive list:
- Canned Tuna: Two 5-ounce cans, packed in water or oil, drained. (Water-packed is lighter; oil-packed offers richer flavor.)
- Mayonnaise: 1/2 cup, good quality. (Adjust to your preferred creaminess; Greek yogurt is a healthy alternative.)
- Celery: 2 stalks, finely diced. (Adds a crucial crunch and fresh flavor.)
- Red Onion: 1/4 cup, finely minced. (Provides a subtle bite and sweetness; can be omitted for milder flavor.)
- Dill Pickles (or Relish): 2 tablespoons, finely chopped, or 1 tablespoon sweet pickle relish. (For tang and a touch of sweetness.)
- Fresh Lemon Juice: 1 tablespoon. (Brightens the flavors and adds acidity.)
- Dijon Mustard: 1 teaspoon. (Adds a sophisticated depth without overpowering.)
- Salt & Black Pepper: To taste. (Season generously to enhance all ingredients.)
- Bread: Your favorite sliced bread (e.g., whole wheat, sourdough, rye). (The canvas for your culinary creation.)
- Optional Add-ins: Hard-boiled eggs (chopped), capers, fresh dill, or a pinch of paprika. (Personalize your tuna salad recipe!)
Kitchen Tools:
- Medium mixing bowl: To combine all ingredients.
- Fork: For flaking the tuna and mixing.
- Cutting board and sharp knife: For dicing vegetables.
- Measuring cups and spoons: For accurate ingredient amounts.
- Rubber spatula: For scraping the bowl clean.
Prep Time & Cooking Schedule
This recipe is a champion of efficiency! You’ll be enjoying your delicious sandwich in no time.
- Prep Time: 10-15 minutes
- Cook Time: 0 minutes (no cooking required!)
- Resting Time (Optional): 15-30 minutes. While you can eat it immediately, allowing the tuna salad to rest in the refrigerator briefly (15-30 minutes) lets the flavors meld beautifully, creating a more harmonious and satisfying experience. This is especially useful if you’re making it for meal prep.
Step-by-Step Instructions
1. Drain the Tuna: Open the canned tuna and thoroughly drain any liquid. Place the well-drained tuna in your medium mixing bowl. Use a fork to gently flake the tuna into smaller pieces.
2. Chop & Combine Veggies: Finely dice the celery, red onion, and dill pickles (or measure out relish). Add these chopped vegetables directly to the bowl with the flaked tuna.
3. Create the Dressing: In a small separate bowl, whisk together the mayonnaise, fresh lemon juice, and Dijon mustard until smooth. This ensures an even distribution of flavor.
4. Dress the Tuna Salad: Pour the prepared dressing over the tuna and vegetables in the mixing bowl.
5. Season & Mix: Season generously with salt and black pepper to taste. Using your fork or a rubber spatula, gently mix all the ingredients until everything is well combined and coated with the dressing. Be careful not to over-mix, which can make the tuna mushy. You want to maintain some texture! This step is crucial for perfecting your tuna salad recipe.
6. Assemble the Tuna Salad Sandwich: Spread a generous amount of the prepared tuna salad onto one slice of your chosen bread. Top with another slice of bread. Slice in half diagonally or straightforward, as desired.
7. Serve & Enjoy: Serve immediately, or refrigerate for later enjoyment.
Nutritional Benefits & Advantages
Tuna is a fantastic source of lean protein, which is essential for muscle repair and satiety. It’s also rich in omega-3 fatty acids, known for their heart-healthy properties and benefits for brain function. Celery and onions add valuable fiber, vitamins, and antioxidants. While mayonnaise adds calories, using a light version or substituting with Greek yogurt can significantly reduce the fat content, making this a truly nutritious and balanced meal. This sandwich offers a quick way to get vital nutrients into your diet.
Tips, Variations & Cooking Advice
- Spice It Up: Add a pinch of cayenne pepper, a dash of hot sauce, or finely chopped jalapeño for a kick.
- Herbaceous Delight: Incorporate fresh herbs like chopped parsley, chives, or fresh dill for vibrant flavor.
- Avocado Creaminess: Mash in 1/4 of an avocado for extra creaminess and healthy fats, reducing the need for as much mayonnaise.
- Texture Play: Add toasted nuts (pecans, walnuts) or sunflower seeds for an extra crunch.
- Dietary Adaptations:
* Gluten-Free: Use gluten-free bread or serve the tuna salad in lettuce cups, bell pepper “boats,” or with rice crackers.
* Dairy-Free: Ensure your bread is dairy-free, and use a dairy-free mayonnaise alternative if preferred.
* Lower Carb: Serve over a bed of mixed greens, in hollowed-out tomatoes, or on cucumber slices.
Common Mistakes to Avoid
- Not Draining Tuna Thoroughly: Excess water or oil will make your tuna salad watery and greasy. Always drain well!
- Over-Mixing: This can lead to a mushy texture. Mix just until combined.
- Under-Seasoning: Don’t be shy with salt and pepper! Taste as you go and adjust. Lemon juice also helps brighten flavors, so don’t skimp.
- Using Too Much Mayonnaise: Start with less and add more until you reach your desired consistency. You can always add, but you can’t take away.
Storage & Meal Prep Tips
Tuna salad is excellent for meal prep!
- Refrigeration: Store leftover tuna salad in an airtight container in the refrigerator for up to 3-4 days.
- Freezing: Tuna salad typically does not freeze well due to the mayonnaise base, which can separate and become watery upon thawing. It’s best enjoyed fresh or refrigerated.
- Reheating: No reheating needed! Serve chilled directly from the refrigerator. For best results, keep the tuna salad separate from the bread until just before serving to prevent the bread from becoming soggy.
Conclusion
There you have it – the ultimate guide to crafting the perfect Tuna Salad Sandwich. This simple yet satisfying dish proves that homemade can be both effortless and incredibly delicious. By following these steps and incorporating our tips, you’ll be able to create a personalized and flavorful tuna salad recipe that will elevate your lunch game. Don’t just make a sandwich; create an experience. We encourage you to try this recipe, experiment with your favorite add-ins, and share your delicious creations with us!
FAQs
Q1: Can I make tuna salad ahead of time?
A: Absolutely! Tuna salad can be prepared up to 2-3 days in advance and stored in an airtight container in the refrigerator. The flavors often meld even better after a day.
Q2: What can I use instead of mayonnaise?
A: Greek yogurt (plain), sour cream, mashed avocado, or a combination of yogurt and mayo are excellent alternatives for reducing fat or changing the flavor profile.
Q3: How can I prevent my sandwich bread from getting soggy?
A: To prevent sogginess, spread butter or cream cheese on your bread slices before adding tuna salad, or pack the tuna salad separately and assemble just before eating.
Q4: Is canned tuna healthy?
A: Yes, canned tuna is a good source of lean protein, omega-3 fatty acids, and essential vitamins and minerals. Choose tuna packed in water to minimize fat content, if desired.
Q5: What are some unique additions to tuna salad?
A: Get creative! Try adding chopped apple or grapes for sweetness, a dash of curry powder for an exotic twist, or crumbled bacon for a smoky flavor.