Mastering the Art of Homemade Holiday Stuffing: Your Ultimate Guide
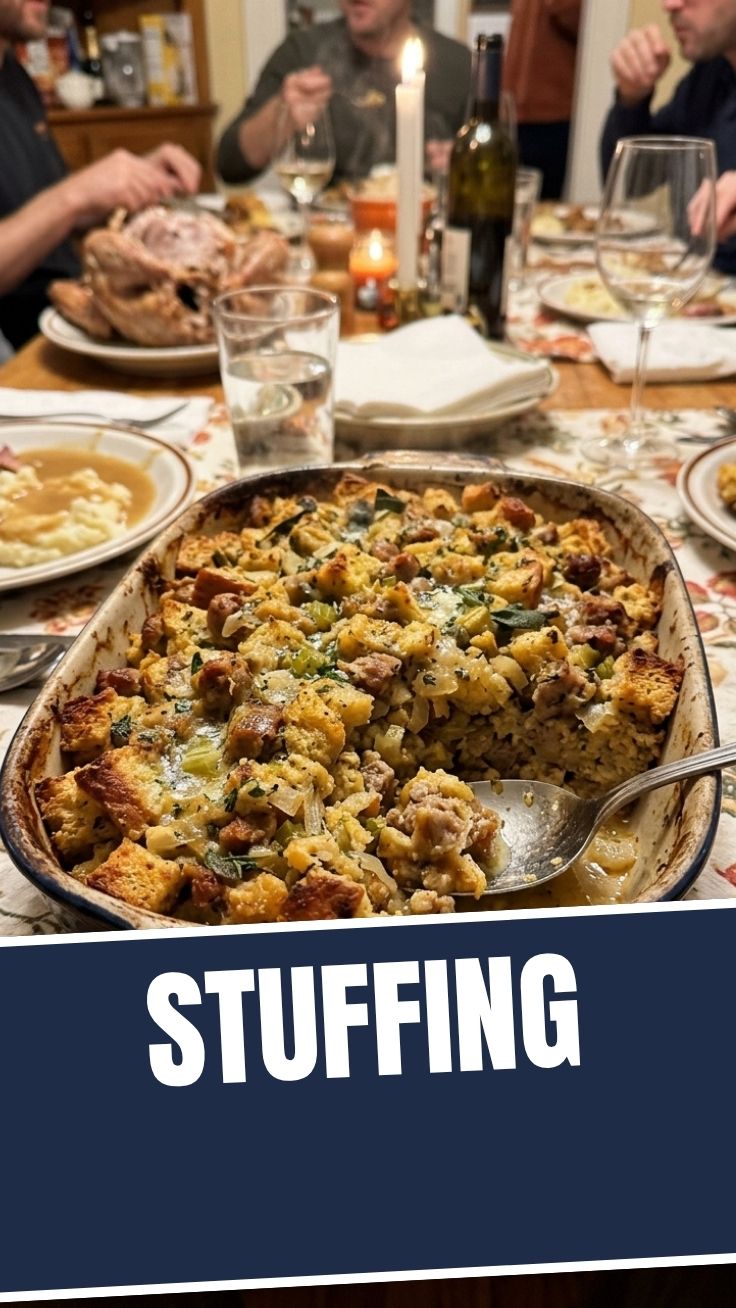
Ever wondered if you could truly capture the essence of a holiday feast right in your own kitchen? The answer is a resounding yes, especially when it comes to crafting the perfect homemade Stuffing. There’s an undeniable magic in a dish that evokes warmth, tradition, and pure comfort. Preparing this classic side at home isn’t just about saving money; it’s about customizing flavors, ensuring the freshest ingredients, and creating a culinary masterpiece that truly reflects your personal touch. This comprehensive guide will walk you through every step, ensuring your holiday Stuffing is the star of the show.
ingredients & Kitchen Tools
To embark on this delightful culinary journey, gather the following:
- Ingredients:
* 1 loaf (16 oz) day-old artisan bread: Such as sourdough, challah, or French bread. Stale bread is key for proper absorption.
* 1 cup unsalted butter (2 sticks): Adds richness and helps sauté aromatics.
* 2 large yellow onions, finely chopped: Provides a sweet and savory base.
* 4 stalks celery, finely chopped: Adds a classic crisp texture and earthy notes.
* 2 cups sliced mushrooms (cremini or button): Optional, but adds an umami depth.
* 4 cloves garlic, minced: Essential for aromatic complexity.
* 2 tbsp fresh sage, chopped: The quintessential herb for holiday Stuffing.
* 1 tbsp fresh thyme, chopped: Complements the sage beautifully.
* 1 tsp dried rosemary, crushed: Adds a fragrant, piney aroma.
* 1 tsp salt: To enhance all flavors. Adjust to taste.
* 1/2 tsp black pepper: For a hint of warmth and spice.
* 4 cups chicken or vegetable broth: The liquid base that moistens and binds the ingredients.
* 2 large eggs, lightly beaten: Acts as a binder, preventing the Stuffing from being too crumbly.
* 1/2 cup fresh parsley, chopped: For a burst of freshness and color.
* Optional additions: 1 cup cooked sausage, 1 cup dried cranberries, 1/2 cup toasted pecans.
- Kitchen Tools:
* Large baking dish (9×13 inch)
* Large mixing bowl
* Large skillet or Dutch oven
* Cutting board and sharp knife
* Measuring cups and spoons
* Whisk
Prep Time & Cooking Schedule
- Prep Time: 30 minutes
- Cooking Time: 45-60 minutes
- Resting Time: 10 minutes (after baking)
To make your holiday meal preparation seamless, consider prepping your vegetables (onions, celery, garlic) the day before. You can also cube your bread and let it air dry overnight for optimal texture. This dish is excellent for pre-assembly; you can mix all the components and refrigerate it up to 24 hours before baking, covering it tightly. Just add an extra 10-15 minutes to the baking time if starting from cold.
Step-by-Step Instructions
1. Prepare the Bread: If your bread isn’t already day-old, cut it into 1-inch cubes and spread them on a baking sheet. Bake at 300°F (150°C) for 15-20 minutes, or until lightly toasted and dry. This crucial step prevents soggy Stuffing.
2. Sauté Aromatics: In a large skillet or Dutch oven, melt the butter over medium heat. Add the chopped onions and celery, cooking until softened and translucent, about 8-10 minutes. If using, add the mushrooms and cook until their liquid has evaporated.
3. Infuse with Flavor: Stir in the minced garlic, fresh sage, thyme, and dried rosemary. Cook for another 1-2 minutes until fragrant, being careful not to burn the garlic.
4. Combine ingredients: In a large mixing bowl, combine the toasted bread cubes with the sautéed vegetable mixture. Add the salt and pepper. If using, stir in any optional additions like cooked sausage, cranberries, or pecans.
5. Moisten and Bind: In a separate bowl, whisk together the chicken or vegetable broth and the lightly beaten eggs. Pour this liquid mixture evenly over the bread and vegetable mixture. Gently toss everything together until the bread cubes are evenly moistened. Be careful not to overmix, as this can make the Stuffing dense. Let it sit for 5-10 minutes to allow the bread to soak up the liquid.
6. Bake to Perfection: Transfer the Stuffing mixture into your greased 9×13 inch baking dish. Cover loosely with foil and bake at 375°F (190°C) for 30 minutes.
7. Brown and Crisp: Remove the foil and continue baking for another 15-25 minutes, or until the top is golden brown and crispy. The internal temperature should reach at least 165°F (74°C).
8. Garnish and Serve: Remove from the oven and let it rest for 10 minutes before serving. Garnish with fresh chopped parsley.
Nutritional Benefits & Advantages
Homemade Stuffing offers several advantages over store-bought versions. By controlling the ingredients, you can reduce sodium content and opt for healthier fats. The generous amount of vegetables like onions, celery, and mushrooms contributes dietary fiber, vitamins, and minerals. Herbs like sage and thyme are rich in antioxidants. Using whole grain bread can further boost fiber intake, making this a more wholesome addition to your holiday table.
Tips, Variations & Cooking Advice
- Gluten-Free: Simply substitute the artisan bread for a sturdy gluten-free bread. Ensure all other ingredients are certified gluten-free.
- Dairy-Free: Use a plant-based butter alternative and vegetable broth.
- Spice It Up: Add a pinch of red pepper flakes for a subtle kick.
- Fruity Twist: Incorporate diced apples or pears for a touch of sweetness.
- Make Ahead: As mentioned, assemble the day before and bake when ready.
- Crispier Top: For extra crispiness, drizzle a little more melted butter over the top before the final unwrapped baking phase.
Common Mistakes to Avoid
- Soggy Stuffing: This is often due to using fresh bread or too much liquid. Always use day-old or toasted bread cubes, and ensure your liquid-to-bread ratio is appropriate.
- Dry Stuffing: Too little liquid, over-baking, or not covering during the initial bake are common culprits. Follow the broth measurements and baking times closely.
- Bland Flavor: Don’t skimp on the herbs and aromatics. Fresh herbs make a significant difference. Taste and adjust seasoning before baking.
- Overmixing: Tossing too vigorously can compress the bread, leading to a dense texture. Be gentle when combining ingredients.
Storage & Meal Prep Tips
Leftover Stuffing can be stored in an airtight container in the refrigerator for up to 3-4 days. To reheat, you can microwave individual portions, or for best results, reheat in the oven at 300°F (150°C) with a splash of broth or water, covered, until warmed through. For longer storage, freeze cooled Stuffing in freezer-safe containers for up to 3 months. Thaw overnight in the refrigerator before reheating. It’s excellent for meal prepping, allowing you to enjoy a taste of the holidays any time.
Conclusion
Crafting your own holiday Stuffing from scratch is a rewarding experience that elevates any meal. With carefully selected ingredients and a little patience, you can achieve that perfect balance of crispy edges and moist, flavorful interior. This guide provides all the tools and knowledge you need to create a truly memorable dish. Don’t be afraid to experiment and personalize this recipe to make it your own!
FAQs
Q1: Can I use fresh bread instead of day-old?
A1: While day-old bread is ideal, you can use fresh bread if you dry it out thoroughly in the oven at a low temperature (300°F/150°C) for 15-20 minutes until toasted and dry. This prevents a soggy texture.
Q2: What’s the secret to moist but not mushy Stuffing?
A2: The key is using properly dried bread and the right amount of liquid, along with an egg binder. Don’t overmix and ensure you cover it during the initial baking phase.
Q3: Can I add meat to this recipe?
A3: Absolutely! Cooked sausage, ground beef, or turkey can be browned and added with the sautéed vegetables for a heartier Stuffing.
Q4: How do I know when my Stuffing is fully cooked?
A4: It should be golden brown and crusty on top, and an instant-read thermometer inserted into the center should register at least 165°F (74°C).
Q5: Can I bake this in the turkey?
A5: While traditionally done, baking it separately in a dish (as this recipe outlines) is generally recommended for food safety, ensuring it reaches a safe internal temperature without overcooking the turkey.