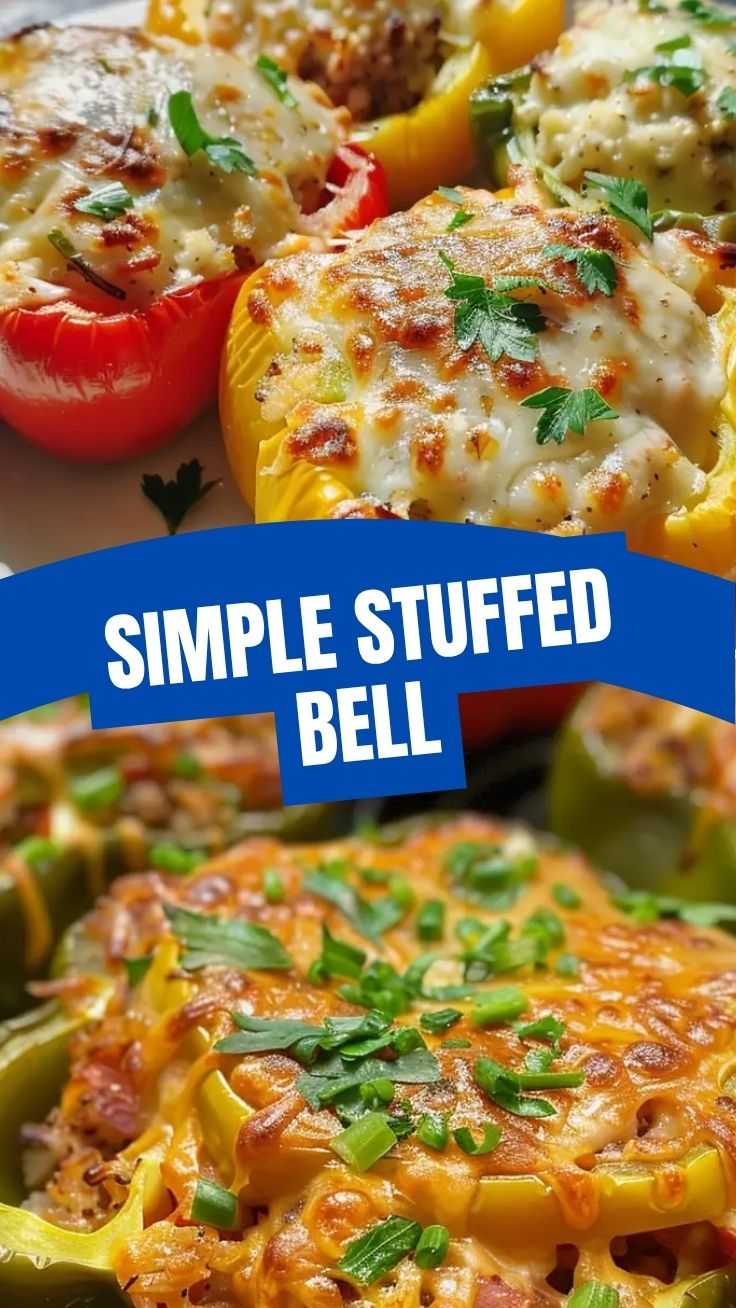
From Humble to Hero: Why This Stuffed Bell Peppers Recipe is Your Next Dinner Obsession
Tired of the same old dinner routine? Do you crave a dish that’s both comforting and bursting with flavor, yet surprisingly easy to prepare? Look no further! This incredible recipe for Stuffed Bell Peppers is about to transform your weeknight meals. Imagine vibrant red, yellow, and orange bell peppers, overflowing with a savory, perfectly seasoned filling, baked until tender and fragrant. Preparing this delightful dish at home isn’t just about saving money; it’s about crafting a personalized culinary experience, controlling ingredients for optimal health, and impressing your family with a meal that feels gourmet, but is entirely approachable. Get ready to elevate your kitchen game!
Ingredients & Kitchen Tools
For a truly exceptional Stuffed Bell Peppers experience, gather these essentials:
- Large bell peppers (4-6): Choose a variety of colors (red, yellow, orange) for visual appeal and slightly different sweetness levels. These are the stars of our show!
- Ground meat (1 lb): Lean ground beef, turkey, or a combination for a robust filling.
- Cooked rice (1 cup): White or brown rice, pre-cooked to save time. Adds texture and absorbs flavors.
- Diced onion (1 medium): Aromatic base for the filling, lending sweetness and depth.
- Minced garlic (2-3 cloves): Essential for a pungent, savory kick.
- Canned diced tomatoes (14.5 oz can, undrained): Provides moisture, acidity, and a rich tomato base.
- Tomato sauce (8 oz can): For a smoother, saucier consistency in the filling.
- Worcestershire sauce (1 tbsp): Adds a unique umami depth.
- Italian seasoning (1 tsp): A classic blend of herbs that complements the tomato and meat.
- Salt & black pepper (to taste): Fundamental seasonings to enhance all other flavors.
- Shredded cheese (1 cup): Mozzarella, cheddar, or a blend for a melty, cheesy topping. Optional, but highly recommended!
- Olive oil (1 tbsp): For sautéing the aromatics.
- Large baking dish: To comfortably hold the stuffed peppers.
- Large skillet: For preparing the filling.
- Cutting board & knife: For chopping vegetables.
- Mixing spoon: For combining ingredients.
Prep Time & Cooking Schedule
- Prep Time: 20-25 minutes (includes chopping vegetables, browning meat, and mixing the filling)
- Cooking Time: 35-45 minutes (baking until peppers are tender and filling is heated through)
- Resting Time: 5-10 minutes (allows flavors to meld and makes slicing easier)
This recipe is perfect for a weeknight dinner, as much of the prep can be done in advance. You can pre-cook the rice, dice the onions and garlic, or even prepare the entire filling a day ahead and store it in the refrigerator. This strategic planning will significantly reduce your active cooking time on a busy evening.
Step-by-Step Instructions
1. Prepare the Bell Peppers: Preheat your oven to 375°F (190°C). Carefully slice the top off each bell pepper (about ½ inch down) and remove the seeds and membranes. You can stand them upright or slice them lengthwise for a boat-like shape. Set aside.
2. Sauté Aromatics: In a large skillet, heat olive oil over medium heat. Add the diced onion and cook until softened and translucent, about 5-7 minutes. Add the minced garlic and cook for another minute until fragrant.
3. Brown the Meat: Add the ground meat to the skillet with the onions and garlic. Break it up with a spoon and cook until fully browned, draining any excess grease.
4. Combine the Filling: Stir in the cooked rice, diced tomatoes (undrained), tomato sauce, Worcestershire sauce, Italian seasoning, salt, and pepper. Bring the mixture to a simmer, then reduce heat and cook for 5 minutes, allowing the flavors to meld. This savory filling is what makes our Stuffed Bell Peppers so special!
5. Stuff the Peppers: Carefully spoon the filling into each hollowed-out bell pepper. Don’t overpack them; leave a little space for the cheese if using.
6. Bake to Perfection: Arrange the stuffed peppers in your baking dish. You can add a splash of water (about ¼ cup) to the bottom of the dish to create some steam and help soften the peppers. Cover loosely with foil and bake for 30 minutes.
7. Add Cheese (Optional) & Finish Baking: Remove the foil, sprinkle the shredded cheese generously over the top of each pepper, and return to the oven, uncovered, for another 10-15 minutes, or until the cheese is melted and bubbly, and the peppers are tender when pierced with a fork.
8. Rest and Serve: Let the peppers rest for 5-10 minutes before serving. This allows the filling to set and prevents burns.
Nutritional Benefits & Advantages
These Stuffed Bell Peppers are not just delicious; they’re also packed with goodness! Bell peppers themselves are an excellent source of Vitamin C and A, potent antioxidants that support immune health and vision. The lean ground meat provides high-quality protein for muscle repair and satiety, while the rice offers sustained energy. Tomatoes contribute lycopene, another powerful antioxidant linked to heart health. This dish is a fantastic way to incorporate more vegetables into your diet in a fun and filling way.
Tips, Variations & Cooking Advice
- Spice It Up: Add a pinch of red pepper flakes or a dash of hot sauce to the filling for a spicy kick.
- Vegetarian Version: Substitute the ground meat with cooked lentils, quinoa, or a plant-based ground meat alternative.
- Cheese Alternatives: Experiment with feta cheese, goat cheese, or nutritional yeast for different flavor profiles.
- Herb Twist: Fresh herbs like parsley, basil, or oregano chopped and stirred into the filling just before baking will brighten the flavors.
- Slow Cooker Method: For a hands-off approach, you can cook the stuffed peppers in a slow cooker on low for 3-4 hours after preparing the filling.
Common Mistakes to Avoid
- Overfilling: Don’t pack the peppers too tightly. This can lead to uneven cooking and a harder-to-manage serving.
- Undercooking Bell Peppers: Ensure the bell peppers are tender. They shouldn’t be crunchy, but rather yielding when pierced. Covering them with foil initially helps steam them.
- Greasy Filling: If using higher-fat ground meat, be sure to drain excess grease after browning to avoid a greasy end product.
- Lack of Seasoning: Taste the filling before stuffing! Adjust salt, pepper, and other seasonings as needed to ensure a flavorful result.
Storage & Meal Prep Tips
Leftover Stuffed Bell Peppers store beautifully. Allow them to cool completely, then transfer them to an airtight container. They will keep in the refrigerator for 3-4 days. For longer storage, freeze individual peppers on a baking sheet until solid, then transfer to a freezer-safe bag or container. They will last for up to 3 months. To reheat, thaw overnight in the refrigerator (if frozen), then bake at 350°F (175°C) until heated through, or microwave in short intervals. Adding a spoonful of water or broth before reheating can help maintain moisture.
Conclusion
There you have it – a magnificent recipe for Stuffed Bell Peppers that promises to be a family favorite. This dish combines the richness of a savory filling with the vibrant freshness of bell peppers, creating a wholesome and incredibly satisfying meal. We encourage you to try this recipe and discover the joy of creating healthy, delicious food at home. Share your culinary creations with us, and let us know how your stuffed peppers turned out!
FAQs
1. Can I use uncooked rice in the filling?
It’s strongly recommended to use cooked rice. Uncooked rice will absorb too much liquid from the filling, making it dry, and may not cook thoroughly within the pepper.
2. How do I prevent the peppers from toppling over in the baking dish?
If your peppers are round and wobbly, you can trim a small slice off the very bottom to create a flat base. Alternatively, nestle them closely together in the baking dish or use crumpled aluminum foil to prop them up.
3. What vegetables can I add to the filling?
Finely diced mushrooms, zucchini, corn, or spinach are excellent additions. Sauté them with the onions and garlic to soften before adding other ingredients.
4. Can I make these dairy-free?
Absolutely! Simply omit the cheese, or use a plant-based shredded cheese alternative.
5. My peppers are still a bit firm after baking. What should I do?
Cover them with foil again and bake for an additional 10-15 minutes, or until desired tenderness is reached. Oven temperatures can vary, so adjust cooking time as needed.