Unlock the Secret to Restaurant-Quality Fried Rice at Home!
Are you constantly searching for that perfect balance of savory, umami, and tender shrimp in your fried rice? Look no further! This comprehensive guide will empower you to create unbelievably delicious Shrimp Fried Rice right in your own kitchen. While takeout is convenient, mastering this classic dish at home not only saves money but also allows for complete control over ingredients, freshness, and flavor. Forget the mystery oils and questionable ingredients; prepare an Easy Shrimp Fried Rice that will impress your family and friends. This recipe is designed to be straightforward yet yields exceptional results, proving that gourmet flavors are well within your reach.
Ingredients & Kitchen Tools
Here’s everything you’ll need to create your culinary masterpiece:
- 2 tablespoons vegetable oil: (or other neutral oil like canola or grapeseed) For sautéing and stir-frying.
- 1 pound raw shrimp: (peeled, deveined, tails on or off, your preference) The star protein of our dish.
- 1 small yellow onion: (finely diced) Adds aromatic depth and a touch of sweetness.
- 2 cloves garlic: (minced) Essential for flavor.
- 1 cup frozen peas and carrots blend: (thawed) Adds color, sweetness, and vegetables.
- 4 cups cooked day-old white rice: (chilled) Crucial for fluffy, non-soggy fried rice. Using leftover rice prevents clumping.
- 2 large eggs: (lightly beaten) Creates tender, scrambled egg pieces throughout.
- 3 tablespoons soy sauce: (low-sodium preferred) Fundamental for umami and seasoning.
- 1 tablespoon oyster sauce: (optional, but highly recommended for authentic flavor) Adds a rich, savory depth.
- 1 teaspoon sesame oil: (toasted, adds a nutty aroma) Drizzle at the end for flavor.
- 1/4 teaspoon white pepper: (or black pepper) For a subtle kick.
- Green onions: (sliced, for garnish) Adds freshness and a pop of color.
Kitchen Tools:
- Large wok or non-stick skillet: Essential for even cooking and tossing.
- Spatula: For stirring and scraping.
- Measuring cups and spoons: For precise ingredient amounts.
- Cutting board and knife: For prepping vegetables.
- Small bowl: For whisking eggs.
Prep Time & Cooking Schedule
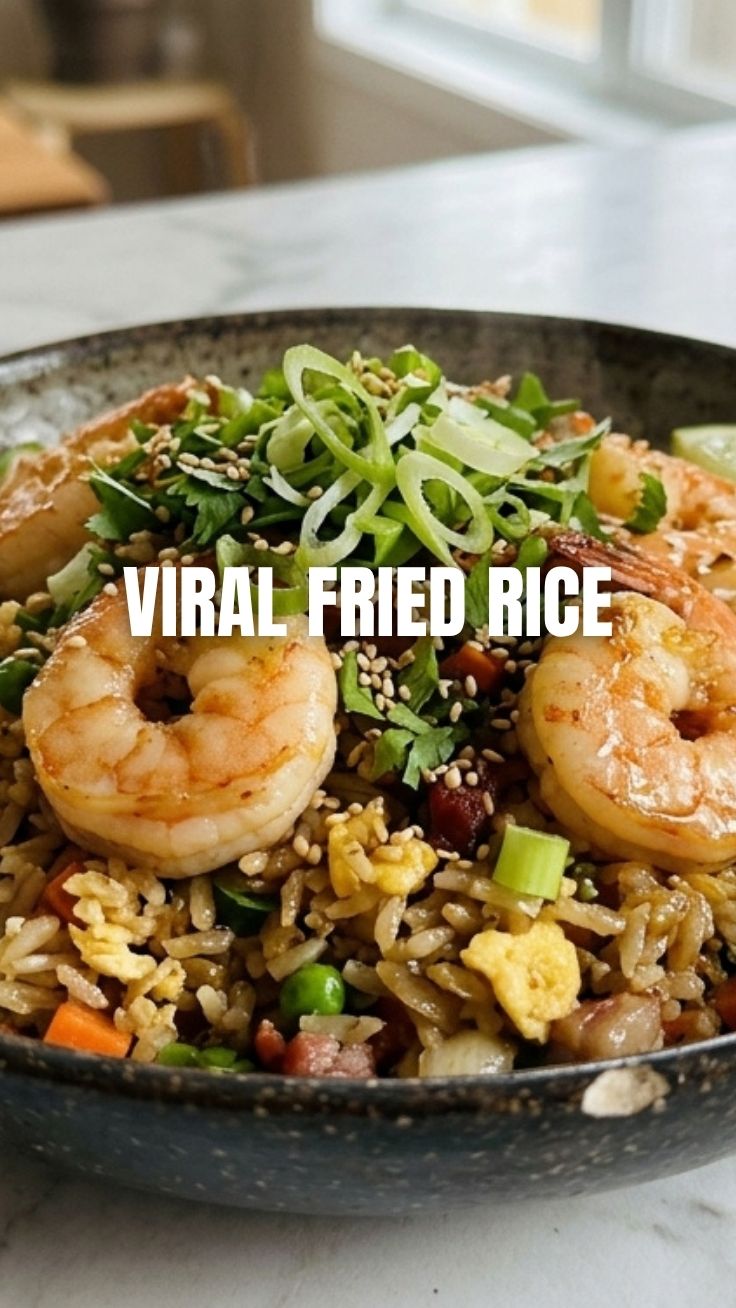
- Prep time: 15 minutes (Includes chopping vegetables and peeling shrimp).
- Cook time: 15-20 minutes (Fried rice cooks quickly!).
- Resting time: None (Serve immediately for best results).
The key to an efficient fried rice experience is having all your ingredients prepped and ready to go before you even touch the heat. This “mise en place” approach ensures a smooth and enjoyable cooking process, as fried rice demands quick action once it hits the pan. Ensure your day-old rice is chilled; freshly cooked, warm rice will make for a gummy texture.
Step-by-Step Instructions
1. Prepare the Shrimp: Pat the shrimp dry with paper towels. In a medium bowl, season with a pinch of salt and pepper.
2. Scramble the Eggs: Heat 1 tablespoon of vegetable oil in your wok or skillet over medium-high heat. Pour in the beaten eggs and scramble until just set but still slightly moist. Transfer the eggs to a separate plate and set aside.
3. Cook the Shrimp: Add another tablespoon of vegetable oil to the wok. Increase heat to high. Add the seasoned shrimp in a single layer and cook for 1-2 minutes per side, or until pink and opaque. Do not overcrowd the pan; cook in batches if necessary. Remove shrimp and set aside with the eggs.
4. Sauté Aromatics: Add the diced onion to the wok and cook for 2-3 minutes until softened. Add the minced garlic and cook for another 30 seconds until fragrant, being careful not to burn it.
5. Add Vegetables & Rice: Stir in the thawed peas and carrots. Cook for 2 minutes. Add the chilled day-old rice, breaking up any clumps with your spatula. Stir-fry for 3-5 minutes, allowing the rice to heat through and slightly crisp up.
6. Combine & Season: Return the cooked Shrimp Fried Rice and scrambled eggs to the wok. Pour in the soy sauce, oyster sauce (if using), and white pepper. Toss everything together vigorously for 2-3 minutes, ensuring all ingredients are well combined and coated with the sauces.
7. Finish & Serve: Drizzle with sesame oil and give one final toss. Garnish generously with sliced green onions. Serve your delicious Easy Shrimp Fried Rice immediately!
Nutritional Benefits & Advantages
This homemade Shrimp Fried Rice is not only delicious but also packs nutritional advantages. Shrimp is an excellent source of lean protein, low in fat and calories, and rich in omega-3 fatty acids, selenium, and vitamin B12. The inclusion of various vegetables like peas, carrots, and onions adds essential vitamins, minerals, and dietary fiber, promoting digestive health. By preparing it at home, you can control the amount of sodium and unhealthy fats, making it a much healthier alternative to many takeout options.
Tips, Variations & Cooking Advice
- Spice it Up: Add a dash of sriracha or red pepper flakes for a spicier kick.
- Protein Power: Feel free to add other proteins like diced chicken, pork, or tofu for a heartier meal.
- Vegetable Variety: Incorporate other quick-cooking vegetables such as bell peppers, corn, or bean sprouts.
- Egg Variations: Instead of scrambling, you can fry an egg and place it on top for a runny yolk experience.
- Gluten-Free: Use tamari instead of soy sauce for a gluten-free version.
- Dairy-Free: This recipe is naturally dairy-free!
- Oil Choice: Experiment with avocado oil for a healthier alternative to vegetable oil.
Common Mistakes to Avoid
- Using fresh, hot rice: This is the most common mistake. Always use day-old, chilled rice to prevent a mushy, clumpy texture.
- Overcrowding the wok: Cooking too many ingredients at once lowers the temperature of the pan, leading to steaming instead of stir-frying, resulting in soggy food. Cook in batches if necessary.
- Too much sauce: Start with the recommended amount and adjust to taste. Too much liquid can make the rice wet and heavy.
- Burning the garlic: Garlic cooks very quickly. Add it after onions have softened and cook only until fragrant, usually 30 seconds to a minute.
Storage & Meal Prep Tips
Leftover Shrimp Fried Rice can be stored in an airtight container in the refrigerator for up to 3-4 days. To reheat, gently warm in a skillet over medium heat, adding a splash of water or broth if it seems dry. Alternatively, microwave until heated through. Freezing is not recommended as it can alter the texture of the rice and shrimp. This dish is fantastic for meal prepping, offering a quick and satisfying lunch or dinner solution throughout the week.
Conclusion
There you have it – a foolproof guide to crafting extraordinary Shrimp Fried Rice that rivals your favorite restaurant! By following these steps and incorporating our expert tips, you’ll master this classic in no time. Enjoy the satisfaction of creating a flavorful, nutritious, and incredibly satisfying meal from scratch. Don’t be afraid to experiment with different vegetables and protein combinations to truly make this Easy Shrimp Fried Rice your own. Share your culinary creations with us and let us know how your homemade fried rice turned out!
FAQs
Q1: Can I use brown rice for fried rice?
A1: Yes, you can! Brown rice will impart a nuttier flavor and chewier texture. Ensure it’s cooked and chilled day-old, just like white rice, for the best results.
Q2: What if I don’t have day-old rice?
A2: If you’re in a pinch, you can spread freshly cooked rice thinly on a baking sheet and pop it in the freezer for about 15-20 minutes to quickly chill and dry it out.
Q3: How can I make my fried rice less greasy?
A3: Use a non-stick wok or skillet and avoid using excessive oil. High heat and quick stir-frying help prevent the rice from absorbing too much oil.
Q4: Can I add other seasonings beyond soy and oyster sauce?
A4: Absolutely! Some like to add a pinch of ginger powder, a dash of fish sauce for extra umami, or a touch of sugar to balance the savory notes. Experiment to find your preferred flavor profile.