Mastering the Art of the Perfect Roast Turkey: Your Definitive Guide
Dreaming of that golden-brown, succulent centerpiece gracing your holiday table or a special family dinner? There’s something undeniably satisfying about preparing a homemade meal that brings everyone together, and few dishes achieve this better than a perfectly cooked Roast Turkey. This guide will walk you through every step, ensuring your bird is juicy, flavorful, and a true culinary triumph. We’ll demystify the process, from selecting the right ingredients to mastering the perfect roast turkey recipe, making it achievable for even the most hesitant home cook. Get ready to impress!
Ingredients & Kitchen Tools
Crafting an unforgettable Roast Turkey requires quality ingredients and the right equipment. Here’s what you’ll need:
- 1 (12-15 lb) Whole Turkey: Fresh or fully thawed. Choose a bird that fits your oven and guest count.
- ½ cup Unsalted Butter, softened: For basting and adding richness under the skin.
- 1 large Yellow Onion, quartered: Adds aromatic depth to the cavity.
- 2 Celery Stalks, roughly chopped: Contributes to the savory aroma.
- 2 Carrots, roughly chopped: Sweetens the cavity and pan drippings.
- 4 sprigs Fresh Rosemary: Earthy, aromatic herb.
- 6 sprigs Fresh Thyme: Fragrant, slightly minty herb.
- 1 head Garlic, halved horizontally: Infuses a milder garlic flavor.
- 2 cups Chicken or Vegetable Broth: For the roasting pan, keeps the turkey moist and creates drippings.
- Salt and Freshly Ground Black Pepper: Essential seasonings.
- Optional Herb Butter: Mix softened butter with chopped fresh sage, parsley, and a pinch of paprika for extra flavor under the skin.
Kitchen Tools:
- Large Roasting Pan with Rack: Crucial for even air circulation and collecting drippings.
- Meat Thermometer: Non-negotiable for ensuring food safety and perfect doneness. A probe thermometer is highly recommended.
- Basting Brush: For applying butter or pan juices.
- Twine: To tie the legs together for even cooking and presentation.
- Carving Knife and Fork: For effortless slicing.
- Aluminum Foil: For resting the turkey and preventing over-browning.
Prep Time & Cooking Schedule
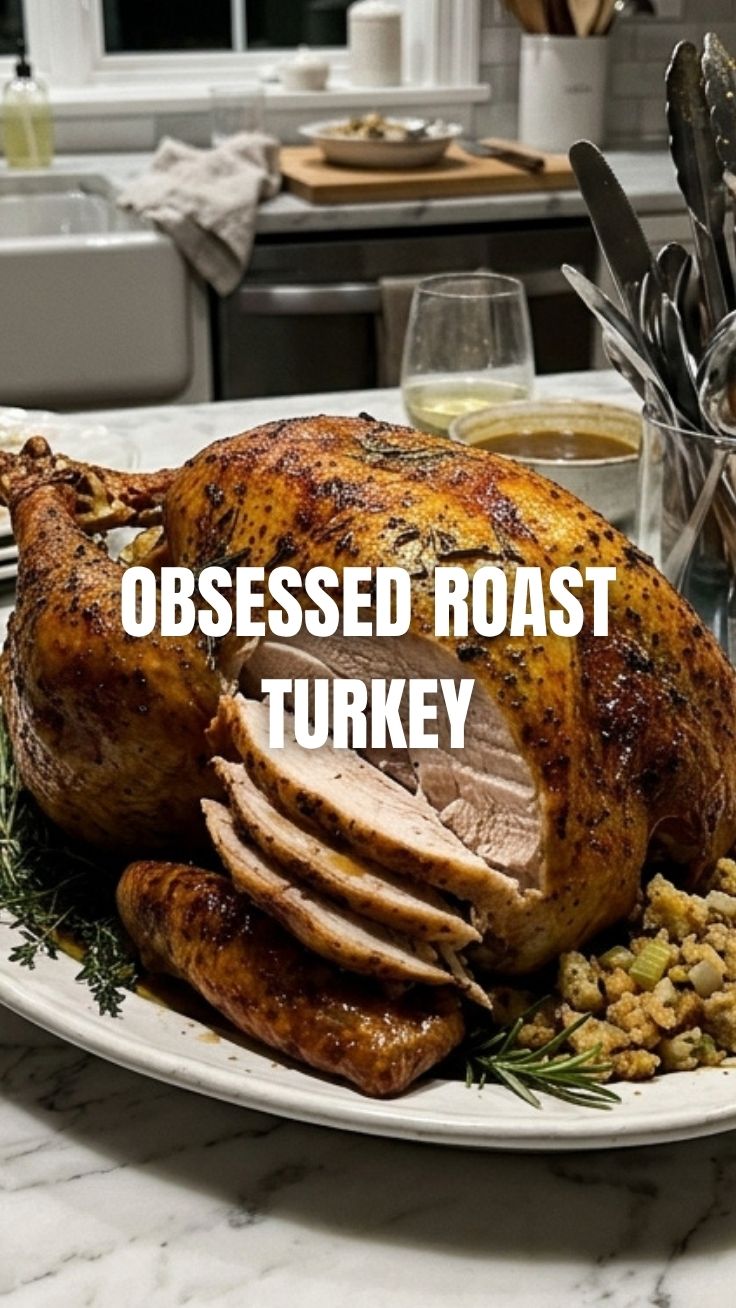
Planning is key for a stress-free experience. Here’s a typical schedule for a 12-15 lb turkey:
- Thawing Time (if frozen): 1-3 days in the refrigerator (allow 24 hours per 4-5 lbs).
- Prep Time: 30-45 minutes (includes seasoning, stuffing cavity)
- Roasting Time: 3 – 4 hours (approximately 13-15 minutes per pound at 325°F/160°C). This can vary based on your oven and turkey.
- Resting Time: 20-30 minutes (crucial for juicy results)
Planning Context: Start thawing your turkey well in advance. On the day of, ensure you begin prepping at least 4-5 hours before you plan to serve, allowing ample time for cooking and resting.
Step-by-Step Instructions
Follow these steps for a moist and flavorful Roast Turkey:
1. Prepare the Turkey: Remove the giblets and neck from the turkey cavities. Pat the turkey dry thoroughly with paper towels – this helps achieve crispy skin.
2. Seasoning: In a small bowl, mix softened butter with salt and pepper (and optional herbs if using). Gently loosen the skin over the breast meat and spread about half of the butter mixture directly onto the breast meat, under the skin. Rub the remaining butter over the exterior skin of the turkey.
3. Stuff the Cavity (Aromatics Only): Place the quartered onion, celery, carrots, rosemary, thyme, and halved garlic into the turkey’s main cavity. Do not stuff with traditional bread stuffing, as this can increase cooking time and pose food safety risks.
4. Trussing: Tie the turkey legs together with kitchen twine and tuck the wing tips under the body to prevent them from burning.
5. Preheat Oven: Preheat your oven to 325°F (160°C).
6. Roasting: Place the turkey, breast-side up, on the rack in the roasting pan. Pour 2 cups of chicken or vegetable broth into the bottom of the pan to create a moist environment and flavorful drippings.
7. Initial Roast: Roast for 1.5 – 2 hours. If the skin begins to brown too quickly, loosely tent with aluminum foil.
8. Continue Roasting & Basting: Continue roasting, basting every 30-45 minutes with pan juices or melted butter, until the internal temperature reaches 165°F (74°C) in the thickest part of the thigh (without touching the bone) and 160°F (71°C) in the breast. Remember, the temperature will rise during resting. Achieving this perfect internal temperature with this roast turkey recipe ensures ultimate tenderness.
9. Resting: Once cooked, remove the turkey from the oven and transfer it to a large cutting board. Loosely tent it with aluminum foil and let it rest for at least 20-30 minutes before carving. This crucial step allows the juices to redistribute, resulting in a more tender and moist turkey.
Nutritional Benefits & Advantages
Turkey is a lean protein powerhouse! It’s an excellent source of protein, essential for muscle repair and growth, and is lower in saturated fat compared to some other meats. It’s also rich in B vitamins (especially B6 and B12), selenium, and zinc, all vital for energy production, immune function, and overall well-being. Opting for a homemade Roast Turkey allows you to control the ingredients, avoiding excessive sodium, unhealthy fats, and artificial additives often found in store-bought options.
Tips, Variations & Cooking Advice
- Brining: For an extra juicy turkey, consider a wet or dry brine 1-2 days before roasting.
- Aromatics: Experiment with different aromatics in the cavity – citrus fruits like oranges or lemons add a bright, zesty note.
- Herb Combinations: Beyond rosemary and thyme, consider sage, marjoram, or tarragon for diverse flavor profiles.
- Spatchcocking: For faster, more even cooking and crispier skin, cut out the turkey’s backbone and flatten it. Adjust cooking time accordingly.
- Gravy: Don’t discard those pan drippings! Deglaze the pan with broth, thicken with a flour or cornstarch slurry, and season to make an incredible homemade gravy.
- Dietary Adaptations: This roast turkey recipe is naturally gluten-free if you avoid gluten-containing broths. For dairy-free, use olive oil or a plant-based butter alternative.
Common Mistakes to Avoid
- Overcooking: The number one culprit for dry turkey. Always use a meat thermometer!
- Not Resting: Skipping the rest period allows all the juices to escape when carving, leading to a dry bird.
- Under-Seasoning: Turkey needs generous seasoning to truly shine.
- Stuffing the Cavity with Bread Stuffing: This can lead to uneven cooking and potential food safety issues as the stuffing may not reach a safe temperature.
- Opening the Oven Door Too Often: Each time you open the oven, the temperature drops, extending cooking time and potentially drying out the turkey.
Storage & Meal Prep Tips
Leftover Roast Turkey is a culinary gift!
- Refrigeration: Store carved turkey meat in airtight containers in the refrigerator for up to 3-4 days.
- Freezing: For longer storage, freeze cooked turkey meat in airtight freezer bags or containers for up to 2-3 months. Thaw overnight in the refrigerator before reheating.
- Reheating: Gently reheat slices of turkey in a microwave, oven (covered with foil with a splash of broth), or stovetop (with a little gravy or broth) to prevent drying out.
- Meal Prep Uses: Transform leftovers into sandwiches, salads, soups, pot pies, or stir-fries for delicious, healthy meals throughout the week.
Conclusion
Mastering the art of the perfect Roast Turkey is incredibly rewarding, and with this comprehensive guide, you’re well-equipped to create a show-stopping dish. By focusing on proper technique, precise temperatures, and allowing adequate resting time, you’ll achieve a tender, juicy, and incredibly flavorful result. Don’t be intimidated by this classic! Embrace the process, trust the guidance for this roast turkey recipe, and prepare to delight your taste buds and those of your loved ones. We encourage you to try this recipe, share your successes in the comments below, and explore our other delicious culinary adventures!
FAQs
Q1: How do I know if my turkey is fully thawed?
A1: A thawed turkey should feel soft and pliable, with no ice crystals in the cavity. A good rule of thumb is 24 hours of refrigeration per 4-5 pounds.
Q2: Can I skip basting?
A2: While basting enhances flavor and promotes even browning, it’s not strictly necessary for moisture if you have sufficient broth in the pan and don’t overcook. However, it does contribute to a beautiful, golden crust.
Q3: My turkey skin isn’t getting crispy. What can I do?
A3: Ensure the turkey is thoroughly patted dry before roasting, and try patting it dry again during roasting if you’ve basted. Roasting at slightly higher temperatures for the last 30 minutes can also help, but watch carefully to prevent burning. Ensure you’re not opening the oven door too frequently.
Q4: How important is resting the turkey?
A4: Resting is critically important! It allows the juices, which have rushed to the center of the bird during cooking, to redistribute throughout the meat. Skipping this step results in a dry, less flavorful turkey.
Q5: What’s the best way to make gravy from the pan drippings?
A5: After removing the turkey, skim off excess fat from the drippings. Place the roasting pan on the stovetop over medium heat, deglaze with a cup or two of broth or wine, scraping up any browned bits. Strain the liquid, then whisk in a slurry of flour or cornstarch mixed with a little cold water, simmering until thickened. Season to taste.