Unleash Your Inner Chef: Crafting the Perfect Homemade Rice Krispie Treats
Ever wondered what makes those classic, chewy treats so irresistibly good? Are you ready to elevate your snack game with a beloved dessert that’s surprisingly simple to master at home? Today, we’re diving deep into the art of creating the most delectable Rice Krispie Treats you’ve ever tasted. Forget store-bought versions; homemade delivers an unparalleled freshness, customizable sweetness, and a satisfying gooey texture that’s simply unmatched. This comprehensive guide will not only walk you through each step but also empower you with professional tips to ensure your sweet endeavors are nothing short of spectacular. We’ll even explore the joy of crafting perfect Rice Krispie squares, perfect for any occasion.
Ingredients & Kitchen Tools
Crafting these delightful snacks requires just a handful of simple ingredients and basic kitchen essentials.
- Unsalted Butter (4 tablespoons): Essential for flavor and aiding in the marshmallow’s melt. Unsalted allows you to control the sodium content.
- Mini Marshmallows (10 ounces): The heart of our treats, providing that signature chew and sweetness. Mini marshmallows melt more quickly and evenly.
- Crispy Rice Cereal (6 cups): The eponymous star, offering the crucial crunchy texture. Ensure it’s fresh for optimal crispness.
- Vanilla Extract (1 teaspoon, optional): Enhances the flavor profile, adding a warm, aromatic depth. Pure vanilla is always best.
- Pinch of Salt (optional): Balances the sweetness and brings out the other flavors.
- Large Mixing Bowl: For combining ingredients. Choose one large enough to comfortably stir.
- Large Saucepan or Pot: For melting butter and marshmallows. A non-stick pot is ideal for easy cleanup.
- 9×13 Inch Baking Dish: To press and set your treats. Lightly grease or line with parchment paper.
- Spatula (Heatproof): For stirring and pressing. A silicone spatula works beautifully for sticky mixtures.
- Parchment Paper or Wax Paper: For lining the pan and easy removal, preventing sticking.
Prep Time & Cooking Schedule
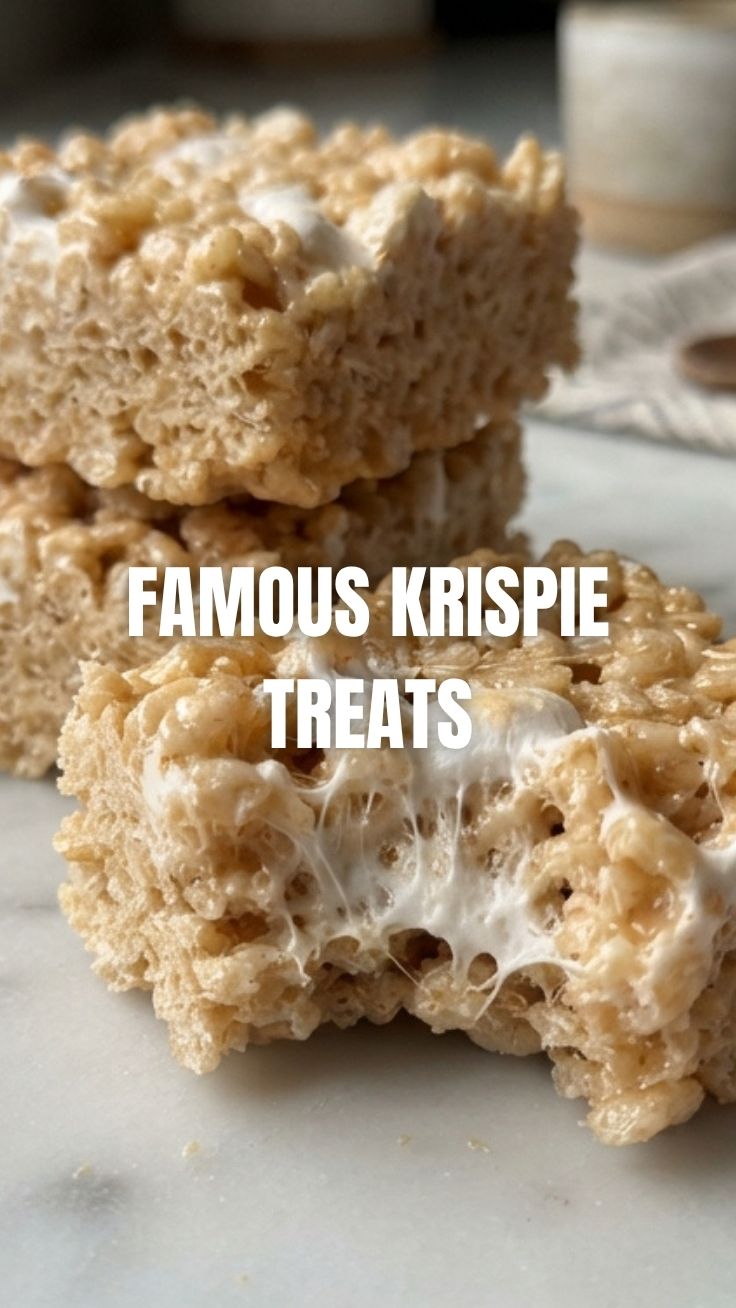
This recipe is incredibly quick, making it perfect for a last-minute dessert or a fun activity with children.
- Prep Time: 10 minutes
- Cook Time: 5 minutes
- Resting Time: 30 minutes (This is crucial for the treats to set and achieve their perfect chewy texture.)
Total time from start to deliciousness is approximately 45 minutes, allowing you to whip up a batch with minimal planning.
Step-by-Step Instructions
Follow these steps for perfectly chewy and delightful Rice Krispie Treats every time. Pay attention to the details for optimal results, especially when aiming for those perfectly formed Rice Krispie squares.
1. Prepare Your Pan: Lightly grease a 9×13-inch baking dish with butter or non-stick spray, or line it with parchment paper for effortless removal.
2. Melt Butter: In a large saucepan or pot over low heat, melt the 4 tablespoons of unsalted butter. Low heat is key to prevent butter from browning too quickly and imparting a nutty flavor, unless desired.
3. Add Marshmallows: Once the butter is melted, add the 10 ounces of mini marshmallows. Continue stirring constantly over low heat until the marshmallows are completely melted and smooth. This constant stirring prevents scorching.
4. Remove from Heat & Flavor: Remove the pan from the heat. Stir in the optional 1 teaspoon of vanilla extract and a pinch of salt. Mix until well combined.
5. Combine with Cereal: Gently fold in the 6 cups of crispy rice cereal. Work quickly, but gently, until the cereal is evenly coated with the marshmallow mixture. Over-mixing can crush the cereal and result in a less crisp treat.
6. Press into Pan: Transfer the mixture into your prepared baking dish. Using a buttered spatula or wax paper, gently and evenly press the mixture into the pan. Do not compact too tightly, as this can lead to a harder, less chewy treat.
7. Set: Allow the treats to cool and set at room temperature for at least 30 minutes before cutting into squares. This ensures they firm up properly.
Nutritional Benefits & Advantages
While Rice Krispie Treats are primarily a sweet indulgence, they do offer some surprising benefits. The crispy rice cereal provides a source of carbohydrates for quick energy. Opting for whole-grain crispy rice cereal can introduce more fiber. Furthermore, making them at home allows you to control sugar content or use organic ingredients, avoiding artificial additives often found in commercially produced snacks. Marshmallows, in moderation, offer a simple sweet treat.
Tips, Variations & Cooking Advice
- Brown Butter Bliss: For a richer, nuttier flavor, brown your butter before adding marshmallows. Melt butter then cook until it foams and turns golden brown with a nutty aroma. Strain if desired.
- Flavor Extravaganza: Stir in sprinkles, chocolate chips, dried fruit, or a touch of citrus zest (orange or lemon) before pressing into the pan.
- Dietary Adaptations:
* Gluten-Free: Ensure your crispy rice cereal and marshmallows are certified gluten-free.
* Dairy-Free: Use dairy-free butter alternatives (e.g., coconut oil or plant-based butter sticks).
- The Perfect Press: For even compression, use the back of a measuring cup lightly coated with butter or non-stick spray. This prevents sticking and ensures an even surface.
Common Mistakes to Avoid
- High Heat Haste: Melting marshmallows over high heat can cause them to become stiff and grainy, leading to hard treats. Always use low heat and stir constantly.
- Over-Compacting: Pressing the mixture too firmly into the pan will result in dense, brick-like treats rather than light and chewy ones.
- Old Cereal: Stale cereal loses its crispness, making your treats less enjoyable. Always use fresh cereal.
- Skipping Resting Time: Cutting into the treats too soon can lead to a gooey, messy experience. Patience ensures a perfectly set square.
Storage & Meal Prep Tips
- Room Temperature: Store your homemade Rice Krispie Treats in an airtight container at room temperature for up to 3-4 days. This helps maintain their soft, chewy texture.
- Individual Wrapping: For grab-and-go convenience, wrap individual squares in plastic wrap.
- Avoid Refrigeration: Refrigerating these treats can make them hard and less enjoyable. Freezing is possible for longer storage (up to 6 weeks), but they might lose some crispness upon thawing. Thaw at room temperature.
Conclusion
There you have it – the ultimate guide to crafting irresistible Rice Krispie Treats right in your own kitchen! From the buttery, gooey marshmallow base to the perfectly crisp cereal, these treats are a timeless classic that brings joy to all ages. By following these detailed instructions and incorporating our expert tips, you’ll consistently create delightful Rice Krispie squares that are superior to any store-bought version. We encourage you to try this recipe, experiment with variations, and share your delicious creations with family and friends. Happy baking!
FAQs
1. Can I use regular-sized marshmallows instead of mini marshmallows?
Yes, you can. You’ll need to keep them over low heat longer and stir frequently until completely melted and smooth.
2. Why are my Rice Krispie Treats hard?
This often happens if you cook the marshmallows on too high heat (which can stiffen the sugar) or if you compress the mixture too tightly into the pan. Ensure low heat and a gentle press.
3. How can I make my treats extra chewy?
Adding about 1-2 extra tablespoons of butter to the marshmallow mixture can contribute to a chewier texture. Also, avoid overcooking the marshmallows.
4. Can I add chocolate to this recipe?
Absolutely! You can gently fold in up to 1 cup of chocolate chips (milk, dark, or white) at the same time as the cereal, or drizzle melted chocolate over the set treats.
5. What’s the best way to cut clean squares?
Once the treats are fully set, use a sharp, lightly buttered knife. You can also run the knife under hot water and wipe it clean between cuts to prevent sticking.