The Ultimate Guide to Homemade Peanut Butter Fudge: Creamy, Dreamy, and Irresistible
Are you ready to transform simple ingredients into a dessert that’s pure magic? If you’ve ever dreamt of a treat that melts in your mouth, rich with nutty flavor and incredibly easy to make, then you’re in for a delightful surprise. This blog post isn’t just about a recipe; it’s about unlocking the joy of crafting your own perfect batch of Peanut Butter Fudge right in your kitchen. Forget complicated confections; this guide will walk you through creating a decadent dessert that rivals any store-bought delicacy, offering a homemade touch that truly makes it special. Dive into the world of delicious Fudge Recipes with confidence, and discover why making your own is not just an activity, but a truly rewarding experience.
Ingredients & Kitchen Tools
Gathering your tools and ingredients is the first step to sweet success!
- 1 cup (2 sticks) Unsalted Butter: Provides richness and a creamy texture. Unsalted allows you to control the sodium.
- 1 cup Creamy Peanut Butter: The star of the show! Use a good quality, creamy brand for best results. Avoid natural, oil-separated types for this recipe.
- 1 teaspoon Vanilla Extract: Enhances the overall flavor profile. Pure vanilla extract is always recommended.
- 1 pound (approx. 3 ¾ cups) Confectioners’ Sugar (Powdered Sugar): Adds sweetness and structural integrity to the fudge.
- 1/4 teaspoon Salt: Balances the sweetness and enhances the peanut butter flavor.
Kitchen Tools:
- 9×9 inch Baking Pan: Ideal for setting the fudge. Line it with parchment paper for easy removal.
- Large Saucepan: For melting and combining ingredients over heat.
- Whisk or Spatula: For stirring.
- Measuring Cups and Spoons: For accurate ingredient portions.
Prep Time & Cooking Schedule
This Peanut Butter Fudge recipe is gloriously quick, perfect for last-minute cravings or entertaining.
- Prep Time: 5 minutes
- Cook Time: 5-7 minutes
- Chilling Time: 2-3 hours (minimum), or until firm.
The beauty of this recipe lies in its speed. You can whip up the mixture in less than 15 minutes, leaving the longest part to simply chilling and firming up in the refrigerator. Plan to make it a few hours before you intend to serve, or even the day before for best results.
Step-by-Step Instructions
Ready to create some magic? Follow these simple steps for perfect Peanut Butter Fudge every time.
1. Prepare Your Pan: Line a 9×9 inch baking pan with parchment paper, leaving an overhang on the sides. This makes lifting the set fudge out incredibly easy.
2. Melt Together: In a large saucepan over medium-low heat, combine the butter and creamy peanut butter. Stir constantly until completely melted and smooth. The key here is gentle heat to prevent scorching.
3. Remove from Heat & Add Flavor: Once melted and smooth, remove the saucepan from the heat. Stir in the vanilla extract and salt.
4. Incorporate Sugar: Gradually add the confectioners’ sugar to the mixture, one cup at a time, whisking or stirring vigorously after each addition until fully incorporated. The mixture will become thick and creamy. Continue stirring until smooth and no lumps remain. Don’t be tempted to put it back on the heat; the residual warmth is enough to help the sugar dissolve.
5. Pour and Set: Pour the gloriously smooth fudge mixture into your prepared 9×9 inch pan, spreading it evenly with a spatula.
6. Chill to Perfection: Place the pan in the refrigerator for at least 2-3 hours, or until the Fudge Recipes are firm and sliceable.
7. Slice and Serve: Once firm, use the parchment paper overhang to lift the fudge out of the pan. Cut into desired squares and enjoy!
Nutritional Benefits & Advantages
While Peanut Butter Fudge is undeniably a treat, peanut butter itself offers some benefits. It’s a good source of healthy fats (monounsaturated and polyunsaturated), protein, and essential vitamins and minerals like Vitamin E, magnesium, and potassium. In moderation, homemade fudge allows you to control the quality of ingredients, avoiding artificial flavors and preservatives often found in commercial varieties.
Tips, Variations & Cooking Advice
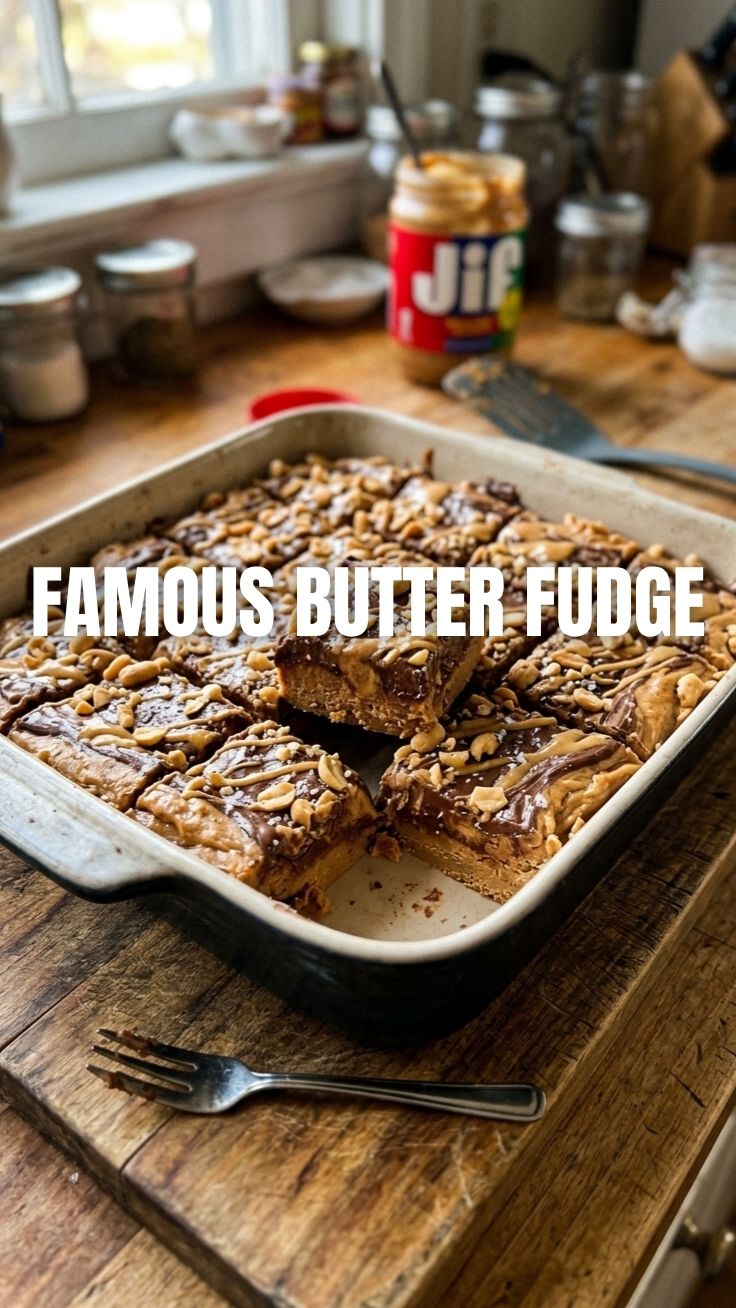
- For a Swirled Effect: After pouring the fudge into the pan, dollop a few spoonfuls of melted chocolate (milk or dark) on top. Use a knife or skewer to swirl it elegantly through the peanut butter fudge.
- Nutty Crunch: For added texture, stir in ½ cup of finely chopped roasted peanuts into the fudge mixture before pouring into the pan.
- Chocolate Layered Fudge: Once the peanut butter fudge has set for about an hour, pour a layer of melted semi-sweet chocolate (mixed with a tablespoon of butter or coconut oil) over the top and chill again until firm for a two-toned delight.
- Dairy-Free Option: Use a high-quality dairy-free butter substitute (like vegan butter sticks, not margarine spreads) and ensure your peanut butter is also dairy-free.
Common Mistakes to Avoid
- Overcooking: Don’t let the butter and peanut butter mixture boil. Gentle melting is key to a smooth texture. Overheating can make the fudge dry and crumbly.
- Not Chilling Long Enough: Patience is a virtue here! Rushing the chilling process will result in soft, difficult-to-cut fudge.
- Using Natural Peanut Butter: While delicious, natural peanut butter (the kind that separates) often has too much oil and a different consistency, which can lead to a greasy or crumbly fudge. Stick to regular creamy peanut butter for this recipe.
- Skipping the Parchment Paper: This small step makes a huge difference in cleanly removing the fudge from the pan. Don’t skip it!
Storage & Meal Prep Tips
Store Peanut Butter Fudge in an airtight container at room temperature for up to one week, or in the refrigerator for up to two weeks. If refrigerated, allow it to come to room temperature for a few minutes before serving for optimal texture. For longer storage, fudge can be frozen for up to 3 months. Wrap individual pieces tightly in plastic wrap, then place them in a freezer-safe bag or container. Thaw at room temperature. This recipe is an excellent make-ahead treat for parties or gifts!
Conclusion
There you have it – a foolproof guide to creating the most incredible Peanut Butter Fudge you’ve ever tasted. This recipe proves that sometimes, the simplest ingredients can yield the most extraordinary results. Whether you’re a seasoned baker or a kitchen novice, these clear steps and expert tips will ensure your success. So go ahead, whip up a batch of this creamy delight, explore other fantastic Fudge Recipes, and taste the sweet satisfaction of homemade goodness. We encourage you to share your results and tag us on social media – we can’t wait to see your creations!
FAQs
Q1: Can I use crunchy peanut butter instead of creamy?
A1: While creamy is recommended for the smoothest texture, you can use crunchy peanut butter if you prefer a little added crunch!
Q2: My fudge didn’t set. What went wrong?
A2: This usually happens if there wasn’t enough confectioners’ sugar or if it wasn’t chilled long enough. Ensure you measure accurately and allow ample chilling time.
Q3: How do I store leftover fudge?
A3: Store in an airtight container at room temperature for up to a week, or in the refrigerator for up to two weeks. It can also be frozen for longer storage.
Q4: Can I halve or double this recipe?
A4: Yes, this recipe is easily scalable. Just ensure you adjust your pan size accordingly (e.g., an 8×8 inch pan for a halved recipe).
Q5: What’s the best way to cut clean fudge squares?
A5: Use a warm, sharp knife. You can run the knife under hot water and wipe it dry between cuts for perfectly clean edges.