Sweet Indulgence, No Oven Required: Crafting Perfect No-Bake Peanut Butter Bars at Home
Ever craved a satisfying, sweet treat without the fuss of turning on your oven? What if I told you there’s a delectable solution that’s incredibly easy to make, packed with flavor, and perfect for any occasion? Preparing No-Bake Peanut Butter Bars at home isn’t just about satisfying a craving; it’s about creating wholesome, customizable snacks that delight both kids and adults. Forget store-bought alternatives; homemade versions offer superior taste, controlled ingredients, and the undeniable satisfaction of crafting something delicious from scratch. These rich, creamy bars are a testament to the magic of simple ingredients coming together to create something extraordinary, making them a fantastic addition to your repertoire of No-Bake Dessert Recipes.
Ingredients & Kitchen Tools
To embark on your no-bake adventure, gather these essentials:
- 1 ½ cups (375g) Smooth Peanut Butter: The star of the show. Opt for natural varieties for a less sugary, more robust flavor. Substitutions: Almond butter or cashew butter for different flavor profiles.
- ½ cup (120g) Unsalted Butter: Adds richness and helps bind the bars. Vegan butter can be substituted for a dairy-free version.
- 1 ¾ cups (210g) Powdered Sugar (Confectioners’ Sugar): Provides sweetness and a smooth texture. Adjust to your sweetness preference.
- 2 cups (240g) Crushed Graham Crackers: The base of your bars. Crush them finely for best results. Gluten-free graham crackers work perfectly for a GF option.
- 1 teaspoon Vanilla Extract: Enhances the overall flavor.
- Pinch of Salt: Balances the sweetness.
- For the Chocolate Topping (Optional but highly recommended):
* 1 cup (170g) Semi-Sweet Chocolate Chips: Or dark chocolate for a less sweet option.
* 2 tablespoons (30g) Unsalted Butter (or Coconut Oil): For a glossy, workable ganache.
Kitchen Tools:
- 9×13 inch Baking Pan: Essential for shaping your bars.
- Parchment Paper or Aluminum Foil: To line the pan, ensuring easy removal.
- Large Microwave-Safe Bowl: For melting ingredients.
- Sturdy Spatula or Wooden Spoon: For mixing.
- Small Saucepan (if melting on stovetop): Alternative to microwave.
- Measuring Cups and Spoons: For accurate ingredient quantities.
Prep Time & Cooking Schedule
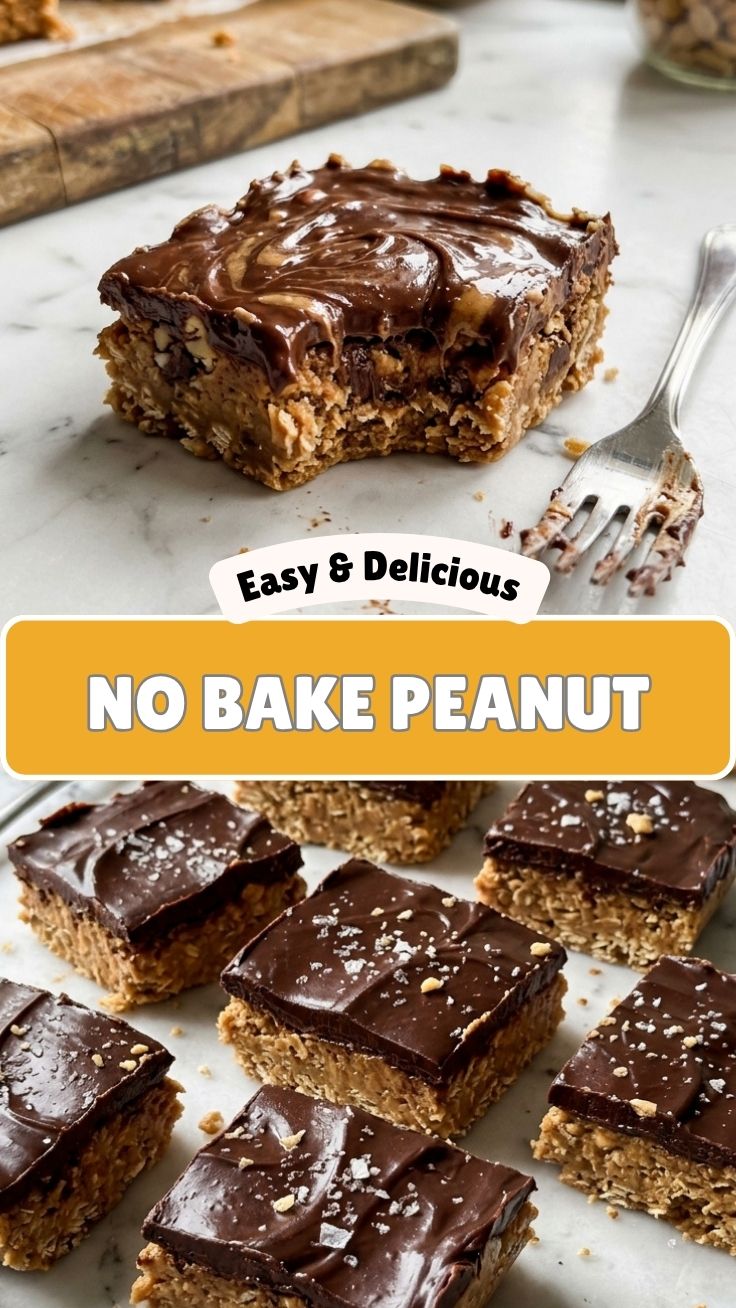
The beauty of these No-Bake Peanut Butter Bars lies in their minimal time commitment.
- Prep Time: 15-20 minutes (includes crushing graham crackers and mixing).
- Chilling Time: 2-3 hours (minimum) in the refrigerator to allow them to set firmly. This is crucial for clean slices!
- Marinating Time: N/A
- Cook Time: 0 minutes!
Plan to make these in the morning or early afternoon for an evening treat, or the night before for a quick grab-and-go snack the next day. The chilling process is non-negotiable for achieving that perfect bar consistency.
Step-by-Step Instructions
Ready to create some magic? Here’s how to whip up these delightful No-Bake Peanut Butter Bars:
1. Prepare Your Pan: Line a 9×13 inch baking pan with parchment paper or aluminum foil, leaving an overhang on the sides. This will make it incredibly easy to lift the finished bars out later.
2. Melt the Base: In a large microwave-safe bowl, combine the peanut butter and ½ cup of unsalted butter. Microwave in 30-second intervals, stirring in between, until completely melted and smooth. Alternatively, melt in a saucepan over low heat, stirring constantly.
3. Combine Ingredients: Remove from heat (if using stovetop). Add the powdered sugar, crushed graham crackers, vanilla extract, and salt to the melted peanut butter mixture. Stir vigorously with a sturdy spatula or wooden spoon until all ingredients are well combined and a thick, uniform dough forms. The mixture should be sticky but hold together.
4. Press into Pan: Transfer the peanut butter mixture into the prepared baking pan. Using the back of a spoon, your hands (lightly greased if too sticky), or another piece of parchment paper, press the mixture firmly and evenly into the pan. This step is key for dense, well-structured bars.
5. Prepare the Topping (Optional): In a small microwave-safe bowl, combine the chocolate chips and 2 tablespoons of unsalted butter (or coconut oil). Microwave in 20-second intervals, stirring thoroughly after each, until the chocolate is melted and smooth. Be careful not to overheat the chocolate, as it can seize.
6. Spread the Topping: Pour the melted chocolate evenly over the peanut butter base. Use an offset spatula or the back of a spoon to spread it to the edges.
7. Chill: Place the pan in the refrigerator for at least 2-3 hours, or until the chocolate topping is firm and the bars are completely set. Patience is a virtue here!
8. Slice and Serve: Once chilled, use the parchment paper overhang to lift the entire slab out of the pan. Place it on a cutting board and slice into squares or rectangles using a sharp, warm knife. For clean cuts, wipe the knife with a warm, damp cloth between slices. Enjoy your homemade No-Bake Dessert Recipes!
Nutritional Benefits & Advantages
These bars aren’t just delicious; they offer several benefits. Peanut butter is a good source of protein and healthy monounsaturated fats, which can help with satiety and energy levels. While they are a treat, the absence of baking means fewer risks of nutrient degradation from high heat. Using natural peanut butter can also mean less added sugar compared to many store-bought baked goods. They’re also an excellent source of quick energy, making them a satisfying snack.
Tips, Variations & Cooking Advice
- Nut Butter Swaps: Experiment with almond butter, cashew butter, or even sunflower seed butter for different flavors and allergy-friendly options.
- Chocolate Choices: Dark chocolate adds a richer, less sweet counterpoint to the peanut butter. White chocolate can also be used for a different aesthetic and flavor profile.
- Add-ins: Fold in mini chocolate chips, chopped nuts (peanuts, walnuts, pecans), shredded coconut, or even a sprinkle of sea salt to the peanut butter base or on top of the chocolate for added texture and flavor.
- Dairy-Free/Vegan: Use vegan butter and ensure your chocolate chips are dairy-free.
- Gluten-Free: Use certified gluten-free graham crackers.
- Portion Control: Slice into smaller squares for easy portion control.
Common Mistakes to Avoid
- Not Crushing Graham Crackers Finely Enough: This can lead to a crumbly base that doesn’t hold together well. Use a food processor for best results.
- Insufficient Chilling: The most common mistake! If the bars aren’t chilled long enough, they will be too soft to slice cleanly and will fall apart. Be patient!
- Overheating Chocolate: When melting chocolate for the topping, heat it gently and stir frequently to avoid burning or seizing.
- Not Lining the Pan: Skipping the parchment paper makes removal incredibly difficult and risks damaging your delicious bars.
Storage & Meal Prep Tips
Store No-Bake Peanut Butter Bars in an airtight container in the refrigerator for up to 1 week. They can also be frozen for up to 3 months. To freeze, individually wrap each bar in plastic wrap, then place them in a freezer-safe container. Thaw in the refrigerator for a few hours or at room temperature for a quicker treat. These are perfect for meal prepping snacks or desserts for the week, providing a convenient and delicious option whenever a craving strikes.
Conclusion
Crafting your own No-Bake Peanut Butter Bars is a delightful and rewarding experience. From the satisfying crunch of graham crackers to the creamy peanut butter and luscious chocolate, these bars offer a perfect harmony of flavors and textures, all without the need for an oven. They’re an ideal choice for quick dessert fixes, homemade snacks, or impressive contributions to potlucks. Don’t hesitate to dive into the world of No-Bake Dessert Recipes with this foolproof guide. Try this recipe today and share your delicious results – you won’t be disappointed!
FAQs
Q1: Can I use crunchy peanut butter?
A1: Yes, you can! Crunchy peanut butter will add an extra layer of texture. Just ensure it’s still smooth enough to mix well.
Q2: How do I get extra clean slices?
A2: For super clean slices, heat your knife under hot water, wipe it dry, and then slice. Repeat this process for each cut.
Q3: Can these be made dairy-free?
A3: Absolutely! Use a high-quality vegan butter substitute for the butter and ensure your chocolate chips are dairy-free.
Q4: My bars are too soft. What went wrong?
A4: Most likely, they haven’t been chilled long enough. Ensure they are in the refrigerator for at least 2-3 hours, or longer if your kitchen is particularly warm. The chilling time is crucial for firmness.
Q5: Can I substitute other cookies for graham crackers?
A5: Yes! Vanilla wafers, digestive biscuits, or even Oreos (crushed fine) can be used for a different flavor base. Adjust sweetness if using very sweet cookies.