Master the Art of Classic Cheesecake at Home: Your Ultimate Guide
Ever wondered if you could recreate that perfectly creamy, rich, and utterly irresistible cheesecake experience right in your own kitchen? The answer is a resounding yes! There’s a certain magic in the aroma that fills your home as a homemade cheesecake bakes, and the unparalleled satisfaction of serving a dessert made with love. Today, we’re diving deep into crafting the quintessential homemade cheesecake, a dish that transcends mere dessert to become a culinary masterpiece. This guide will walk you through every step of creating a show-stopping dessert, ensuring you achieve that dream consistency and flavor. We’ll explore the nuances of the New York Cheesecake style, known for its dense, rich texture, and even touch upon elements reminiscent of a Philadelphia Cheesecake for a slightly lighter, fluffier finish. Get ready to impress your taste buds and your guests!
Ingredients & Kitchen Tools
Crafting the perfect cheesecake requires a precise selection of ingredients and the right tools.
Ingredients:
- For the Crust:
* 1 ½ cups (170g) Graham Cracker Crumbs: The classic base for cheesecake, providing a slightly sweet, crunchy foundation. (Alternatively, use digestive biscuits or shortbread.)
* ¼ cup (50g) Granulated Sugar: Adds a touch of sweetness to the crust.
* 6 tablespoons (85g) Unsalted Butter, melted: Binds the crumbs together for a firm crust.
- For the Filling:
* 32 ounces (900g) Full-Fat Cream Cheese, softened: Crucial for the signature creamy texture. Ensure it’s at room temperature to prevent lumps. (Philadelphia cream cheese is often preferred for its consistency.)
* 1 ½ cups (300g) Granulated Sugar: Sweetens the rich cream cheese base.
* ¼ cup (60ml) Sour Cream, room temperature: Adds a subtle tang and contributes to a smoother, silkier texture. (Greek yogurt can be a substitute for a healthier twist.)
* 1 tablespoon Lemon Juice (freshly squeezed): Brightens the flavor and cuts through the richness.
* 1 teaspoon Vanilla Extract: Enhances the overall flavor profile. (Use good quality extract for best results.)
* 4 Large Eggs, room temperature: Act as a binder and provide structure to the cheesecake. Ensure they’re at room temperature to incorporate smoothly.
Kitchen Tools:
- 9-inch Springform Pan: Essential for easy removal of the cheesecake without damage.
- Aluminum Foil: For wrapping the springform pan to create a water bath (bain-marie).
- Large Roasting Pan: To hold the springform pan in the water bath.
- Electric Mixer (stand or hand-held): For thoroughly creaming the ingredients.
- Mixing Bowls: Various sizes for ingredients.
- Rubber Spatula: For scraping bowls and folding ingredients.
- Measuring Cups and Spoons: For accurate ingredient quantities.
- Parchment Paper (optional): For lining the bottom of the springform pan to prevent sticking.
Prep Time & Cooking Schedule
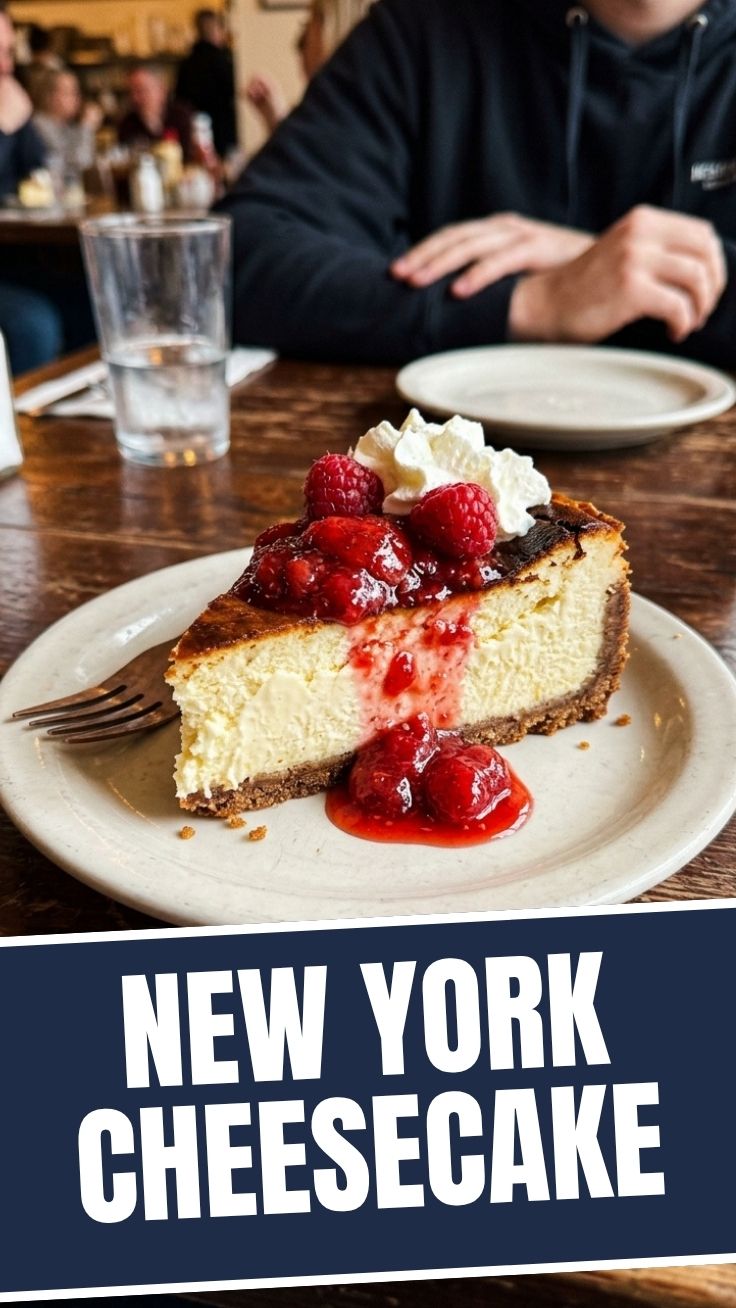
Planning is key for a flawless cheesecake. This recipe requires patience to achieve its renowned creamy texture and prevent cracks.
- Prep Time: 30 minutes
- Cook Time: 60-75 minutes (plus cooling time in the oven)
- Chill Time: Minimum 6-8 hours, preferably overnight
Context: It’s crucial to allow ample time for chilling. This isn’t just about setting the cheesecake; it’s about developing its full flavor and ensuring a firm, sliceable texture. Rushing the chilling process can result in a soft, unset, or crumbly cheesecake. Plan to start your cheesecake the day before you intend to serve it.
Step-by-Step Instructions
Follow these steps carefully to achieve cheesecake perfection.
1. Prepare the Crust (15 minutes):
* Preheat oven to 350°F (175°C).
* In a medium bowl, combine graham cracker crumbs, granulated sugar, and melted butter. Mix until well combined and the crumbs resemble wet sand.
* Press the mixture evenly into the bottom of a 9-inch springform pan. You can use the bottom of a glass to really pack it down.
* Bake for 8-10 minutes, then remove from oven and let cool. This pre-baking helps create a crisp crust.
* Wrap the outside of the springform pan tightly with several layers of heavy-duty aluminum foil to prevent water from seeping in during the water bath.
2. Prepare the Filling (15 minutes):
* Reduce oven temperature to 325°F (160°C).
* In a large mixing bowl, beat the softened cream cheese with the granulated sugar using an electric mixer on medium speed until smooth and creamy, about 3-4 minutes. Scrape down the sides of the bowl.
* Beat in the sour cream, lemon juice, and vanilla extract until just combined. Overmixing at this stage can incorporate too much air.
* Add the eggs one at a time, beating on low speed until just incorporated after each addition. Do not overmix – overbeating eggs can cause the cheesecake to crack. The goal is a dense, smooth, and rich New York Cheesecake.
3. Baking with a Water Bath (60-75 minutes):
* Pour the cream cheese mixture over the cooled crust in the prepared springform pan.
* Place the foil-wrapped springform pan into a larger roasting pan.
* Carefully pour hot water into the roasting pan, ensuring it comes about halfway up the sides of the springform pan. This water bath (bain-marie) creates a moist, even baking environment, preventing cracks and ensuring a creamy texture, making your homemade cheesecake resemble a perfect Philadelphia Cheesecake.
* Carefully transfer the roasting pan with the cheesecake to the preheated oven.
* Bake for 60-75 minutes, or until the edges are set but the center still jiggles slightly when gently shaken.
4. Cooling and Chilling:
* Turn off the oven and prop the oven door open slightly, leaving the cheesecake inside for another hour. This slow cooling prevents cracking.
* Remove the cheesecake from the water bath and roasting pan. Carefully remove the foil.
* Let the cheesecake cool completely on a wire rack at room temperature.
* Once completely cool, cover loosely with plastic wrap and refrigerate for at least 6-8 hours, or preferably overnight.
Nutritional Benefits & Advantages
While often seen as an indulgence, homemade cheesecake, especially when made with quality ingredients, offers some surprising benefits. The full-fat cream cheese provides a source of calcium and protein. Using fresh lemon juice adds a hint of vitamin C. Moreover, by making it at home, you have complete control over the ingredients, allowing you to reduce artificial additives and preservatives often found in store-bought versions. It’s a wonderful occasional treat that can be enjoyed mindfully.
Tips, Variations & Cooking Advice
- Flavor Boost: Add citrus zest (orange or lime) for an aromatic twist. A swirl of fruit puree (raspberry, blueberry) can also add beautiful color and flavor.
- Chocolate Lovers: Incorporate 1/2 cup of melted, cooled semi-sweet chocolate into the cream cheese mixture for a chocolate cheesecake.
- Gluten-Free: Use gluten-free graham crackers or a nut-based crust (almonds, pecans) for a gluten-free option.
- Lighter Version: While a classic cheesecake is rich, you can reduce the fat slightly by using 1/3 less fat cream cheese, though this might slightly alter the texture.
- Toppings: Fresh berries, a fruit compote, chocolate ganache, or a simple dollop of whipped cream are excellent garnishes.
Common Mistakes to Avoid
- Cold Ingredients: Using cold cream cheese or eggs leads to lumps and an uneven texture. Always ensure all dairy and eggs are at room temperature.
- Overmixing the Batter: Overmixing, especially after adding eggs, incorporates too much air, which can cause the cheesecake to puff up and then crack as it cools. Beat just until combined.
- No Water Bath: Skipping the water bath is a common reason for cracked cheesecakes and can result in a drier texture. It’s essential for even, gentle cooking.
- Opening Oven Door Too Soon: Resist the urge to check on your cheesecake constantly. Sudden temperature changes can shock the cheesecake and cause cracks.
- Rushing the Cooling/Chilling: Patience is a virtue here. Prematurely removing the cheesecake from the oven or not chilling it long enough will compromise its set and texture.
Storage & Meal Prep Tips
- Refrigeration: Store leftover cheesecake in an airtight container or wrapped tightly in plastic wrap in the refrigerator for up to 5-7 days.
- Freezing: For longer storage, slice the cheesecake into individual portions. Place them on a baking sheet and freeze until firm. Once frozen, wrap each slice individually in plastic wrap, then aluminum foil, and store in a freezer-safe bag or container for up to 1-2 months. Thaw in the refrigerator overnight before serving.
- Reheating: Cheesecake is best served chilled. Do not reheat.
Conclusion
Mastering the art of a homemade cheesecake is a truly rewarding culinary journey. From the crisp, buttery crust to the incredibly smooth and rich filling, every bite is a testament to careful preparation and a little bit of love. Whether you’re aiming for the dense, characteristic texture of a New York Cheesecake or a slightly airier, creamy one closer to a Philadelphia Cheesecake, the techniques outlined here will guide you to success. Don’t be afraid to experiment with toppings and flavors to make it truly your own. Give this recipe a try, share your magnificent creations with us, and savor the delight of your homemade masterpiece!
FAQs
Q1: Why did my cheesecake crack?
A1: Cracks are usually caused by overmixing the batter (incorporating too much air), baking at too high a temperature, or rapid cooling. Using a water bath and allowing the cheesecake to cool slowly in the oven are key to prevention.
Q2: Can I use low-fat cream cheese?
A2: While you can, it’s not recommended for a classic cheesecake. Low-fat cream cheese contains more water, which can affect the texture and lead to a less rich, potentially grainy result.
Q3: How do I know when the cheesecake is done?
A3: The edges should be set, but the center (about 2-3 inches in diameter) should still have a slight jiggle to it when gently shaken. It will continue to cook and set as it cools.
Q4: Can I make the crust ahead of time?
A4: Yes, you can prepare and pre-bake the crust up to a day in advance. Store it uncovered at room temperature or loosely covered in the refrigerator.
Q5: What if I don’t have a springform pan?
A5: While a springform pan is ideal, you can use a regular 9-inch round cake pan. You may need to line it with parchment paper that extends over the sides to create “handles” for lifting the cheesecake out after chilling. However, this method makes presentation more challenging.