Unlock the Zesty Secret: Crafting the Perfect Homemade Key Lime Pie
Ever dreamt of biting into a slice of pure sunshine, a dessert that perfectly balances tangy zest with creamy sweetness? If so, you’re in the right place! While restaurant-quality Key Lime Pie often seems like a culinary enigma, preparing this iconic treat at home is not only incredibly rewarding but surprisingly straightforward. Forget artificial flavors; we’re diving deep into the world of genuine key lime goodness, transforming simple ingredients into a dessert that will have everyone asking for your secret recipe. Beyond the sheer delight of a homemade classic, taking control of your ingredients ensures a fresh, vibrant flavor profile unmatched by store-bought alternatives.
Ingredients & Kitchen Tools
Crafting this delightful pie requires a few essential items and fresh, quality ingredients:
- For the Crust:
* 1 ½ cups Graham cracker crumbs: About 10-12 full graham cracker sheets, finely crushed. You can achieve this with a food processor or by placing them in a Ziploc bag and crushing with a rolling pin.
* ¼ cup granulated sugar: Adds a touch of sweetness to balance the buttery crust.
* 6 tablespoons unsalted butter, melted: Binds the crumbs together for a firm, delicious base.
- For the Filling:
* 4 large egg yolks: The secret to a rich, creamy, and beautifully set filling. Ensure they are fresh for optimal results.
* 14 ounces (1 can) sweetened condensed milk: Providing the essential sweetness and creamy texture. Do not substitute this with evaporated milk.
* ¾ cup fresh key lime juice: This is non-negotiable for authentic flavor. About 10-15 key limes yield this amount. Bottled key lime juice can be used in a pinch, but fresh is vastly superior.
* 1 tablespoon key lime zest: From about 2-3 key limes. Don’t skip this; it intensifies the citrus aroma and flavor.
- For the Topping (Optional but Recommended):
* 1 cup heavy cream, chilled: For homemade whipped cream.
* 2 tablespoons powdered sugar: Sweetens the whipped cream.
* ½ teaspoon vanilla extract: Enhances the whipped cream flavor.
* Extra lime zest or thin lime slices: For garnish.
Kitchen Tools:
- 9-inch pie plate: A standard size for this recipe.
- Food processor (optional): For quickly crushing graham crackers.
- Small mixing bowls: For separating egg yolks and mixing ingredients.
- Large mixing bowl: For combining filling ingredients.
- Whisk or electric mixer: For whipping ingredients.
- Citrus juicer: For extracting key lime juice.
- Microplane or fine grater: For zesting the key limes.
Prep Time & Cooking Schedule
- Prep Time: 20-25 minutes (This includes zesting and juicing the key limes, which can take a bit of time).
- Cook Time: 15-18 minutes
- Cooling Time: 1-2 hours at room temperature
- Chill Time: At least 4 hours, preferably overnight
This schedule allows you to enjoy a perfectly set and chilled Key Lime Pie. The extended chill time is crucial; it allows the filling to firm up properly and integrates all the zesty flavors.
Step-by-Step Instructions
1. Prepare the Crust: Preheat your oven to 350°F (175°C). In a medium bowl, combine the graham cracker crumbs and granulated sugar. Pour in the melted butter and mix until all crumbs are moistened. Press the mixture firmly and evenly into the bottom and up the sides of your 9-inch pie plate. Bake for 8-10 minutes, or until lightly golden. Remove from the oven and let cool completely on a wire rack.
2. Make the Filling: While the crust cools, separate your egg yolks into a large mixing bowl. Whisk them vigorously for 1-2 minutes until they become pale yellow and slightly thickened. Gradually pour in the sweetened condensed milk, whisking constantly until fully incorporated and smooth.
3. Add the Key Lime Flavor: Slowly add the fresh key lime juice and key lime zest to the egg yolk mixture. Continue whisking until the mixture thickens considerably and is smooth. The acid from the lime juice will react with the egg yolks and condensed milk, causing it to thicken.
4. Bake the Pie: Pour the thickened Key Lime Pie filling into the cooled graham cracker crust. Bake for 15-18 minutes. The pie should be set around the edges but still have a slight jiggle in the center when gently shaken. Overbaking will result in a rubbery texture, so watch it closely!
5. Cool and Chill: Remove the pie from the oven and let it cool completely at room temperature for 1-2 hours. Once cooled, cover loosely with plastic wrap and refrigerate for at least 4 hours, or ideally overnight, before serving. This chilling time is paramount for the pie’s structure and flavor development.
6. Whip the Topping (Optional): Just before serving, whip the cold heavy cream, powdered sugar, and vanilla extract in a chilled bowl with an electric mixer until stiff peaks form.
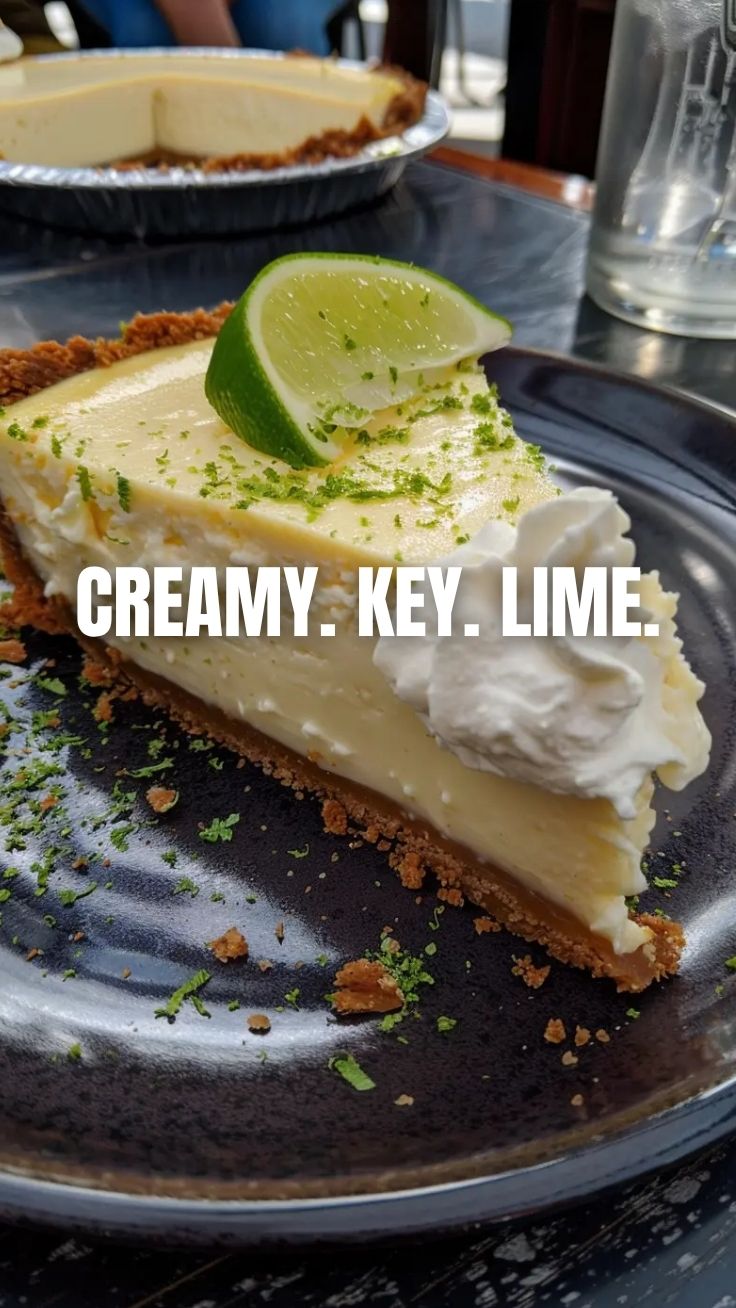
7. Serve and Garnish: Slice the chilled pie with a sharp knife (running the knife under warm water between slices helps for cleaner cuts). Top each slice with a dollop of fresh whipped cream and a sprinkle of additional key lime zest or a thin lime slice.
Nutritional Benefits & Advantages
Key limes, though small, are packed with Vitamin C, an essential antioxidant that supports immune function and skin health. While this is an indulgent dessert, the use of fresh citrus offers some natural goodness. Opting for a homemade version allows you to control the sugar content within reason, and the protein from the egg yolks provides some satiety.
Tips, Variations & Cooking Advice
- Zest First, Then Juice: Always zest your key limes before juicing them; it’s much easier!
- Room Temperature Eggs: For easier separation and better whisking, use room temperature egg yolks.
- Gluten-Free Crust: Use gluten-free graham crackers or a nut-based crust (like almond flour and butter) for a gluten-free option.
- No-Bake Pie: For a true no-bake version, ensure your egg yolks are pasteurized or omit them entirely. The filling will still thicken due to the lime juice and condensed milk, but the texture will be slightly different.
- Meringue Topping: Instead of whipped cream, consider a classic meringue topping for a different texture and flavor profile.
Common Mistakes to Avoid
Using Bottled Lime Juice: While convenient, bottled lime juice lacks the nuanced, fresh flavor of real key limes. It will still taste good, but not great*.
- Overbaking: This is the most common mistake. An overbaked Key Lime Pie will have a rubbery, dense texture instead of a silky, creamy one. Look for that slight jiggle in the center.
- Not Chilling Long Enough: Patience is key! If you cut into the pie too soon, it will be runny and won’t hold its shape.
- Not Pressing the Crust Firmly: A loose crust will crumble when sliced. Ensure it’s packed tightly.
Storage & Meal Prep Tips
Leftover Key Lime Pie should be covered loosely with plastic wrap and stored in the refrigerator. It will stay fresh for 3-4 days. While it can theoretically be frozen for up to a month, the texture of the filling and crust can suffer slightly upon thawing. If freezing, wrap individual slices tightly in plastic wrap and then aluminum foil. Thaw in the refrigerator overnight. Add fresh whipped cream just before serving.
Conclusion
There you have it—your definitive guide to creating a truly unforgettable homemade Key Lime Pie. The satisfaction of crafting this zesty masterpiece from scratch, especially with fresh key lime juice, is unparalleled. This recipe transforms simple ingredients into a dessert that’s both elegant and comforting, a perfect balance of tart and sweet. We encourage you to try this recipe, savor every bite, and share your results! What’s your favorite part of making homemade pie? Let us know in the comments below!
FAQs
Q1: Can I use regular lime juice instead of key lime juice?
A1: Yes, you can, but the flavor will be different. Regular limes are more tart and less aromatic than key limes. If you do use them, you might want to slightly reduce the amount of juice or add a tiny bit more sugar to compensate.
Q2: My pie filling didn’t set, what went wrong?
A2: The most common reasons are not enough fresh key lime juice (the acid sets the pie) or not enough baking time. Ensure your fresh key lime juice is accurately measured and don’t underbake. Also, adequate chilling time is crucial for final setting.
Q3: How do I get clean slices of pie?
A3: Ensure the pie is thoroughly chilled, preferably overnight. Use a sharp, thin knife, and wipe or rinse it under warm water between each slice to prevent sticking and ensure clean edges.
Q4: Can I make this a no-bake recipe entirely?
A4: You can make a no-bake crust, and the filling will set without baking due to the interaction of lime juice and condensed milk, but it typically includes egg yolks which are usually baked. For a strictly no-bake filling, you would need to omit the egg yolks or use pasteurized ones. The texture will be softer than the one achieved with a short bake.