Craving a Weeknight Dinner That’s Both Effortless and Explodes with Flavor?
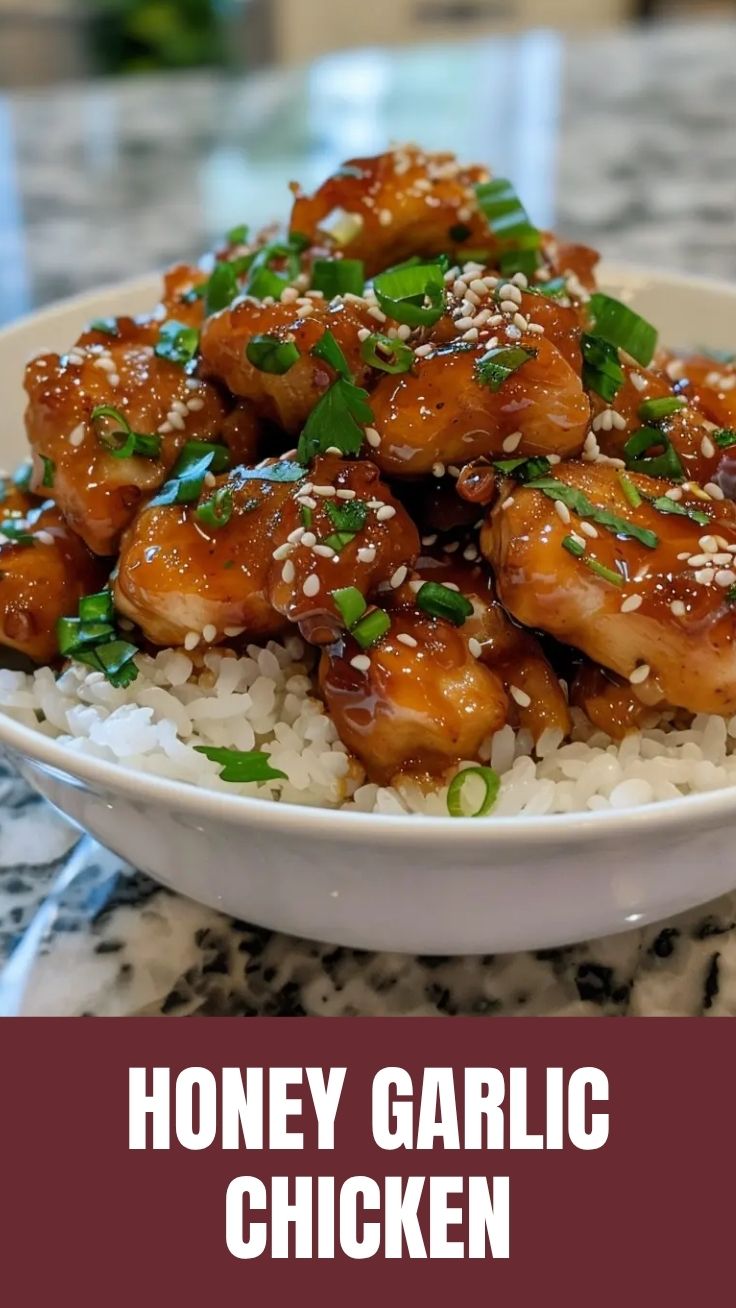
Imagine this: succulent chicken, glazed to perfection, with a complex interplay of sweet and savory notes that dance on your palate. Sounds like a gourmet meal you’d spend hours on, right? What if I told you it could be your reality in under an hour, right in your own kitchen? That’s the magic of Honey Garlic Chicken. This isn’t just another dinner; it’s a culinary experience that transforms a simple poultry dish into a showstopper, all thanks to the incredible depth of a well-crafted Honey Garlic Sauce. Preparing this dish at home offers incredible value – not only do you control the quality of your ingredients, but you also get to tailor the flavors to your exact preference, guaranteeing a healthier and more satisfying meal than any takeout option. Let’s dive into mastering this family-favorite recipe!
Ingredients & Kitchen Tools
- Chicken Thighs (bone-in, skin-on or boneless, skinless): 1.5 – 2 pounds. Thighs offer richer flavor and tenderness. Boneless, skinless breast can also be used, but adjust cooking time.
- Honey: 1/2 cup. Provides the signature sweetness and helps create that beautiful glaze.
- Soy Sauce (low sodium preferred): 1/4 cup. Adds umami and savory depth.
- Garlic (minced): 4-6 cloves. The powerhouse behind the “garlic” in honey garlic! Fresh is best.
- Rice Vinegar: 2 tablespoons. Balances the sweetness and adds a touch of tang.
- Ginger (grated, fresh): 1 teaspoon. Optional, but highly recommended for an extra layer of aromatic warmth.
- Cornstarch: 1 tablespoon (mixed with 2 tablespoons cold water). Creates a slurry to thicken the sauce.
- Sesame Oil: 1 teaspoon. Aromatic finishing oil, adds a nutty depth.
- Vegetable Oil (or other high smoke point oil): 1 tablespoon. For searing the chicken.
- Salt & Black Pepper: To taste. Season the chicken before searing.
- Optional Garnishes: Toasted sesame seeds, chopped green onions, red pepper flakes.
- Large Skillet or Oven-Safe Pan: For searing and simmering.
- Whisk: For making the sauce.
- Tongs: For handling the chicken.
Prep Time & Cooking Schedule
- Prep Time: 15 minutes
- Cook Time: 25-30 minutes (for bone-in thighs), 15-20 minutes (for boneless thighs/breasts)
- Resting Time: 5 minutes
- Total Time: Approximately 45-50 minutes
This recipe is designed for maximum flavor with minimal fuss, making it perfect for a busy weeknight. The brief marinating time (optional, but recommended if you have an extra 30 minutes) allows the flavors to truly penetrate the chicken, but you can also cook it immediately for a faster meal. Plan to start rice or other side dishes just before you begin cooking the chicken, as everything comes together quite quickly.
Step-by-Step Instructions
1. Prepare the Chicken: Pat your chicken thighs dry with paper towels. This is crucial for achieving a crispy skin (if using skin-on) and a good sear. Season liberally with salt and black pepper.
2. Make the Honey Garlic Sauce: In a medium bowl, whisk together the honey, soy sauce, minced garlic, rice vinegar, and grated ginger (if using). In a separate small bowl, whisk the cornstarch with cold water to form a smooth slurry. Set both aside.
3. Sear the Chicken: Heat vegetable oil in a large skillet or oven-safe pan over medium-high heat. Once shimmering, add the chicken, skin-side down first if applicable. Sear for 5-7 minutes per side until deeply golden brown and cooked through. If using boneless, skinless chicken, cook for 4-5 minutes per side. For the juiciest Honey Garlic Chicken, avoid overcrowding the pan; cook in batches if necessary.
4. Simmer in Sauce: Once the chicken is cooked through, carefully drain any excess fat from the pan. Pour the prepared sauce over the chicken. Bring to a gentle simmer, then stir in the cornstarch slurry. Cook, stirring occasionally, for 3-5 minutes, allowing the sauce to thicken and coat the chicken beautifully. The sauce should be glossy and able to cling to the back of a spoon.
5. Finish and Serve: Remove from heat. Drizzle with sesame oil and garnish with toasted sesame seeds and chopped green onions if desired. Let the chicken rest for 5 minutes before serving to allow the juices to redistribute.
Nutritional Benefits & Advantages
Chicken thighs are an excellent source of protein, essential for muscle repair and growth. This dish also provides a good balance of carbohydrates from the honey, offering sustained energy. Garlic is renowned for its immune-boosting properties and antioxidant content, while ginger offers anti-inflammatory benefits. By preparing this at home, you avoid the excessive sodium and unhealthy fats often found in store-bought or restaurant versions, allowing you to create a delicious meal that supports your health goals.
Tips, Variations & Cooking Advice
- Spice It Up: Add a pinch of red pepper flakes to the sauce for a delightful kick.
- Veggie Boost: Stir in steamed broccoli florets or snap peas during the last few minutes of simmering for a complete meal.
- Marinade for Extra Flavor: For even deeper flavor, marinate the chicken in half of the sauce mixture for at least 30 minutes (or up to 4 hours in the refrigerator) before searing.
- Alternative Cooking Methods: This recipe also works well in an air fryer (cook chicken until done, then toss with pre-made, thickened sauce) or baked in the oven (bake chicken at 400°F/200°C for 20-25 minutes, then toss with sauce).
- Gluten-Free: Substitute tamari for soy sauce and ensure any other ingredients are gluten-free.
- Dietary Adaptations: For a lower-sugar option, reduce the honey and use a sugar-free maple syrup substitute, adjusting to your taste.
Common Mistakes to Avoid
- Overcrowding the Pan: This leads to steaming instead of searing, resulting in pale, rather than beautifully browned, chicken. Cook in batches if your pan isn’t large enough.
- Not Patting Chicken Dry: Moisture on the chicken skin prevents it from getting crispy. Always pat it thoroughly dry.
- Overcooking the Chicken: This will lead to dry, tough chicken. Use a meat thermometer to ensure an internal temperature of 165°F (74°C) for perfect doneness.
- Not Letting the Sauce Thicken: Patience is key here. Allow the cornstarch slurry enough time to work its magic and create that luscious, glazed texture.
Storage & Meal Prep Tips
Leftover Honey Garlic Chicken can be stored in an airtight container in the refrigerator for up to 3-4 days. It’s also freezer-friendly; store individual portions in freezer-safe bags or containers for up to 2-3 months. Thaw overnight in the refrigerator before reheating. To reheat, gently warm in a microwave or on the stovetop over low heat, adding a splash of water or broth if the sauce has thickened too much. This recipe is fantastic for meal prep as the flavors often deepen overnight.
Conclusion
There you have it – a dazzling yet decidedly doable recipe for Honey Garlic Chicken that promises to become a staple in your culinary repertoire. With its irresistible blend of sweet and savory notes, enhanced by a perfectly balanced Honey Garlic Sauce, this dish truly delivers on flavor and convenience. We encourage you to try this recipe tonight and experience the joy of a homemade, restaurant-quality meal. Don’t forget to share your delicious creations in the comments below!
FAQs
Q1: Can I use chicken breast instead of thighs?
A1: Yes, you can! Boneless, skinless chicken breasts cook faster (about 4-5 minutes per side) and are a leaner option. Be careful not to overcook them to maintain juiciness.
Q2: How can I make the sauce spicier?
A2: Add red pepper flakes directly to the sauce mixture or a dash of sriracha for an extra kick. Adjust to your preferred level of heat.
Q3: My sauce isn’t thickening. What should I do?
A3: Ensure your cornstarch slurry is well-mixed and completely dissolved before adding it. If the sauce is still too thin after simmering for a few minutes, you can make a small additional slurry (1/2 tsp cornstarch + 1 tbsp cold water) and stir it in, cooking for another minute or two until desired consistency is reached.
Q4: Can I bake the chicken instead of searing?
A4: Absolutely! Bake chicken at 400°F (200°C) for about 20-25 minutes, or until cooked through. While the chicken bakes, prepare the sauce in a separate pan. Once the chicken is done, toss it with the thickened sauce. You won’t get the same crispy skin as searing, but it’s a great hands-off option.