Unlock the Secret to Irresistible Homemade Chocolate Brownies: A Journey to Fudgy Perfection!
Are you ready to transform simple ingredients into a decadent masterpiece that’s guaranteed to impress? There’s a special kind of magic in baking, and when it comes to classic desserts, few things evoke as much joy and comfort as a perfectly baked brownie. While store-bought options abound, nothing quite compares to the rich, gooey, and deeply satisfying experience of homemade Chocolate Brownies. This guide will not only help you achieve baking brilliance but also unlock the secrets behind crafting truly exceptional brownie recipes right in your own kitchen. Prepare to embark on a delightful culinary adventure that will elevate your baking skills and delight your taste buds.
Ingredients & Kitchen Tools
Gather your culinary arsenal! Here’s what you’ll need to create your fudgy dreams:
- Unsalted Butter (1 cup / 226g): Essential for richness and flavor. Unsalted allows you to control the salt content.
- Granulated Sugar (2 cups / 400g): Provides sweetness and contributes to that desirable chewy texture.
- Large Eggs (4): Act as a binder, provide structure, and add moisture for a fudgy interior.
- All-Purpose Flour (1 cup / 125g): Just enough to hold everything together without making them cakey. Sift for best results.
- Unsweetened Cocoa Powder (¾ cup / 75g): The key to deep chocolate flavor. Opt for high-quality Dutch-processed for a darker color and mellower taste.
- Salt (1 teaspoon): Balances sweetness and enhances the chocolate notes.
- Vanilla Extract (1 tablespoon): A flavor enhancer that complements chocolate beautifully.
- Chocolate Chips or Chunks (1 cup / 170g): (Optional, but highly recommended!) For extra pockets of melted chocolate goodness. Use semi-sweet or dark for best results.
Kitchen Tools:
- 9×13 inch Baking Pan: A standard size for delicious brownies. Line with parchment paper for easy removal.
- Large Mixing Bowl: For combining wet and dry ingredients.
- Whisk: For aerating eggs and combining dry ingredients.
- Rubber Spatula: For scraping down the sides of the bowl and folding ingredients.
- Saucepan (small): For melting butter.
- Measuring Cups & Spoons: Accuracy is key in baking.
- Oven: Preheat to the specified temperature.
Prep Time & Cooking Schedule
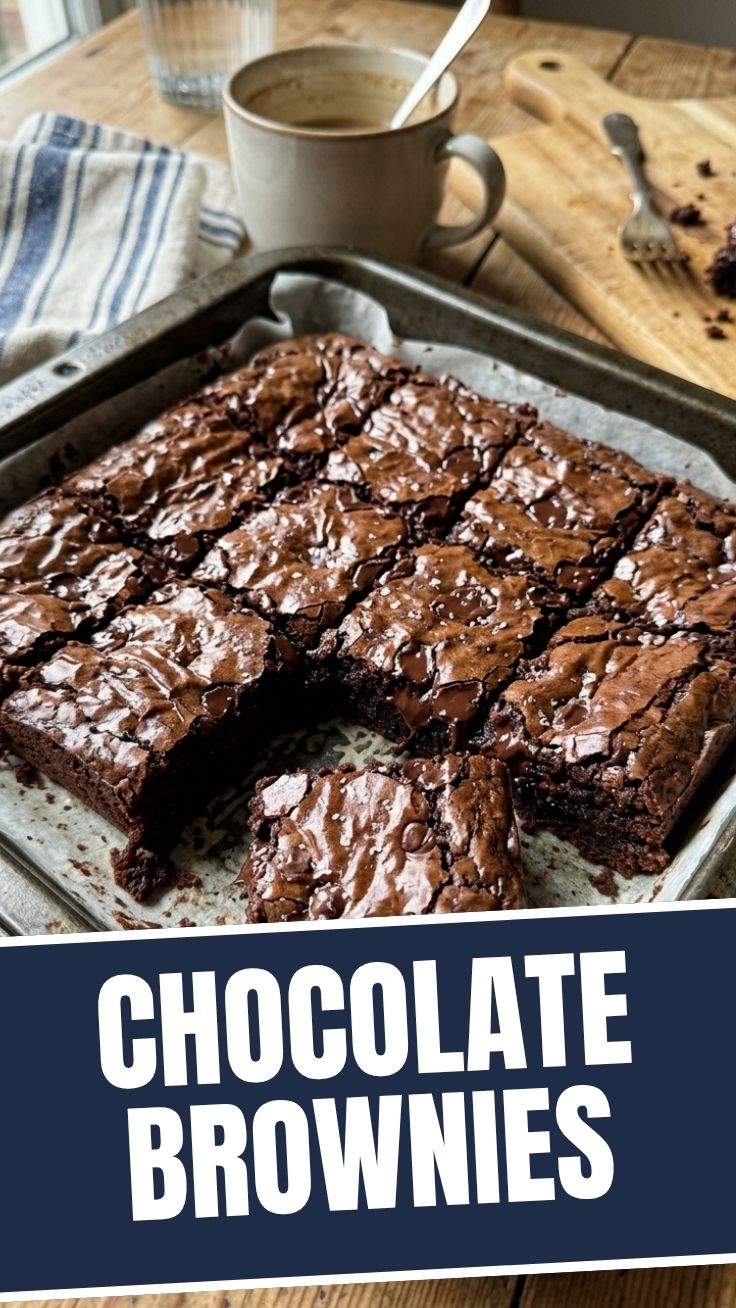
Good things come to those who wait, but thankfully, these brownies don’t require an eternity!
- Prep Time: 15 minutes (This includes melting butter and gathering ingredients).
- Cook Time: 25-30 minutes (This can vary based on oven calibration and desired fudginess).
- Resting Time: 1-2 hours, or until completely cooled (Crucial for achieving that perfect fudgy texture and clean cuts). Trying to cut warm brownies often results in a messy, crumbly experience. Allow them to set up!
Step-by-Step Instructions
Let’s begin our journey to baking perfection and create these incredible homemade Chocolate Brownies!
1. Preheat & Prepare: Preheat your oven to 350°F (175°C). Line a 9×13 inch baking pan with parchment paper, leaving an overhang on the sides for easy lifting. Grease the parchment paper lightly with butter or cooking spray.
2. Melt Butter: In a small saucepan, melt the unsalted butter over low heat. Alternatively, you can microwave it in a microwave-safe bowl in 30-second intervals until fully melted.
3. Combine Wet Ingredients: In a large mixing bowl, whisk together the melted butter, granulated sugar, and vanilla extract until well combined. Add the eggs one at a time, whisking well after each addition until the mixture is glossy and smooth. This aeration is key to a chewy texture.
4. Sift Dry Ingredients: In a separate medium bowl, whisk together the all-purpose flour, unsweetened cocoa powder, and salt. Sifting helps prevent lumps and ensures even distribution.
5. Combine Wet and Dry: Gradually add the dry ingredients to the wet ingredients, folding gently with a rubber spatula until just combined. Be careful not to overmix, as this can lead to tough brownies. Overmixing develops gluten, which we want to avoid for fudgy brownie recipes. If using, fold in the chocolate chips or chunks now.
6. Bake: Pour the batter evenly into the prepared baking pan. Bake for 25-30 minutes, or until a toothpick inserted into the center comes out with moist crumbs, but not wet batter. The edges should be set, but the center might still look slightly undercooked – this is perfect for fudginess!
7. Cool & Serve: Remove the pan from the oven and let the brownies cool completely on a wire rack before lifting them out of the pan and cutting them into squares. This step is non-negotiable for superior texture and clean cuts.
Nutritional Benefits & Advantages
Beyond their undeniable deliciousness, Chocolate Brownies offer a few surprising benefits, especially when made with quality ingredients:
- Antioxidant Power: Dark cocoa powder is rich in antioxidants called flavanols, which are linked to heart health and reduced inflammation.
- Mood Booster: Chocolate is known to stimulate the release of endorphins, making these a delightful pick-me-up!
- Energy Provider: With carbohydrates and fats, brownies offer a quick and satisfying energy boost, perfect for an afternoon treat.
- Customizable Goodness: Making them at home allows you to control sugar levels, quality of fats, and even add nutrient-rich elements like nuts or seeds.
Tips, Variations & Cooking Advice
Get creative with your Chocolate Brownies!
- Nutty Perfection: Add chopped walnuts, pecans, or almonds for extra crunch and flavor.
- Espresso Boost: A teaspoon of instant espresso powder (added to dry ingredients) intensifies the chocolate flavor without making it taste like coffee.
- Minty Fresh: Fold in a handful of chopped Andes Mints for a refreshing twist.
- Salted Caramel Swirl: Drizzle homemade or store-bought caramel over the batter before baking, then sprinkle with sea salt.
- Gluten-Free: Substitute the all-purpose flour with a 1:1 gluten-free baking blend.
- Cakey vs. Fudgy: For a more cake-like brownie, increase the flour by ¼ cup and bake a few minutes longer. For extra fudginess, slightly underbake.
Common Mistakes to Avoid
Steer clear of these pitfalls for consistently perfect brownies:
- Overmixing the Batter: This develops gluten, leading to tough, chewy brownies instead of fudgy ones. Mix only until just combined.
- Overbaking: The cardinal sin of brownie baking! Overbaked brownies are dry and cakey. Remove them when the edges are set and a toothpick has moist crumbs (not wet batter).
- Not Cooling Completely: Cutting warm brownies results in a crumbly, messy disaster. Patience is key for clean, fudgy squares.
- Using Low-Quality Cocoa: The quality of your cocoa powder directly impacts the depth of chocolate flavor. Invest in good Dutch-processed cocoa.
- Forgetting to Salt: A pinch of salt enhances the chocolate flavor and balances the sweetness.
Storage & Meal Prep Tips
Keep your delicious brownies fresh for longer!
- Room Temperature: Store cooled brownies in an airtight container at room temperature for up to 3-4 days.
- Refrigeration: For longer storage (up to a week), place them in an airtight container in the refrigerator. They might firm up slightly, but will soften at room temperature.
- Freezing: For ultimate preservation, wrap individual brownies tightly in plastic wrap, then place them in a freezer-safe bag or container. They can be frozen for up to 2-3 months. Thaw at room temperature.
- Reheating: If you prefer warm brownies, microwave individual squares for 10-15 seconds, or warm in a low oven (250°F / 120°C) for 5-10 minutes.
Conclusion
Congratulations, baker! You’ve just mastered the art of creating truly exceptional homemade Chocolate Brownies. By following these detailed steps and embracing the nuances of baking, you’re now equipped to produce a dessert that’s rich, fudgy, and utterly irresistible. This recipe proves that the best brownie recipes are often the simplest, yielding profound satisfaction and endless enjoyment. Don’t hesitate to experiment with the variations and make this recipe your own. We encourage you to whip up a batch, share your results, and savor every glorious bite!
FAQs
Q: Can I use natural cocoa powder instead of Dutch-processed?
A: Yes, but your brownies might be slightly lighter in color and have a more intense, sometimes slightly bitter chocolate flavor. Dutch-processed cocoa is alkalized, giving a darker color and milder taste.
Q: Why are my brownies dry and cakey?
A: This is usually due to overbaking or overmixing the batter. Ensure you remove them from the oven when they still have moist crumbs on a toothpick, and mix only until the ingredients are just combined.
Q: How do I get perfectly clean cuts?
A: The secret is to cool the brownies completely! You can even chill them in the refrigerator for 30 minutes before cutting. Use a large, sharp knife and clean it with a warm, damp cloth between each cut.
Q: Can I halve this recipe?
A: Yes, you can halve all the ingredients and bake them in an 8×8 inch square pan. The baking time might need slight adjustment, so keep a close eye on them.
Q: What’s the best way to make these extra fudgy?
A: Slightly underbake them (when the edges are set but the center still seems a little wobbly), use high-fat cocoa powder, and add an extra egg yolk to the batter for richness.