Master the Art of Perfect BBQ Ribs: Your Ultimate Home Grilling Guide
Ever wondered how those tender, fall-off-the-bone BBQ Ribs from your favorite smokehouse are made? What if I told you that achieving that mouthwatering perfection is not only possible but incredibly rewarding right in your own backyard? Preparing your own BBQ Ribs at home offers an unparalleled sense of satisfaction, allowing you to control every aspect of the flavor profile, from the smoky char to the sweet and tangy glaze. This comprehensive guide will equip you with the knowledge and techniques to create truly spectacular ribs, transforming your next grilling session into a culinary triumph.
Ingredients & Kitchen Tools
To embark on your journey to perfect BBQ Ribs, gather the following:
Ingredients:
- 2 racks (approximately 4-5 lbs total) baby back ribs or St. Louis style ribs: Baby back ribs are leaner and cook faster; St. Louis style are meatier and richer.
- 2 tablespoons yellow mustard: Acts as a binder for the rub and adds a subtle tang.
- For the Dry Rub:
* 2 tablespoons smoked paprika: Provides rich color and smoky depth.
* 1 tablespoon garlic powder: Essential aromatic.
* 1 tablespoon onion powder: Enhances savory notes.
* 1 tablespoon brown sugar (packed): Balances flavor and aids in caramelization.
* 1 teaspoon black pepper (freshly ground): Adds a pungent kick.
* 1 teaspoon cayenne pepper (optional): For a touch of heat.
* 1 teaspoon kosher salt: Crucial for seasoning and moisture retention.
- 1 cup apple cider vinegar: Used for spritzing, keeping ribs moist and tender.
- 1 cup apple juice or broth: Also for spritzing, adding sweetness and moisture.
- 1-2 cups of your favorite BBQ sauce: For glazing and finishing. Homemade or store-bought premium brand.
Kitchen Tools:
- Sharp paring knife: For removing the membrane.
- Large baking sheet or tray: For seasoning the ribs.
- Basting brush: For applying mustard and BBQ sauce.
- Aluminum foil (heavy-duty): For wrapping the ribs during the cooking process.
- Meat thermometer: Crucial for ensuring ribs are cooked to a safe temperature (195-203°F internal for tenderness).
- Tongs: For easy handling of ribs on the grill.
- Spray bottle: For spritzing mixture.
- Charcoal grill or gas grill: The star of the show for achieving that smoky flavor.
- Wood chips (hickory or applewood, soaked for 30 minutes): For infusing smoky flavor (charcoal grilling) or a smoker box (gas grilling).
Prep Time & Cooking Schedule
Planning is key to perfect ribs. Here’s a breakdown:
- Prep Time: 20-30 minutes (membrane removal, rub application)
- Marinating/Resting Time (with rub): 1-4 hours (or overnight for deeper flavor)
- Cook Time: 3-5 hours (depending on rib type and desired tenderness)
- Resting Time (after cooking): 15-20 minutes
This recipe follows the popular “3-2-1” method, which typically involves 3 hours of smoking, 2 hours wrapped in foil, and 1 hour unwrapped for glazing. Adjust timings based on your grill and rib type. Baby back ribs often cook faster, perhaps a “2-2-1” or even “2-1-1” approach.
Step-by-Step Instructions
1. Preparation (Membrane Removal): Lay the ribs bone-side up. Locate the thin, silvery membrane covering the bones. Using a paring knife, gently lift an edge of the membrane. Grip it firmly with a paper towel and peel it off the entire rack. This step is crucial for tender BBQ Ribs, allowing the smoke and seasoning to penetrate better.
2. Apply the Binder & Rub: Pat the ribs dry with paper towels. Lightly spread yellow mustard over both sides of each rack. In a small bowl, combine all dry rub ingredients. Generously coat the ribs with the dry rub, pressing it gently to adhere. Allow the ribs to rest for at least an hour at room temperature, or refrigerate for up to 4 hours.
3. Preheat Your Grill: For low and slow grilling, aim for a consistent temperature of 225-250°F (107-121°C). If using charcoal, create a two-zone fire. If using gas, turn on burners indirectly. Add your soaked wood chips to generate smoke.
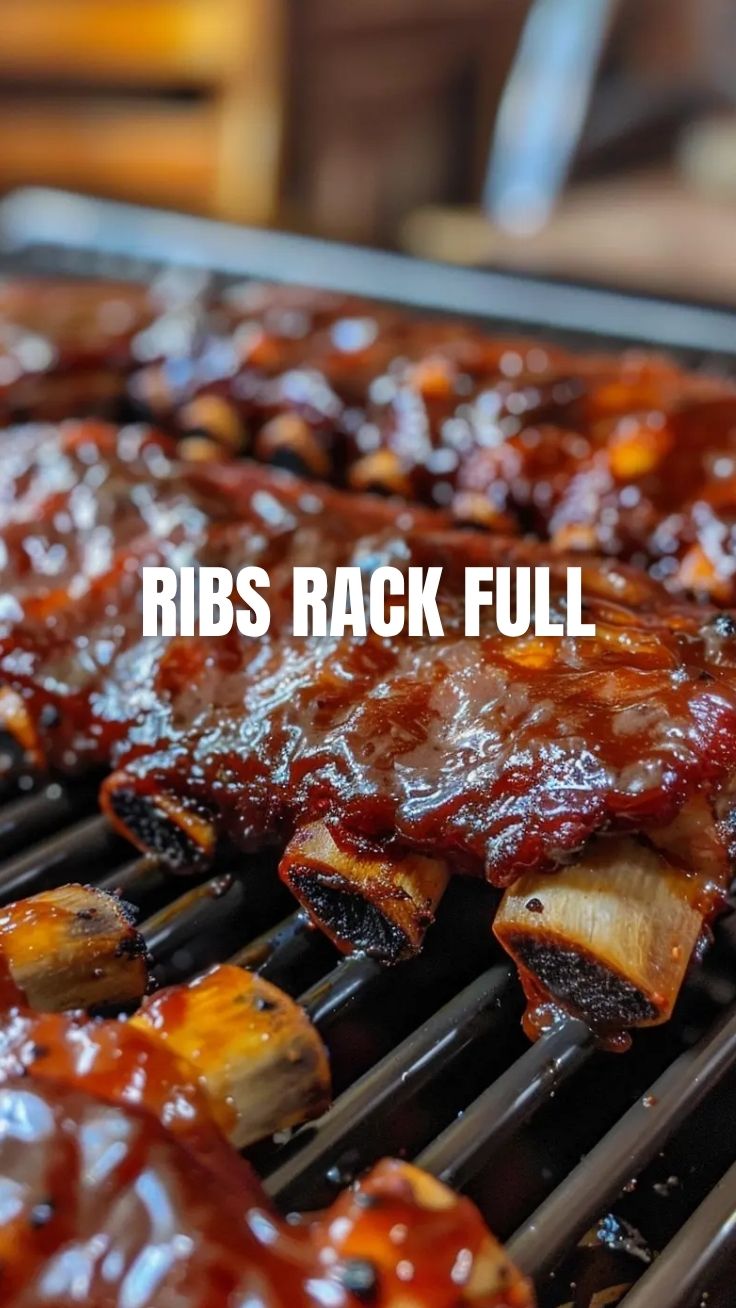
4. The Smoking Phase (3 hours): Place the ribs bone-side down on the indirect heat side of the grill. Close the lid and maintain the temperature. Spritz the ribs every 45-60 minutes with your apple cider vinegar and apple juice mixture to keep them moist and prevent drying out. You’re looking for a rich reddish-brown color to develop.
5. The Wrapping Phase (2 hours): After 3 hours, the ribs should have a beautiful bark. Remove them from the grill and place each rack on a large sheet of heavy-duty aluminum foil. Add a splash of apple juice or cider vinegar inside the foil packet. Wrap tightly, creating a sealed pouch. Return the wrapped ribs to the grill (still at 225-250°F). This steaming process tenderizes the meat further.
6. The Finishing Phase (1 hour): After 2 hours in foil, carefully unwrap the ribs. They should be very pliable. Discard the foil. Return the unwrapped ribs to the grill. Baste generously with your favorite BBQ sauce. Close the lid and continue to cook for another 30-60 minutes, basting every 15-20 minutes, until the sauce is caramelized and slightly tacky. The ribs are done when they reach an internal temperature between 195-203°F, and the meat pulls away easily from the bone.
7. Rest and Serve: Once cooked, remove the ribs from the grill and let them rest, loosely tented with foil, for 15-20 minutes. This allows the juices to redistribute, ensuring maximum tenderness and flavor. Slice between the bones and serve immediately.
Nutritional Benefits & Advantages
Ribs, particularly leaner cuts like baby backs, can be a good source of protein, essential for muscle repair and growth. Pork also provides crucial B vitamins (like B12 and niacin) that are vital for energy metabolism, and minerals such as zinc and phosphorus. By preparing your own ribs, you control the amount of added sugars and sodium in the rub and sauce, making it a healthier alternative to many commercially prepared options. The slow cooking method also helps render out some fat, contributing to a tender and flavorful cut.
Tips Variations & Cooking Advice
- Flavor Variations: Experiment with different wood chips (cherry for a milder smoke, mesquite for a stronger flavor). For a spicier kick, add more cayenne or a pinch of chili flakes to your rub.
- Ingredient Swaps: No apple cider vinegar? Use all apple juice or even beer for spritzing. If you prefer a less smoky flavor, you can bake the ribs in the oven during the wrapped phase.
- Alternative Cooking Methods: While this guide focuses on grilling, you can achieve delicious ribs in a smoker, a slow cooker (followed by a quick broil for char), or even entirely in the oven at a low temperature.
- Dietary Adaptations: For a gluten-free meal, ensure your BBQ sauce and rub ingredients are certified gluten-free. Most homemade rubs are naturally gluten-free.
Common Mistakes to Avoid
- Not removing the membrane: This results in chewy, less flavorful ribs. Always peel it off!
- Cooking at too high a temperature: Low and slow is the mantra for tender ribs. High heat dries them out and makes them tough.
- Not spritzing: Regular spritzing prevents the ribs from drying out and helps the bark develop.
- Over-saucing too early: Sauce burns easily. Apply it only during the last hour or so of cooking.
- Not resting the ribs: Patience is a virtue! Resting allows the juices to settle, leading to incredibly moist meat.
Storage & Meal Prep Tips
Leftover BBQ Ribs can be a delicious treat. Store them in an airtight container in the refrigerator for up to 3-4 days. For longer storage, freeze ribs in an airtight, freezer-safe bag or container for up to 3 months. When reheating, it’s best to do so slowly. Wrap them in foil and reheat in the oven at 250°F (120°C) until warmed through, or gently on a grill over indirect heat, wrapped in foil. This prevents them from drying out and maintains tenderness.
Conclusion
Mastering the art of fall-off-the-bone BBQ Ribs truly elevates your home cooking, transforming a simple piece of meat into a culinary masterpiece. By following these detailed steps, you’ve learned to prepare incredibly tender, flavorful ribs, ensuring a successful grilling experience every time. Don’t be afraid to experiment with rubs and sauces to make this recipe uniquely yours. So fire up that grill, and get ready to impress your family and friends with the best BBQ Ribs you’ve ever made! We encourage you to try this recipe and share your delectable results in the comments below!
FAQs
Q1: Can I use frozen ribs?
A1: Yes, but ensure they are completely thawed in the refrigerator before beginning preparation. Thawing can take 24-48 hours depending on size.
Q2: My ribs are tough, what went wrong?
A2: Tough ribs usually indicate undercooking or cooking at too high a temperature. Ribs need low, slow heat to break down connective tissues. Ensure your grill temperature is consistent and cook to the recommended internal temperature of 195-203°F.
Q3: How do I know when the ribs are done without a thermometer?
A3: While a thermometer is best, a good indicator is the “bend test.” Pick up a rack of ribs with tongs in the middle; if it bends significantly and the surface cracks (but doesn’t break), they’re likely done. The meat should also have pulled back from the ends of the bones.
Q4: Can I make the rub ahead of time?
A4: Absolutely! You can mix the dry rub ingredients and store them in an airtight container for several weeks. This makes prep even quicker on grilling day.