The Secret to the Perfect Slice: Unveiling the Ultimate Homemade Banana Bread
Ever wondered why some homemade treats taste miles better than anything you can buy? It’s the love, the precise measurements, and the fresh ingredients, all culminating in an experience that transcends mere sustenance. Today, we’re diving into the delightful world of baking to master a classic that consistently delivers comfort and joy: a truly exceptional Banana Bread. This isn’t just about mixing flour and bananas; it’s about crafting a moist, flavorful loaf that will become a staple in your kitchen. Learning this Recipe at home ensures you control every delicious aspect, from the ripeness of your bananas to the subtle spices that make it sing.
Ingredients & Kitchen Tools
Gather your culinary arsenal for this glorious bake. Precision is key, so pay attention to the details!
Ingredients:
- 3 large, very ripe bananas: (the spottier, the better! These contribute natural sweetness and moisture.)
- ½ cup (1 stick) unsalted butter: (softened to room temperature for smooth creaming.)
- ¾ cup granulated sugar: (provides sweetness and aids in browning.)
- 2 large eggs: (room temperature, acting as a binder and adding richness.)
- 1 teaspoon vanilla extract: (enhances the overall flavor profile.)
- 1 ½ cups all-purpose flour: (the structural base of our loaf.)
- 1 teaspoon baking soda: (a leavening agent for a light and airy texture.)
- ½ teaspoon salt: (balances the sweetness and enhances other flavors.)
- ½ cup chopped walnuts or pecans (optional): (adds a delightful crunch and nutty flavor.)
- ½ cup chocolate chips (optional): (for an extra touch of indulgence.)
Kitchen Tools & Utensils:
- Large mixing bowl: (for combining ingredients.)
- Fork or potato masher: (for mashing those ripe bananas.)
- Electric mixer (handheld or stand) or whisk: (for creaming butter and sugar.)
- Rubber spatula: (for scraping down the bowl and folding ingredients.)
- Measuring cups and spoons: (for accurate ingredient portions.)
- Loaf pan (8.5 x 4.5 inches or 9 x 5 inches): (the vessel for your delicious creation.)
- Parchment paper: (optional, but makes for easy removal and cleanup.)
- Wire rack: (for cooling the baked loaf evenly.)
Prep Time & Cooking Schedule
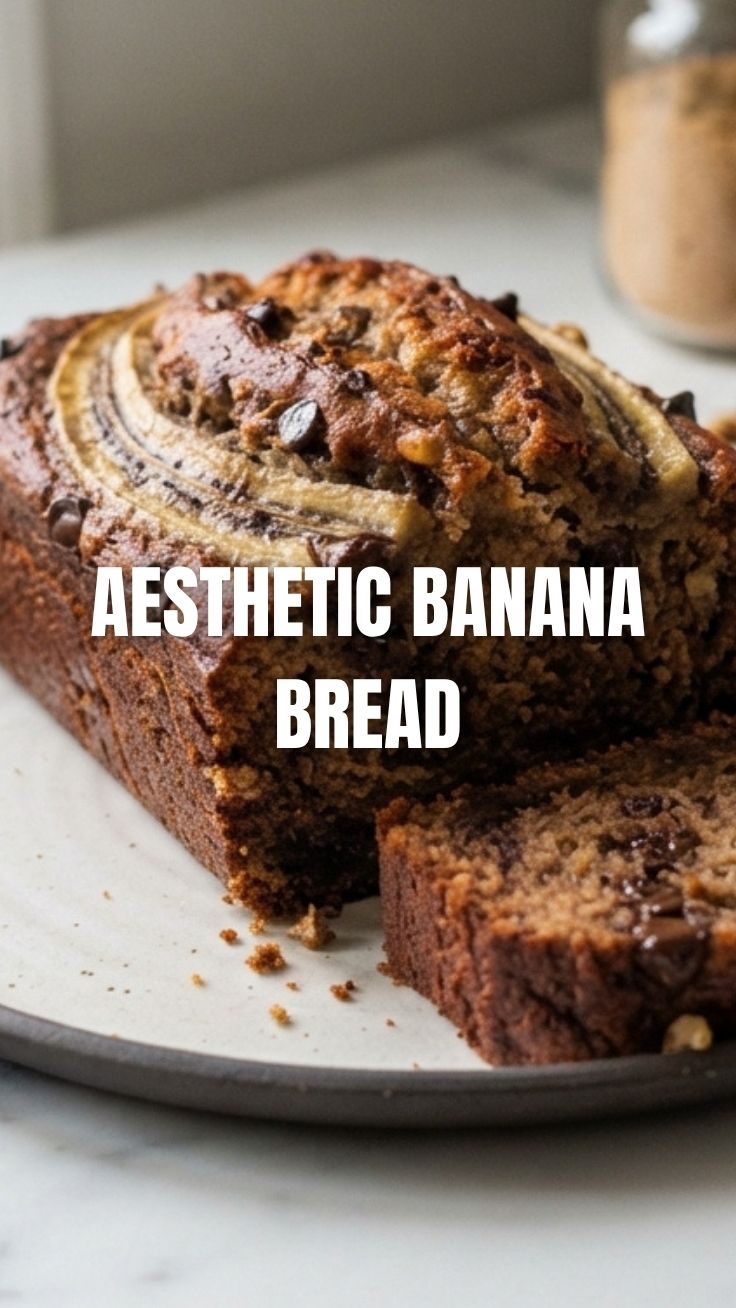
This Banana Bread is a relatively quick and rewarding baking project, perfect for a cozy weekend afternoon.
- Prep Time: 15-20 minutes (includes mashing bananas and gathering ingredients)
- Cook Time: 50-65 minutes
- Resting Time: 10-15 minutes (after baking, before slicing)
Plan to have your ingredients ready and your oven preheated. While the bread bakes, the enticing aroma will fill your home, building anticipation for that first warm slice. The resting time is crucial for allowing the internal structure to set and preventing the loaf from crumbling when cut.
Step-by-Step Instructions
Let’s get baking! Follow these steps for a perfect loaf of Banana Bread. This comprehensive Recipe will guide you through every detail.
1. Preheat & Prepare: Preheat your oven to 350°F (175°C). Grease and flour a loaf pan, or line it with parchment paper for easy removal.
2. Mash the Bananas: In your large mixing bowl, thoroughly mash the ripe bananas with a fork until mostly smooth desired consistency – a few small lumps are perfectly fine for added texture.
3. Cream Butter & Sugar: In a separate bowl (or using the same once bananas are set aside), cream together the softened butter and granulated sugar until light and fluffy, about 2-3 minutes. This incorporates air, contributing to a tender crumb.
4. Add Wet Ingredients: Beat in the eggs one at a time, ensuring each is fully incorporated before adding the next. Stir in the vanilla extract.
5. Combine Wet & Dry: Add the mashed bananas to the wet ingredients and mix until just combined.
6. Whisk Dry Ingredients: In a medium bowl, whisk together the flour, baking soda, and salt.
7. Combine All Ingredients: Gradually add the dry ingredients to the wet ingredients, mixing on low speed or by hand with a spatula until just combined. Do not overmix! Overmixing develops gluten, leading to a tough bread.
8. Fold in Add-ins (Optional): Gently fold in the chopped nuts and/or chocolate chips if you’re using them.
9. Bake: Pour the batter into your prepared loaf pan and spread evenly. Bake for 50-65 minutes, or until a wooden skewer inserted into the center comes out clean.
10. Cool: Remove the loaf from the oven and let it cool in the pan on a wire rack for 10-15 minutes. Then, carefully invert it onto the wire rack to cool completely before slicing.
Nutritional Benefits & Advantages
Beyond its comforting taste, Banana Bread offers several nutritional perks. Bananas are a fantastic source of potassium, which is vital for heart health, and provide dietary fiber, aiding digestion. They also deliver vitamins B6 and C. The eggs contribute protein, while whole-grain flour (if opted for) can boost fiber content further. Making it at home allows you to control the sugar and fat content, making it a potentially healthier alternative to store-bought versions.
Tips, Variations & Cooking Advice
- Spice It Up: Add ½ teaspoon of ground cinnamon or a pinch of nutmeg for extra warmth.
- Dairy-Free: Substitute unsalted butter with a plant-based butter alternative to make it dairy-free.
- Gluten-Free: Use a 1:1 gluten-free baking flour blend for a gluten-sensitive option.
- Sweetness Adjustment: If your bananas are exceptionally ripe, you might reduce the sugar by ¼ cup.
- Moisture Boost: A dollop of sour cream or plain Greek yogurt (about ¼ cup) can add extra moisture and a slight tang.
- Mini Loaves: Divide the batter into mini loaf pans and reduce baking time to 25-30 minutes.
Common Mistakes to Avoid
- Under-ripe Bananas: Using bananas that aren’t very ripe will result in a less sweet and less moist bread.
- Overmixing: As mentioned, overmixing the batter will lead to a dense, tough loaf. Mix until just combined.
- Overbaking: This can dry out your bread. Keep an eye on it and use the skewer test.
- Slicing When Hot: Resist the temptation! Slicing hot bread can make it gummy and difficult to cut neatly.
Storage & Meal Prep Tips
Your homemade Banana Bread stores beautifully!
- Room Temperature: Store cooled slices or the entire loaf tightly wrapped in plastic wrap or in an airtight container for up to 3-4 days.
- Refrigerator: For extended freshness, especially in warmer climates, store in an airtight container in the refrigerator for up to a week.
- Freezing: Slice the cooled loaf and wrap individual slices tightly in plastic wrap, then place them in a freezer-safe bag or container. It freezes well for up to 3 months. Thaw individual slices at room temperature or gently reheat in a microwave or toaster oven.
Conclusion
There’s a unique satisfaction in pulling a perfectly baked loaf of Banana Bread from the oven, its golden crust promising a tender, aromatic interior. This comprehensive Recipe ensures delicious success every time, providing not just a treat, but a heartwarming experience. We encourage you to try this ultimate Banana Bread Recipe in your own kitchen, experiment with the variations, and share your delightful creations! Share your baking adventures with us in the comments below. Happy baking!
FAQs
Q1: Can I use frozen bananas for this recipe?
A1: Yes! Thaw frozen bananas completely, drain any excess liquid, and then mash them as usual. The texture might be a little softer, but the flavor will be just as good.
Q2: My Banana Bread top cracked. Is that normal?
A2: A cracked top is very common and perfectly normal for Banana Bread and other quick breads. It usually indicates a good rise!
Q3: How can I make this Banana Bread healthier?
A3: Reduce the sugar, use whole wheat flour for half of the all-purpose flour, add more nuts for healthy fats, and consider leaving out the chocolate chips.
Q4: What’s the best way to get really ripe bananas?
A4: Buy bananas and let them sit on your counter for several days until their skins are heavily speckled with brown spots. For faster ripening, place them in a paper bag with an apple.