Beyond the Can: Crafting the Perfect Homemade Pumpkin Pie for Your Thanksgiving Table
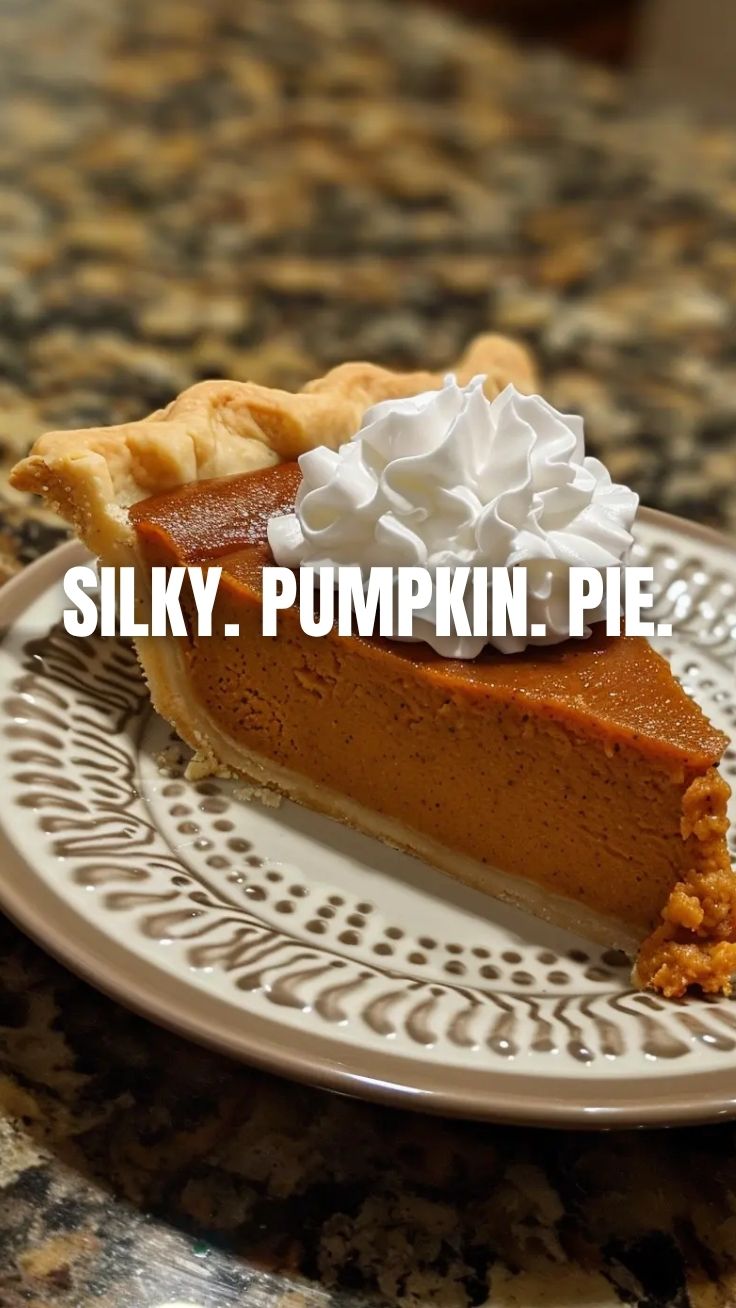
Is there any aroma more evocative of autumn and festive gatherings than a freshly baked Pumpkin Pie? While store-bought versions offer convenience, there’s an unparalleled satisfaction and superior flavor profile that comes with crafting this beloved Thanksgiving Dessert from scratch. Imagine a silky, spiced custard nestled in a flaky, golden crust, filling your home with warmth and anticipation. This isn’t just about baking; it’s about creating a cherished memory, a culinary masterpiece that speaks volumes of your effort and love. In this comprehensive guide, we’ll demystify the art of homemade pumpkin pie, ensuring your holiday table boasts a spectacular treat that will impress even the most discerning palates.
Ingredients & Kitchen Tools
Crafting the perfect pie starts with the right components. Here’s what you’ll need:
- For the Crust:
* 2 ½ cups All-Purpose Flour: Provides the structure for our flaky crust.
* 1 teaspoon Salt: Enhances the flavor of the flour.
* 1 cup (2 sticks) Unsalted Butter, very cold and cubed: Crucial for flakiness; cold butter creates steam pockets during baking.
* ½ cup Ice Water: Hydrates the dough without developing too much gluten, keeping it tender.
Substitutions:* For a gluten-free crust, use a 1:1 gluten-free flour blend.
- For the Filling:
* 1 (15-ounce) can Pumpkin Puree: Not pumpkin pie filling; pure pumpkin provides the authentic flavor base.
* 1 cup Heavy Cream: Adds richness and a luxurious texture.
* ½ cup Granulated Sugar: Sweetens the filling.
* ½ cup Packed Light Brown Sugar: Contributes a deeper, molasses-like sweetness.
* 2 Large Eggs, lightly beaten: Binds the filling together.
* 1 teaspoon Ground Cinnamon: Classic warm spice for pumpkin.
* ½ teaspoon Ground Ginger: Adds a subtle zing.
* ¼ teaspoon Ground Nutmeg: Earthy and aromatic.
* ⅛ teaspoon Ground Cloves: A potent spice, use sparingly for balance.
* ½ teaspoon Salt: Balances sweetness and enhances other flavors.
Substitutions:* For a dairy-free version, use full-fat coconut milk or a dairy-free cream substitute. Adjust spices to your preference.
- Essential Kitchen Tools:
* 9-inch Pie Plate: The standard size for most pies.
* Large Mixing Bowls: For combining ingredients.
* Whisk: For emulsifying the filling.
* Rolling Pin: For shaping the pie crust.
* Pastry Blender or Food Processor: For cutting butter into flour (optional, but recommended for consistent results).
* Measuring Cups and Spoons: For accurate ingredient portions.
* Aluminum Foil: For blind baking the crust and preventing over-browning.
Prep Time & Cooking Schedule
- Crust Prep: 20 minutes (plus 30 minutes chilling)
- Filling Prep: 15 minutes
- Baking Time: 50-60 minutes
- Cooling/Resting Time: At least 2-3 hours (ideally overnight)
Plan ahead! The pie crust benefits from at least 30 minutes of chilling, and the baked pie needs ample time to set up and cool completely. Rushing the cooling process can lead to a runny pie. For optimal results, consider making the crust a day in advance and the pie the day before your event.
Step-by-Step Instructions
Follow these precise steps for a perfectly structured and flavorful Pumpkin Pie, ensuring it stands out as the ultimate Thanksgiving Dessert.
1. Prepare the Pie Crust: In a large bowl, whisk together the flour and salt. Cut in the very cold butter using a pastry blender, your fingertips, or a food processor until the mixture resembles coarse crumbs with some pea-sized pieces of butter remaining. Gradually add the ice water, 1 tablespoon at a time, mixing until the dough just comes together. Be careful not to overmix. Form into a disc, wrap in plastic, and refrigerate for at least 30 minutes.
2. Roll Out the Crust & Blind Bake: On a lightly floured surface, roll out the chilled dough into a 12-inch circle. Carefully transfer it to your 9-inch pie plate. Trim the edges, leaving about ½ inch overhang, then crimp or flute the edges as desired. Prick the bottom of the crust all over with a fork. Line the crust with parchment paper and fill with pie weights or dried beans. Blind bake in a preheated oven at 375°F (190°C) for 15 minutes. Remove the weights and parchment, then bake for another 5-7 minutes until lightly golden. This step prevents a soggy bottom crust.
3. Prepare the Pumpkin Filling: While the crust is blind baking, whisk together the pumpkin puree, heavy cream, granulated sugar, brown sugar, eggs, cinnamon, ginger, nutmeg, cloves, and salt in a large bowl until smooth and well combined.
4. Assemble and Bake: Pour the pumpkin filling into the warm, blind-baked pie crust. Carefully transfer the pie to the oven. Bake at 375°F (190°C) for 15 minutes, then reduce the oven temperature to 350°F (175°C) and continue baking for 35-45 minutes, or until the edges are set and a knife inserted about one inch from the crust comes out clean. The center may still be slightly jiggly; this is normal.
5. Cool Completely: Carefully remove the pie from the oven. Let it cool on a wire rack for at least 2-3 hours, or preferably overnight, before slicing and serving. This allows the custard to fully set.
Nutritional Benefits & Advantages
Pumpkin is not just a delicious base for pie; it’s a nutritional powerhouse. Rich in beta-carotene, a powerful antioxidant our body converts to Vitamin A, pumpkin supports eye health and immune function. It also provides a good source of fiber, promoting digestive wellness. While this is a celebratory dessert, opting for a homemade version allows you to control sugar levels and use high-quality ingredients, making it a more wholesome treat than many store-bought alternatives.
Tips, Variations & Cooking Advice
- Spice It Up: For an extra kick, add a pinch of cardamom or a tiny bit of black pepper to the filling.
- Crust Variations: Experiment with different crusts – a gingerbread crust for a festive twist, or a graham cracker crust for ease.
- Sweetener Swaps: You can substitute some of the sugar with maple syrup or agave nectar for a different flavor profile, though this may alter the texture slightly.
- Toppings Galore: Serve with a dollop of freshly whipped cream, a sprinkle of toasted pecans, or a drizzle of caramel sauce for an elevated experience.
- Custard Test: To check for doneness, gently shake the pie. If only the very center (about 1-2 inches) jiggles slightly, it’s ready.
Common Mistakes to Avoid
- Overmixing the Crust: Leads to a tough, chewy crust. Mix only until just combined.
- Warm Butter in Crust: Results in a less flaky crust. Ensure butter is ice-cold.
- Not Blind Baking the Crust: Can lead to a soggy bottom. Don’t skip this step!
- Overbaking the Filling: Causes cracks in the custard. Stick to the suggested times and rely on the knife test.
- Not Cooling Enough: The number one reason for a runny pie. Patience is key!
Storage & Meal Prep Tips
Leftover Pumpkin Pie should be stored in the refrigerator, covered with plastic wrap or aluminum foil, for up to 3-4 days. For longer storage, slices of pie can be frozen for up to 1 month. Wrap individual slices tightly in plastic wrap, then an additional layer of aluminum foil, and place in a freezer-safe bag. Thaw in the refrigerator overnight before serving. Reheating is generally not recommended as it can alter the custard’s texture; enjoy chilled or at room temperature.
Conclusion
Creating a homemade Pumpkin Pie is a rewarding endeavor that elevates any holiday spread, making it a truly unforgettable Thanksgiving Dessert. By following these detailed instructions, from perfecting the flaky crust to achieving a silky, spiced filling, you’re not just baking; you’re crafting a centerpiece of flavor and tradition. We encourage you to embark on this culinary journey, savor the process, and delight in the incredible aroma and taste of your own masterpiece. Share your pie creations with us in the comments – we’d love to see them!
FAQs
Q1: My pie crust sometimes shrinks. How can I prevent this?
A: Ensure your butter is very cold, don’t overwork the dough, and allow ample chilling time (at least 30 minutes, preferably longer) before rolling and blind baking. Pricking the bottom with a fork also helps prevent shrinking.
Q2: Can I use store-bought pie crust for this recipe?
A: Absolutely! While homemade is superior, a good quality store-bought crust is a perfectly acceptable time-saver. Just follow the package directions for blind baking, if applicable.
Q3: How do I prevent my pumpkin pie from cracking?
A: Cracking is often caused by overbaking or drastic temperature changes. Ensure you don’t overbake (the center should still jiggle slightly), and allow the pie to cool slowly at room temperature on a wire rack, away from drafts.
Q4: Can I make this pie ahead of time?
A: Yes! Pumpkin pie is an excellent make-ahead dessert. You can prepare it up to 2 days in advance and store it in the refrigerator. The flavors often meld and improve over time.
Q5: What’s the difference between pumpkin puree and pumpkin pie filling?
A: Pumpkin puree is 100% cooked, mashed pumpkin. Pumpkin pie filling, on the other hand, is pre-seasoned and sweetened pumpkin puree, often containing spices and sugar. For this recipe, always use 100% pure pumpkin puree.