Unlock the Ultimate Flavor: Crafting the Perfect Homemade Roasted Salsa
Have you ever tasted a Salsa so vibrant, so fresh, that it instantly transported you to a sun-drenched fiesta, perhaps even inspiring a spontaneous urge to Salsa dance? While store-bought options offer convenience, nothing compares to the rich, layered flavors and personalized touch of homemade roasted Salsa. Preparing this culinary masterpiece at home allows you to control every ingredient, ensuring a healthier and more delicious accompaniment for your favorite dishes. This isn’t just about dipping; it’s about crafting an experience, a symphony of savory notes that will elevate any meal. Get ready to impress your taste buds and your guests with a truly authentic flavor journey.
Ingredients & Kitchen Tools
- 1.5 lbs Ripe Roma Tomatoes: The stars of our Salsa, offering a perfect balance of sweetness and acidity.
- 2-3 Jalapeños: For a moderate kick. Adjust to your spice preference (remove seeds and membranes for milder, leave some for hotter).
- 1-2 Serranos (Optional): For an extra fiery punch. Use sparingly if you prefer less heat.
- 1 Medium White Onion: Adds a sharp, pungent flavor that mellows beautifully when roasted.
- 4-5 Garlic Cloves: Essential for depth and aromatic complexity.
- 1/2 Bunch Fresh Cilantro: Brightens the Salsa with its fresh, herbaceous notes.
- 1-2 Limes: For fresh acidity and balance; juice as needed.
- 1 tsp Ground Cumin: Earthy warmth, a foundational spice in many Mexican dishes.
- 1/2 tsp Dried Oregano (Mexican preferred): Adds a distinct aromatic, slightly peppery flavor.
- Salt to Taste: Crucial for enhancing all other flavors.
- Pinch of Sugar (Optional): To balance acidity if tomatoes are tart.
Kitchen Tools:
- Baking Sheet: For roasting vegetables evenly.
- Parchment Paper or Aluminum Foil: Prevents sticking and makes cleanup easier.
- Blender or Food Processor: For achieving the desired Salsa consistency.
- Large Mixing Bowl: For combining ingredients.
- Cutting Board & Sharp Knife: For prepping vegetables.
Prep Time & Cooking Schedule
- Prep Time: 15 minutes (chopping vegetables)
- Roasting Time: 20-30 minutes (until vegetables are charred and tender)
- Cooling Time: 15 minutes (allowing vegetables to cool before blending)
- Assembly Time: 5 minutes
- Chilling Time: 30 minutes (minimum, for flavors to meld)
Total estimated time: Approximately 1 hour 30 minutes. This recipe is perfect for a weekend afternoon, allowing ample time for the roasted Salsa‘s flavors to deepen.
Step-by-Step Instructions
1. Preheat Oven & Prep Veggies: Preheat your oven to 400°F (200°C). Line a large baking sheet with parchment paper. Halve the Roma tomatoes, cut the white onion into thick wedges, and leave jalapeños and serranos whole. Place all these on the baking sheet with the unpeeled garlic cloves.
2. Roast to Perfection: Roast the vegetables for 20-30 minutes, or until the tomatoes are softened and slightly charred, the onion is translucent, and the peppers have black spots. The garlic will be soft. Roasting brings out an incredible depth of flavor that defines a truly exceptional Salsa dance.
3. Cool & Peel Garlic: Remove the baking sheet from the oven and let the vegetables cool for about 15 minutes. Once cool enough to handle, peel the skin from the roasted garlic cloves; it should slip off easily.
4. Blend the Flavors: Transfer all roasted vegetables (tomatoes, onions, jalapeños, serranos, garlic) into a blender or food processor. Add fresh cilantro, cumin, dried oregano, and the juice of one lime.
5. Pulse & Season: Pulse the mixture until you achieve your desired consistency. Some prefer a chunkier Salsa, while others like it smoother. Be careful not to over-blend to avoid a watery texture. Taste and season with salt, adding more lime juice or a pinch of sugar if needed to balance the flavors.
6. Chill & Serve: Transfer the finished Salsa to a bowl and chill in the refrigerator for at least 30 minutes. This resting period allows the flavors to meld and intensify, making it even more delicious.
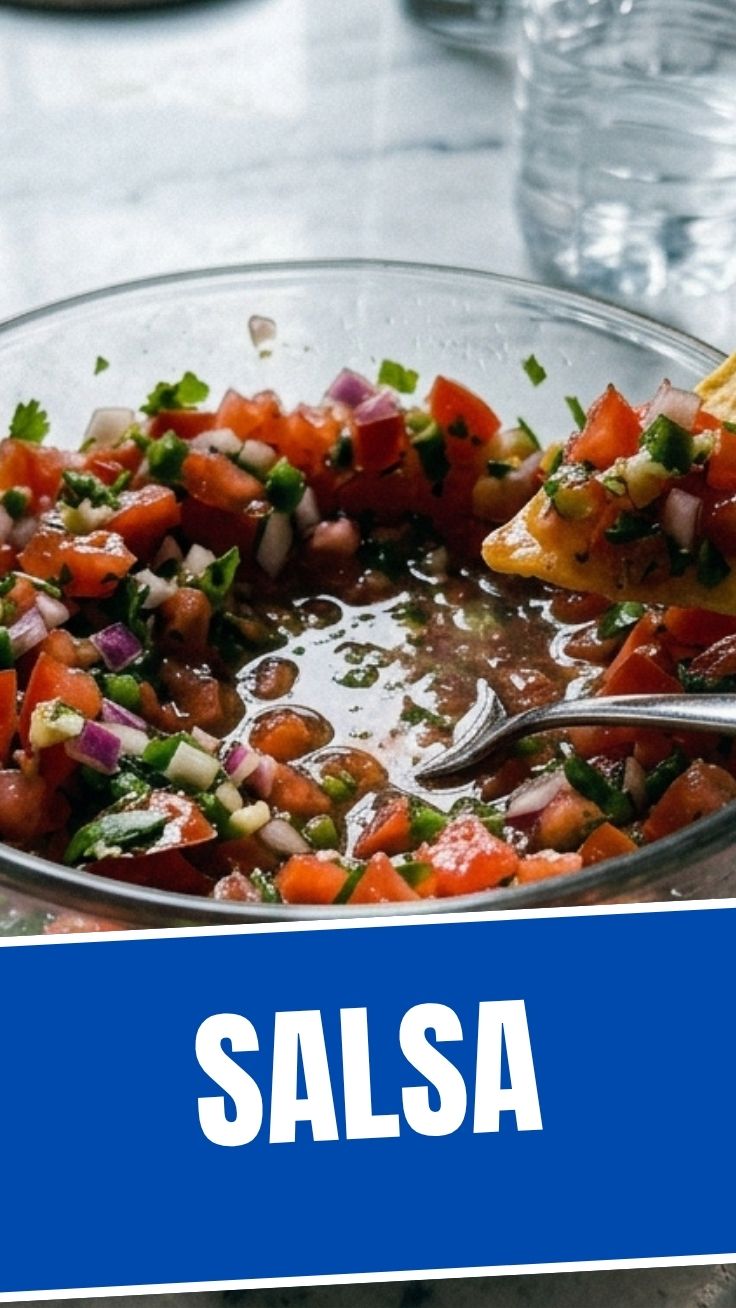
7. Enjoy: Serve your homemade roasted Salsa with tortilla chips, tacos, enchiladas, or as a vibrant accompaniment to grilled meats.
Nutritional Benefits & Advantages
This homemade roasted Salsa is not just delicious; it’s packed with nutritional goodness. Tomatoes are an excellent source of lycopene, a powerful antioxidant, and Vitamin C. Jalapeños and serranos contain capsaicin, which has anti-inflammatory properties and can boost metabolism. Onions and garlic offer prebiotics for gut health and immune-boosting compounds. Choosing fresh ingredients and roasting them locks in these nutrients, providing a low-calorie, flavor-rich addition to any meal. This recipe avoids artificial preservatives and excessive sodium found in many store-bought alternatives, giving you a fresh advantage.
Tips Variations & Cooking Advice
- Smoky Twist: For an extra smoky flavor, add one roasted chipotle pepper in adobo sauce to the blender.
- Sweet Heat: Incorporate a roasted bell pepper (red or orange) for a sweeter undertone and vibrant color.
- Herbaceous Boost: Experiment with adding a few sprigs of epazote, a traditional Mexican herb, for an authentic flavor profile.
- Fire-Roasted Perfection: If you have a gas stove, char your tomatoes and peppers directly over an open flame for a more intense smoky flavor before proceeding with the recipe.
- Consistency Control: For a thinner Salsa, add a splash of water or vegetable broth while blending. For a thicker sauce, use fewer liquid ingredients.
- Dietary Adjustments: This recipe is naturally gluten-free and vegan. Ensure all ingredients are fresh and unprocessed.
Common Mistakes to Avoid
- Under-Roasting Vegetables: Don’t rush the roasting process! The charring and softening of the vegetables are crucial for developing the deep, complex flavors of the roasted Salsa.
- Over-Blending: Pulsing is key to achieving a good texture. Continuous blending can turn your Salsa into a watery puree.
- Skipping the Chill Time: While tempting to taste immediately, allowing the Salsa to chill lets the flavors meld and deepen, significantly improving the taste.
- Ignoring Seasoning: Always taste and adjust! Salt and lime juice are vital for balancing the flavors. Don’t be afraid to add a pinch more to make the flavors sing.
Storage & Meal Prep Tips
Your homemade roasted Salsa can be stored in an airtight container in the refrigerator for up to 5-7 days. For longer storage, you can freeze it. Pour the cooled Salsa into freezer-safe bags or ice cube trays. Once frozen, transfer the cubes to a larger freezer bag. Thaw in the refrigerator overnight before use. Freezing might slightly alter the texture upon thawing, but the flavor will remain excellent. It’s a fantastic component for meal prepping throughout the week, ready to elevate tacos, burrito bowls, or simply enjoyed as a healthy snack.
Conclusion
Crafting your own roasted Salsa is a rewarding culinary adventure that promises unparalleled flavor and freshness. By following these steps, you’ve created a versatile condiment that’s leaps and bounds above anything store-bought, truly ready to bring a festive spirit to any gathering, perhaps even encouraging a spontaneous Salsa dance! So, gather your ingredients, unleash your inner chef, and get ready to experience the vibrant taste of authentic homemade Salsa. Don’t hesitate to share your creations and let us know how your homemade Salsa turned out in the comments below!
FAQs
Q1: Can I use canned tomatoes instead of fresh?
A1: While fresh Roma tomatoes are highly recommended for the best flavor and texture, you can use high-quality canned whole peeled tomatoes (drained) as a substitute. Roasting them briefly under the broiler can still add a touch of smoky flavor.
Q2: How can I make my Salsa spicier?
A2: To increase the heat, leave the seeds and membranes in the jalapeños and serranos before roasting. You can also add an extra serrano pepper or a pinch of cayenne pepper to the blender.
Q3: What if my Salsa is too watery?
A3: If your Salsa is too thin, try letting it drain in a fine-mesh sieve for 15-20 minutes, or gently simmer it in a saucepan over low heat to reduce some of the liquid.
Q4: Can I make this Salsa without a blender?
A4: Yes, you can finely chop all the roasted vegetables by hand and then incorporate the fresh ingredients. It will result in a chunkier Salsa, sometimes called “pico de gallo style.”
Q5: What are some good serving suggestions for this Salsa?
A5: Besides traditional chips, this Salsa is fantastic with breakfast huevos rancheros, as a topping for grilled chicken or fish, mixed into scrambled eggs, or as a vibrant sauce for burritos and tacos.