Master the Art of Homemade Tuna Salad: A Culinary Journey
Are you tired of bland, store-bought spreads that promise flavor but deliver disappointment? Imagine a vibrant, creamy Tuna Salad, bursting with fresh ingredients, perfectly seasoned, and crafted with your own hands. This isn’t just about making another dish; it’s about elevating an everyday classic into a gourmet experience right in your kitchen. Learning to perfect your homemade Tuna Sandwich is a valuable skill that not only saves money but ensures you’re enjoying wholesome, delicious food tailored precisely to your taste. This comprehensive guide will walk you through every step, from selecting the finest ingredients to mastering the perfect creamy texture, ensuring your next tuna creation is nothing short of extraordinary.
Ingredients & Kitchen Tools
Crafting the perfect tuna dish requires quality components and the right implements. Here’s what you’ll need:
Canned Tuna (Focus Keyword): 2 cans (5 oz each), packed in water or olive oil. Water-packed is lighter; oil-packed offers richer flavor.*
Mayonnaise: 1/2 cup (or Greek yogurt for a lighter option). Binds ingredients and adds creaminess.*
Celery: 2 stalks, finely chopped. Adds a refreshing crunch and subtle bitterness.*
Red Onion: 1/4 cup, finely minced. Provides a sharp, piquant flavor; soak in cold water for 5 minutes to reduce pungency if desired.*
Dill Pickles (or Relish): 1/4 cup, finely chopped. Introduces essential tang and brine.*
Fresh Dill: 2 tablespoons, chopped. Elevates the flavor profile with its fresh, herbaceous notes.*
Dijon Mustard: 1 tablespoon. Adds a subtle zesty kick and emulsifies the dressing.*
Lemon Juice: 1 tablespoon, freshly squeezed. Brightens the overall flavor and prevents oxidation.*
Salt & Black Pepper: To taste. Essential for seasoning.*
Optional Stir-ins: Capers, hard-boiled eggs, chopped bell peppers, corn kernels. Personalize your creation!*
Kitchen Tools:
- Medium Mixing Bowl: For combining all ingredients.
- Can Opener: To open the tuna cans.
- Cutting Board & Sharp Knife: For chopping vegetables.
- Measuring Cups & Spoons: For accurate ingredient quantities.
- Rubber Spatula or Spoon: For mixing.
- Serving Spoon: For plating.
Prep Time & Cooking Schedule
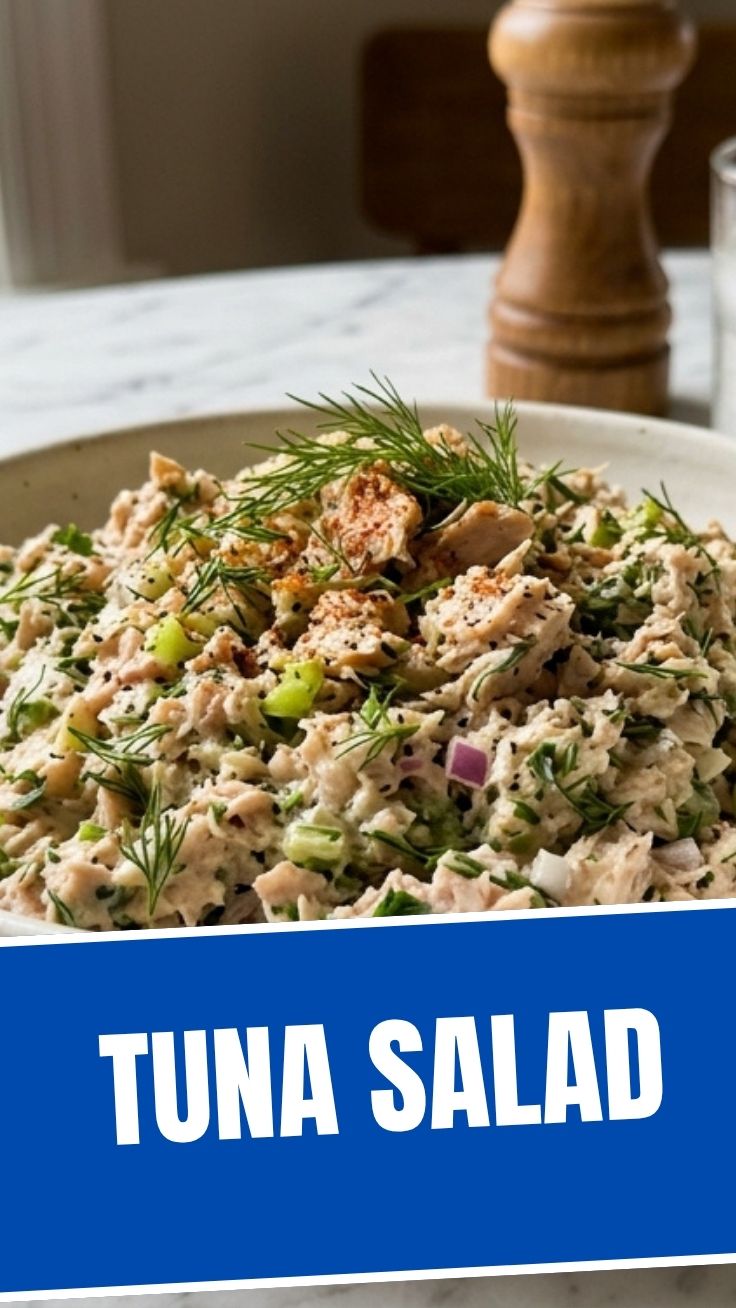
One of the greatest appeals of this recipe is its swift preparation. There’s no cooking involved, making it ideal for a quick lunch or dinner.
- Prep Time: 15 minutes
- Chilling Time: 15-30 minutes (optional, but recommended for flavors to meld)
This recipe is perfect for last-minute meals or for meal prepping at the start of your week. The chilling time allows the flavors to truly come together, transforming good into great.
Step-by-Step Instructions
Follow these simple steps for a truly memorable culinary delight:
1. Drain the Tuna: Open both cans of tuna. If packed in water, drain thoroughly to prevent a watery consistency. If packed in oil, you can drain some or leave a little for extra richness. Transfer the drained Tuna Salad to your medium mixing bowl.
2. Flake the Tuna: Using a fork, gently flake the tuna apart. You want a mix of small pieces and some larger chunks for textural interest.
3. Chop the Vegetables: Finely chop the celery, red onion, and dill pickles. Ensure consistent sizing for even distribution of flavor and texture. Add these to the bowl with the flaked fish.
4. Add the Dressing Components: Spoon in the mayonnaise (or Greek yogurt), fresh dill, Dijon mustard, and freshly squeezed lemon juice.
5. Season: Season generously with salt and black pepper to taste. Remember, the salt can make all the other flavors pop.
6. Mix Thoroughly: Using your rubber spatula or spoon, gently but thoroughly mix all the ingredients until everything is well combined and coated with the dressing. Avoid over-mixing, as this can break down the tuna too much.
7. Taste and Adjust: Taste a small spoonful. Adjust seasoning as needed – perhaps a little more salt, pepper, or a squeeze of lemon juice to enhance the brightness.
8. Chill (Optional but Recommended): For optimal flavor development, cover the bowl and refrigerate for at least 15-30 minutes. This allows the ingredients to meld and chill, making for an even more refreshing Tuna Sandwich experience.
9. Serve: Spoon onto fresh bread, crackers, or use it as a hearty salad topping.
Nutritional Benefits & Advantages
Homemade tuna isn’t just delicious; it’s a powerhouse of nutrition. Tuna is an excellent source of lean protein, essential for muscle repair and satiety, helping you feel full longer. It’s also rich in Omega-3 fatty acids (especially if using oil-packed tuna), which are vital for heart health and brain function. The added vegetables bring fiber, vitamins, and antioxidants, while the lemon juice provides a boost of Vitamin C. By making it at home, you control the amount of mayonnaise, salt, and other additives, making it a healthier alternative to many store-bought versions.
Tips, Variations & Cooking Advice
- Spice It Up: Add a pinch of cayenne pepper or a dash of hot sauce for a fiery kick.
- Herbaceous Boost: Experiment with other fresh herbs like parsley, chives, or tarragon.
- Creamy Alternatives: For a lighter rendition, substitute half or all of the mayonnaise with Greek yogurt, sour cream, or even mashed avocado.
- Texture Play: Add chopped hard-boiled eggs, toasted pecans, or water chestnuts for extra crunch.
- Low-Carb Option: Serve in lettuce cups, stuffed into bell peppers, or alongside cucumber slices instead of bread.
- Mediterranean Twist: Incorporate chopped kalamata olives, sun-dried tomatoes, and a sprinkle of crumbled feta cheese.
Common Mistakes to Avoid
- Insufficiently Draining Tuna: This leads to a watery salad lacking desired creaminess. Always drain thoroughly.
- Over-mixing: Aggressive mixing can turn your tuna into a paste, losing its delightful flaky texture. Mix gently.
- Under-seasoning: Don’t be afraid to taste and adjust! Bland tuna is a missed opportunity. Salt and pepper are your friends.
- Using Too Much Mayonnaise: While delicious, excessive mayo can overpower the other flavors and make it overly rich. Start with the recommended amount and add more only if needed.
- Skipping Fresh Ingredients: While dried herbs can work, fresh dill, lemon juice, and crisp celery make a significant difference in flavor and vibrancy.
Storage & Meal Prep Tips
Your homemade creation stores beautifully. Transfer any leftovers to an airtight container and refrigerate promptly. It will stay fresh for 3-4 days. This recipe is fantastic for meal prep; make a larger batch on Sunday and enjoy it throughout the week for quick lunches or snacks. It does not freeze well, as the mayonnaise and vegetables can separate and become watery upon thawing. Always consume chilled for the best experience.
Conclusion
Mastering a classic like the Tuna Salad is more than just following a recipe; it’s about understanding the synergy of fresh ingredients and personalizing it to your palate. This guide equips you with all the knowledge to create a truly exceptional dish, transforming your everyday lunch into a culinary delight. So, go ahead, gather your ingredients, and craft the perfect Tuna Sandwich that will leave everyone craving another bite. We encourage you to try this recipe, experiment with the variations, and share your delicious creations with us!
FAQs
Q1: Can I use fresh tuna instead of canned?
A1: Absolutely! Poached or pan-seared fresh tuna, flaked, makes an even more gourmet version. Just ensure it’s cooked through and cooled before mixing.
Q2: How can I make my tuna salad less watery?
A2: Ensure thorough draining of the canned tuna. You can also pat it dry with a paper towel. Using slightly less mayonnaise or a thicker binder like Greek yogurt can also help.
Q3: What’s the best way to serve this creation?
A3: It’s incredibly versatile! Serve on toasted bread, in a pita, on crackers, in lettuce wraps, or as a scoop on a bed of mixed greens.
Q4: Can I prepare this in advance?
A4: Yes, it’s a perfect make-ahead dish! Prepare it a day in advance and store it in an airtight container in the refrigerator. The flavors often deepen overnight.