Unlock Culinary Magic: Your Guide to the Perfect Lemon Herb Roasted Chicken!
Ever wondered how to transform a simple chicken into a golden, succulent masterpiece that tantalizes taste buds and fills your home with an irresistible aroma? Preparing a Roasted Chicken at home isn’t just about saving money; it’s about crafting an unforgettable culinary experience, controlling ingredients, and tailoring flavors to your exact preferences. This comprehensive guide will walk you through creating a truly spectacular dish, demonstrating that deliciousness doesn’t have to be complicated. Forget takeout and embrace the joy of creating mouthwatering Easy Chicken Recipes right in your own kitchen!
Ingredients & Kitchen Tools
Here’s what you’ll need to create this culinary delight. Feel free to explore substitutions to match your pantry and taste!
- 1 (3-4 lb) Whole Chicken: Opt for a free-range, organic bird for the best flavor and texture.
- 2 Lemons: Zest of one, and slice the other for stuffing and roasting. Adds bright, zesty notes.
- 4-5 sprigs Fresh Rosemary: Pungent and piney; dried rosemary can be substituted (use 1/3 the amount).
- 6-8 sprigs Fresh Thyme: Earthy and subtly floral; dried thyme is also an option (use 1/3 the amount).
- 4-6 cloves Garlic: Minced or smashed for aromatic depth. Garlic powder can be used in a pinch.
- 2 tbsp Olive Oil: Extra virgin preferred, for coating the chicken and promoting crispy skin.
- 1.5 tsp Sea Salt: Essential for seasoning and bringing out flavors. Adjust to taste.
- 1 tsp Black Pepper: Freshly ground for best results.
- 1 Large Yellow Onion (optional): Quartered and placed in the roasting pan for added flavor and moisture.
- 1 lb Fingerling Potatoes (optional): Halved and roasted alongside the chicken for a complete meal.
Kitchen Tools:
- Roasting Pan with Rack: Crucial for even air circulation and crispy skin.
- Meat Thermometer: The key to perfectly cooked, safe chicken.
- Sharp Knife: For cutting lemons and potentially trussing.
- Cutting Board: A stable surface for prep.
- Small Bowl: For mixing herbs and spices.
- Twine (optional): For trussing the chicken to ensure even cooking.
Prep Time & Cooking Schedule
Planning is key to a stress-free cooking experience!
- Prep Time: 20 minutes (includes chopping herbs, zesting lemon, and seasoning chicken).
- Marinating Time (Optional but Recommended): At least 30 minutes, or up to 4 hours in the refrigerator for deeper flavor penetration.
- Cook Time: 60-90 minutes, depending on the size of your chicken.
- Resting Time: 10-15 minutes (crucial for juicy results).
Context: The beauty of this recipe is its flexibility. You can prepare the chicken in the morning for an evening meal by letting it marinate, allowing the flavors to meld beautifully. The “no-peak” cooking strategy means less fuss and more free time while your oven does the work.
Step-by-Step Instructions
Follow these steps for a glorious Roasted Chicken every time.
1. Preheat & Prep: Preheat your oven to 400°F (200°C). Remove the chicken from its packaging, pat it thoroughly dry with paper towels (this is critical for crispy skin!), and remove any giblets from the cavity.
2. Aromatic Rub: In a small bowl, combine minced garlic, lemon zest, chopped rosemary, chopped thyme, olive oil, salt, and pepper. Mix well to form a fragrant paste.
3. Seasoning & Stuffing: Gently loosen the skin over the breast and thighs, and generously rub about half of the herb mixture directly onto the meat under the skin. Rub the remaining mixture all over the exterior of the chicken. Stuff the cavity with lemon slices (from the second lemon) and any remaining herb sprigs. If desired, truss the chicken legs together with kitchen twine.
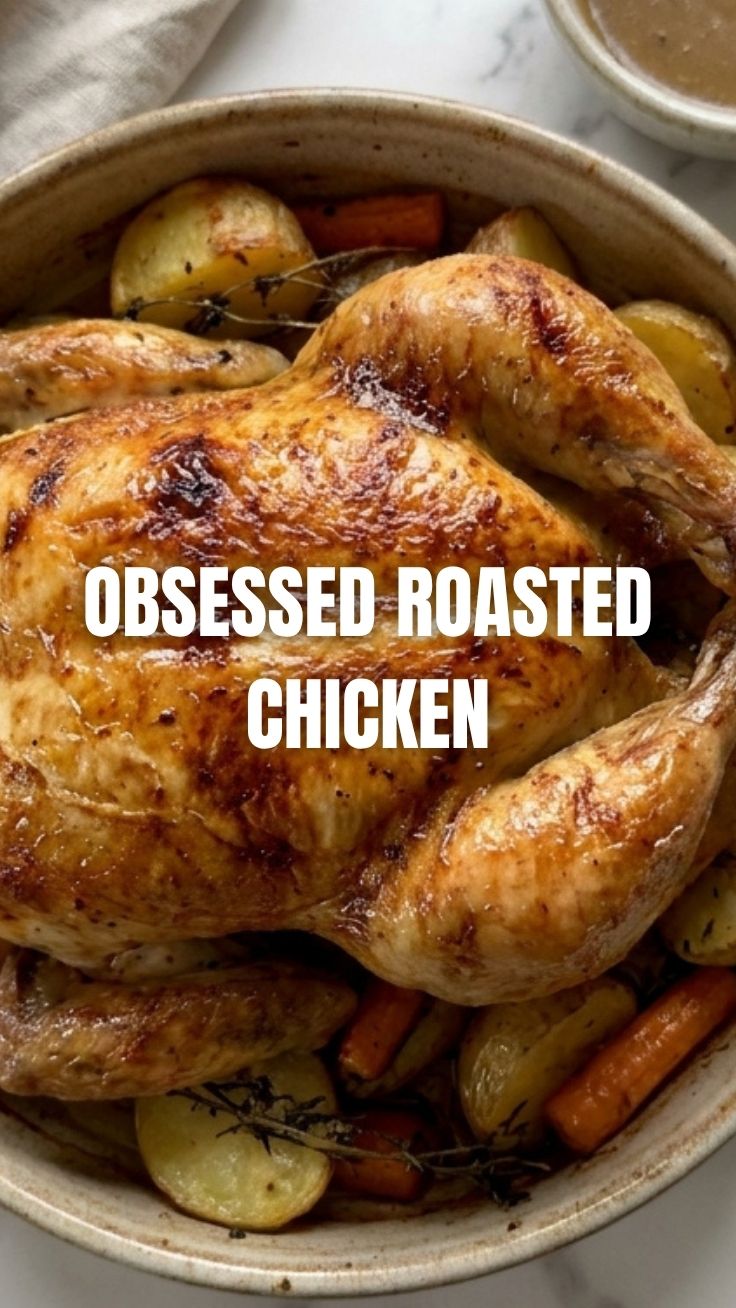
4. Roast to Perfection: Place the seasoned chicken on a rack in your roasting pan. If using, arrange the quartered onion and halved potatoes around the chicken in the pan. Roast for 60-90 minutes, or until a meat thermometer inserted into the thickest part of the thigh (without touching bone) reads 165°F (74°C). The skin should be deeply golden and crispy. For those seeking Easy Chicken Recipes, this step is practically hands-off once the initial prep is done.
5. Rest & Serve: Once cooked, remove the chicken from the oven, transfer it to a cutting board, and tent it loosely with foil. Let it rest for 10-15 minutes. This allows the juices to redistribute, ensuring a tender and moist bird. Carve and serve immediately!
Nutritional Benefits & Advantages
Beyond its incredible taste, this lemon herb roasted chicken offers significant nutritional benefits. Chicken is an excellent source of lean protein, essential for muscle repair and growth. Lemon provides a boost of Vitamin C, an antioxidant crucial for immune health. Rosemary and thyme are not just flavor powerhouses; they’re packed with antioxidants and anti-inflammatory compounds. Oliging your own chicken means avoiding unnecessary additives, excess sodium, and unhealthy fats often found in store-bought or restaurant versions, making it a wholesome choice for any diet.
Tips, Variations & Cooking Advice
- Spicy Kick: Add a pinch of red pepper flakes to your herb rub for a subtle heat.
- Smoked Paprika: A teaspoon of smoked paprika adds a beautiful color and a smoky depth of flavor.
- Root Vegetables: Beyond potatoes, try roasting carrots, parsnips, or sweet potatoes underneath the chicken for a full-flavored side dish.
- Gluten-Free/Dairy-Free: This recipe is naturally gluten-free and dairy-free, making it a fantastic option for those with dietary restrictions.
- Compound Butter: For extra crispy skin and rich flavor, mix the herb rub with softened butter and rub it under and over the skin.
Common Mistakes to Avoid
- Not Patting Dry: A damp chicken skin will steam, not crisp! Always pat it thoroughly dry.
- Overcrowding the Pan: If roasting vegetables, ensure there’s enough space for air circulation to prevent steaming.
- Skipping the Rest: Resting the chicken is non-negotiable for juicy results. Cutting into it too soon will cause all the delicious juices to run out.
- Underseasoning: Don’t be shy with salt and pepper. They are crucial for flavor.
- Not Using a Thermometer: Visual cues can be misleading. A meat thermometer is your best friend for perfectly cooked chicken.
Storage & Meal Prep Tips
Leftover roasted chicken is a versatile component for future meals!
- Refrigeration: Store leftover carved chicken in an airtight container in the refrigerator for up to 3-4 days.
- Freezing: For longer storage, freeze carved chicken in a freezer-safe bag or container for up to 3 months. Thaw in the refrigerator overnight before reheating.
- Reheating: Gently reheat chicken in the oven at 300°F (150°C) until warmed through, or in a microwave for convenience, though the skin may not remain as crispy. Add a splash of broth to prevent drying out.
- Meal Prep Uses: Shredded leftover chicken is perfect for sandwiches, salads, wraps, tacos, or even a quick chicken noodle soup base.
Conclusion
Mastering the art of Roasted Chicken is a rewarding culinary journey that elevates your home cooking. With fresh herbs, zesty lemon, and a few simple steps, you can create a truly memorable meal that impresses without excessive effort. We hope this guide has empowered you to tackle this classic dish with confidence, proving that delectable Easy Chicken Recipes are well within your reach. Give it a try, share your culinary creations, and let us know how your perfect bird turns out!
FAQs
Q1: How do I get extra crispy skin?
A: Pat the chicken very dry before seasoning, use a high oven temperature (400-425°F), and ensure the chicken is on a rack so air circulates all around it. Elevating the chicken sometimes helps too.
Q2: Can I use dried herbs instead of fresh?
A: Yes, you can. As a general rule, use about one-third the amount of dried herbs compared to fresh, as their flavor is more concentrated.
Q3: What if my chicken is browning too quickly on top?
A: If the skin is getting too dark before the chicken is fully cooked, loosely tent it with aluminum foil for the remainder of the cooking time to prevent burning.
Q4: How do I know when the chicken is fully cooked?
A: The most reliable way is to use a meat thermometer. Insert it into the thickest part of the thigh, avoiding the bone. It should read 165°F (74°C). The juices should also run clear when poked.
Q5: Can I brine the chicken beforehand?
A: Absolutely! Brining can add extra moisture and flavor to the chicken. Follow your favorite brining recipe, then proceed with patting dry and seasoning as directed in this recipe.