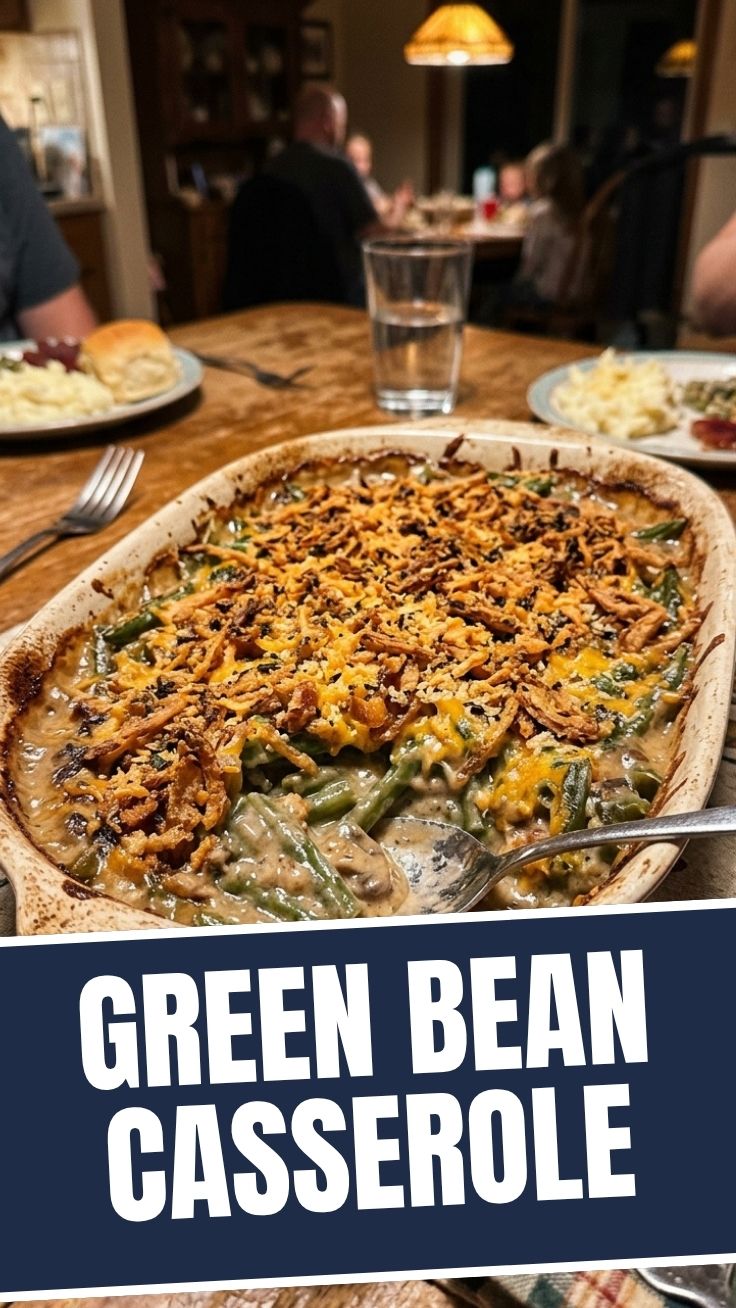
The Ultimate Homemade Green Bean Casserole: Your Holiday Table Never Looked So Good!
Ever wondered how to elevate a classic side dish from good to extraordinary? Forget the canned soup shortcuts and dive into the art of crafting a truly magnificent Green Bean Casserole from scratch. This isn’t just about combining ingredients; it’s about creating a rich, creamy, and undeniably delicious experience that will become the star of your holiday spread. Preparing this comforting dish at home offers unparalleled control over flavor and freshness, transforming humble green beans into something truly special. Let’s unlock the secrets to a casserole that will have everyone asking for seconds!
Ingredients & Kitchen Tools
Here’s everything you’ll need to create this culinary masterpiece:
- 1 ½ lbs fresh green beans, trimmed and snapped: Fresh is key for vibrant color and crisp-tender texture.
- ½ cup unsalted butter: For rich flavor and building the roux.
- ½ cup all-purpose flour: The base for our creamy sauce.
- 3 cups whole milk, warm: Adds lusciousness and helps prevent lumps in the sauce.
- 2 cups chicken broth (or vegetable broth for vegetarian): Enhances savory depth.
- 1 tsp garlic powder: Aromatic and foundational flavor.
- ½ tsp onion powder: Complements the garlic and adds savory notes.
- ½ tsp black pepper: For a touch of warmth and spice.
- 1 tsp salt (or to taste): Balances the flavors; adjust after tasting.
- ¾ cup Parmesan cheese, grated: Adds a salty, umami kick and lovely texture.
- 1 (6 oz) can crispy fried onions (plus more for topping): The quintessential crunchy topping!
- 9×13 inch baking dish: Essential for baking a casserole of this size.
- Large saucepan or Dutch oven: For blanching beans and making the sauce.
- Whisk: Crucial for achieving a smooth sauce.
- Measuring cups and spoons: For precise ingredient amounts.
Prep Time & Cooking Schedule
- Prep Time: 20 minutes (includes trimming beans and grating cheese)
- Cook Time: 30-35 minutes (includes blanching beans and baking)
- Resting Time: 10 minutes (allows the casserole to set slightly before serving)
Plan to start about an hour before you want to serve, with an additional 10 minutes for resting. This structured approach ensures a perfectly baked and easy-to-serve casserole.
Step-by-Step Instructions
1. Prepare the Green Beans: Bring a large pot of salted water to a rolling boil. Add the trimmed green beans and blanch for 3-4 minutes until bright green and crisp-tender. Immediately drain and plunge into an ice bath to stop the cooking process and preserve their vibrant color. Drain again thoroughly and set aside.
2. Make the Cream Sauce: In your large saucepan or Dutch oven, melt the butter over medium heat. Once melted, gradually whisk in the flour, creating a roux. Cook for 1-2 minutes, stirring constantly, until lightly golden and fragrant.
3. Build the Béchamel: Slowly whisk in the warm milk, a little at a time, ensuring a smooth consistency with no lumps. Continue whisking until the sauce thickens.
4. Add Flavor: Stir in the chicken broth, garlic powder, onion powder, salt, and pepper. Bring to a gentle simmer, stirring occasionally, until the sauce coats the back of a spoon. Remove from heat.
5. Incorporate Cheese and Onions: Stir in the grated Parmesan cheese until melted and smooth. Fold in half of the crispy fried onions (about 3/4 cup).
6. Combine and Bake: Gently fold the blanched green beans into the creamy sauce. Transfer the mixture to your prepared 9×13 inch baking dish.
7. Top and Finish: Bake in a preheated oven at 375°F (190°C) for 20-25 minutes, or until bubbly and heated through. Remove from the oven, sprinkle the remaining crispy fried onions evenly over the top, and return to the oven for another 5 minutes, or until the onions are golden brown. This ensures the perfect crunch for your Green Bean Casserole.
Nutritional Benefits & Advantages
Crafting this Green Bean Casserole from scratch allows you to maximize its nutritional value. Fresh green beans are an excellent source of vitamins K, C, and A, as well as fiber and folate, contributing to bone health, immune function, and digestion. By making your own sauce, you control sodium levels and avoid unnecessary additives often found in commercially prepared condensed soups, making it a healthier and more wholesome choice for your family.
Tips, Variations & Cooking Advice
- Mushroom Upgrade: Sauté 8 oz of sliced fresh mushrooms (cremini or button) with the butter before adding the flour for an earthier flavor profile.
- Cheesy Variations: Experiment with different cheeses! A blend of Gruyere or white cheddar can add fantastic depth.
- Gluten-Free: Substitute the all-purpose flour with a 1:1 gluten-free flour blend for the roux. Ensure your broth is also gluten-free.
- Dairy-Free: Use a plant-based butter, unsweetened almond or oat milk, and a dairy-free cheese alternative.
- Spicy Kick: Add a pinch of red pepper flakes to the sauce for a subtle heat.
- Crispy Topping Alternatives: Crushed Ritz crackers mixed with melted butter, or panko breadcrumbs, can offer a different textural crunch if you’re not a fan of fried onions.
Common Mistakes to Avoid
- Overcooking Green Beans: Blanched beans should be crisp-tender, not mushy. Overcooking them initially will result in an unappetizing texture after baking.
- Lumpy Sauce: Whisking constantly while adding milk to the roux and ensuring the milk is warm will prevent lumps. If lumps occur, pass the sauce through a fine-mesh sieve.
- Too Salty: Taste your sauce before adding the Parmesan and adjust salt accordingly. Remember, Parmesan is quite salty.
- Soggy Fried Onions: Adding the fried onions only in the last 5 minutes of baking (or even just before serving for ultimate crispness) prevents them from becoming soggy.
Storage & Meal Prep Tips
Leftover Green Bean Casserole can be stored in an airtight container in the refrigerator for up to 3-4 days. To reheat, cover with foil and bake at 350°F (175°C) until warmed through, then uncover for the last few minutes if you want to crisp up the topping. For best results, add fresh crispy fried onions after reheating to maintain their crunch. This dish freezes well for up to 2 months. To reheat from frozen, thaw overnight in the refrigerator, then bake as directed, or bake directly from frozen, adding an additional 15-20 minutes to the cooking time.
Conclusion
Crafting your own Green Bean Casserole from scratch is a rewarding experience that transforms this beloved side dish into a culinary triumph. By using fresh green beans and a homemade creamy sauce, you’ll achieve a depth of flavor and a texture that far surpasses any store-bought alternative. We encourage you to try this recipe for your next holiday feast or family gathering and delight in the rich, comforting taste of a truly exceptional casserole. Don’t forget to share your delicious results with us!
FAQs
1. Can I use frozen green beans? Yes, you can. Thaw them completely and pat dry before blanching for 2-3 minutes.
2. How can I make the sauce thicker or thinner? For a thicker sauce, cook it a bit longer until it reduces. For a thinner sauce, whisk in a little more warm milk or broth until desired consistency is reached.
3. My crispy fried onions got soggy. What went wrong? They were likely added too early in the baking process. Add them only for the last few minutes, or just before serving, for maximum crispness.
4. Can I assemble this casserole ahead of time? Absolutely! You can assemble the casserole (without the final topping of fried onions) up to 24 hours in advance. Cover and refrigerate, then add about 10-15 minutes to the initial baking time when you’re ready to cook, then add the onions for the last 5 minutes.
5. Is there a way to make this spicier? Add a pinch of cayenne pepper or a dash of hot sauce to the cream sauce for an extra kick.