Cracking the Code to Perfect Deviled Eggs: Your Ultimate Guide
Ever wondered how to make those irresistibly creamy, perfectly seasoned Deviled Eggs that vanish from the plate in a flash? Beyond being a classic crowd-pleaser, mastering this seemingly simple dish at home offers a world of satisfaction and customization. Forget store-bought versions; preparing your own allows you to control every nuance of flavor and texture, transforming humble eggs into sophisticated Egg appetizers that will impress without fail. This comprehensive guide will equip you with all the knowledge to create the best deviled eggs you’ve ever tasted.
Ingredients & Kitchen Tools
- 12 Large Eggs: The star of our show. Look for fresh eggs for best results.
- 1/2 cup Mayonnaise: (Full-fat recommended for creaminess, but light mayo can be substituted). The binding agent for the yolk mixture.
- 2 Teaspoons Dijon Mustard: Adds a tangy, slightly spicy kick. Yellow mustard can be used as a milder alternative.
- 1 Teaspoon White Vinegar: Brightens the flavor profile and adds a touch of acidity. Apple cider vinegar can also work.
- 1/4 Teaspoon Salt: Enhances all the other flavors. Adjust to taste.
- Pinch of Black Pepper: A subtle seasoning.
- Paprika (for garnish): Sweet or smoked paprika adds color and a delicate flavor.
- Fresh Chives or Parsley (optional, for garnish): Adds freshness and visual appeal.
- Large Pot with Lid: For boiling eggs.
- Ice Bath (large bowl with ice and water): Crucial for stopping the cooking process and making eggs easier to peel.
- Small Mixing Bowl: For the yolk mixture.
- Fork or Potato Masher: For mashing yolks.
- Rubber Spatula: For mixing and scraping.
- Piping Bag with Star Tip (optional): For a professional presentation. A spoon or Ziploc bag with a corner snipped off also works.
Prep Time & Cooking Schedule
- Prep Time: 15 minutes
- Cook Time: 10-12 minutes (for boiling eggs)
- Chill Time: 30 minutes (minimum, for flavors to meld and for easier handling)
To ensure the best results, dedicate enough time. Begin by boiling your eggs, allowing them to cool completely in an ice bath. This crucial step prevents the unsightly green ring around the yolk and makes peeling a breeze. After preparing the filling, a brief chilling period significantly enhances the flavor and makes the Deviled Eggs firmer and easier to serve. These elegant Egg appetizers truly benefit from a little patience.
Step-by-Step Instructions
1. Boil the Eggs: Carefully place eggs in a single layer in a large pot. Cover with cold water by one inch. Bring to a rolling boil over high heat, then immediately turn off the heat, cover the pot, and let stand for 10-12 minutes. This indirect cooking method prevents cracks and ensures perfectly cooked yolks.
2. Ice Bath: Immediately transfer the cooked eggs to an ice bath using a slotted spoon. This stops the cooking process and helps with easy peeling. Let them cool for at least 10 minutes.
3. Peel and Halve: Once cool, gently tap and roll each egg on a hard surface to crack the shell, then carefully peel under cool running water. Halve each egg lengthwise and gently scoop out the yolks into a small mixing bowl.
4. Make the Filling: Mash the egg yolks thoroughly with a fork or potato masher until smooth. Add the mayonnaise, Dijon mustard, white vinegar, salt, and pepper to the mashed yolks. Mix well with a rubber spatula until the mixture is creamy and lump-free. Adjust seasoning to taste – this is crucial for delicious Deviled Eggs.
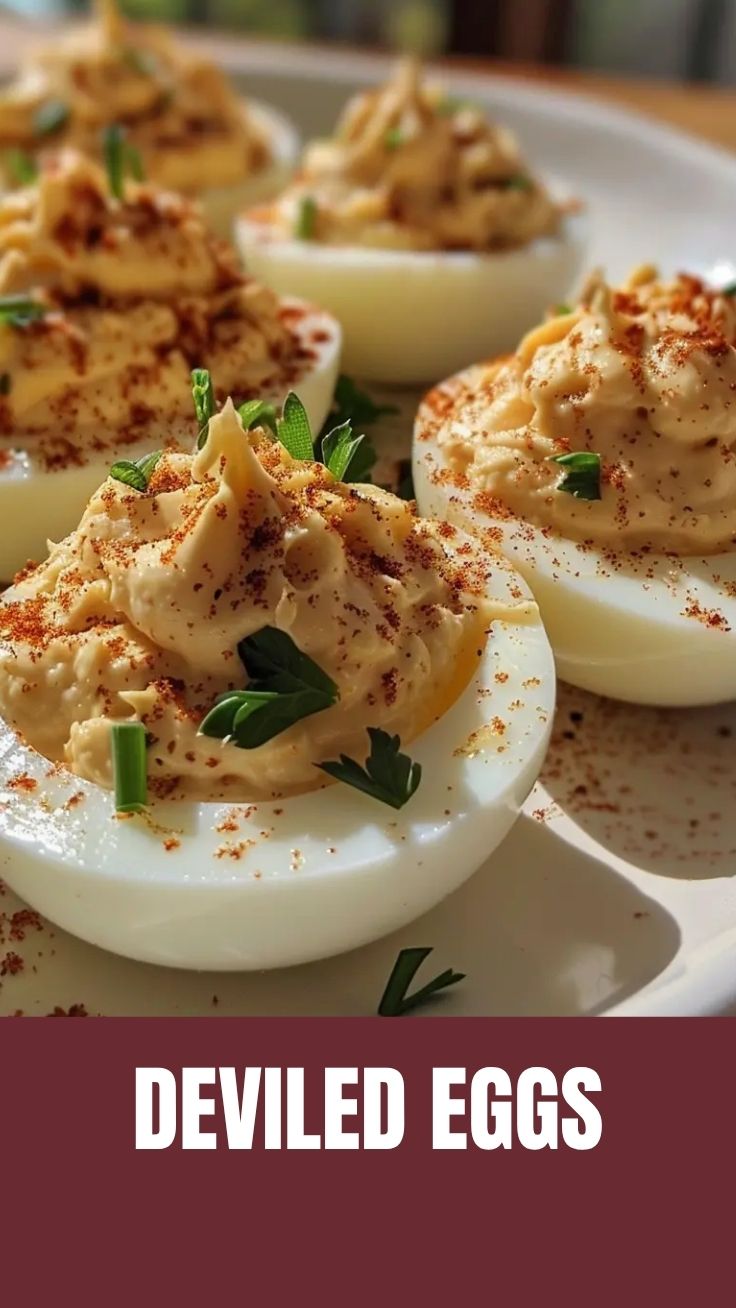
5. Fill the Whites: Spoon or pipe the yolk mixture back into the empty egg white halves. For a professional look, use a piping bag with a star tip. Otherwise, a small spoon works perfectly well. These attractive Egg appetizers are half about presentation!
6. Garnish and Chill: Sprinkle with paprika and, if desired, fresh chives or parsley. Cover and chill in the refrigerator for at least 30 minutes to allow flavors to meld.
Nutritional Benefits & Advantages
Eggs are a nutritional powerhouse, making Deviled Eggs a surprisingly beneficial treat. They are an excellent source of high-quality protein, essential for muscle repair and growth. Furthermore, eggs are packed with vitamins and minerals, including Vitamin D, Vitamin B12, selenium, and choline. Choline is vital for brain health and metabolism. While mayo adds calories, opting for healthy fats and controlling portion sizes ensures you reap the benefits without overindulging.
Tips Variations & Cooking Advice
- Spice It Up: Add a dash of hot sauce, a pinch of cayenne pepper, or a finely minced jalapeño to the yolk mixture for a spicy kick.
- Herbaceous Delight: Incorporate finely chopped fresh herbs like dill, chives, parsley, or tarragon for different flavor profiles.
- Smoky Twist: A hint of smoked paprika or even a tiny amount of liquid smoke can add a delicious depth.
- Cream Cheese Boost: For extra creaminess, sometimes a tablespoon of softened cream cheese can be added to the yolk mixture.
- Gluten-Free/Dairy-Free: This recipe is naturally gluten-free. For dairy-free, ensure your mayonnaise is dairy-free (most are, but always check labels).
- Perfectly Yellow Yolks: Always use an ice bath immediately after boiling to prevent the greenish-gray ring around the yolk.
Common Mistakes to Avoid
- Overcooking Eggs: Leads to rubbery whites and that unsightly green ring around the yolk. Stick to the timing!
- Underseasoning: Bland deviled eggs are a missed opportunity. Taste the yolk mixture before filling and adjust salt, pepper, and mustard as needed.
- Warm Eggs: Trying to peel or mash warm eggs is a messy endeavor. Always cool them completely in an ice bath.
- Ignoring the Vinegar: While a small amount, vinegar is crucial for balancing the richness and brightening the overall flavor.
- Lack of Presentation: While taste is paramount, deviled eggs are visually appealing. A sprinkle of paprika is a minimum.
Storage & Meal Prep Tips
Store Deviled Eggs in an airtight container in the refrigerator for up to 2-3 days. Do not freeze deviled eggs, as the texture of the whites will become rubbery and unappetizing upon thawing. If packing for a picnic or potluck, keep them chilled in a cooler with ice packs until serving. For meal prep, boiling and peeling the eggs ahead of time can significantly cut down on preparation when you’re ready to assemble.
Conclusion
Mastering the art of Deviled Eggs is a skill every home cook should possess. With fresh ingredients, careful technique, and a little creativity, you can transform simple eggs into an unforgettable culinary experience appropriate for any gathering. Whether you prefer a classic rendition or like to experiment with bold new flavors, these versatile Egg appetizers are guaranteed to be a hit. So go ahead, crack those shells, and let your inner chef shine! We’d love to see your creations – share your results and favorite variations in the comments below!
FAQs
Q1: How do I get perfectly peeled eggs every time?
A1: The key is immediate transfer to an ice bath after boiling. The sudden temperature change helps the shell separate from the membrane. Peeling under running water also assists.
Q2: Can I make the yolk filling ahead of time?
A2: Yes, you can mix the yolk filling up to 24 hours in advance and store it in an airtight container in the refrigerator. Fill the egg whites just before serving for best results.
Q3: What if I don’t have Dijon mustard?
A3: Yellow mustard can be used as a milder substitute, though it will impart a slightly different flavor profile. Start with a smaller amount and adjust to taste.
Q4: My deviled egg filling is too thick/thin. How can I fix it?
A4: If it’s too thick, add a tiny bit more mayonnaise or a splash of water/milk until desired consistency. If it’s too thin, you might need to add a bit more mashed yolk (if available) or breadcrumbs, though this can alter the texture.