The Secret to Perfect Chocolate Chip Cookies: A Home Baker’s Guide
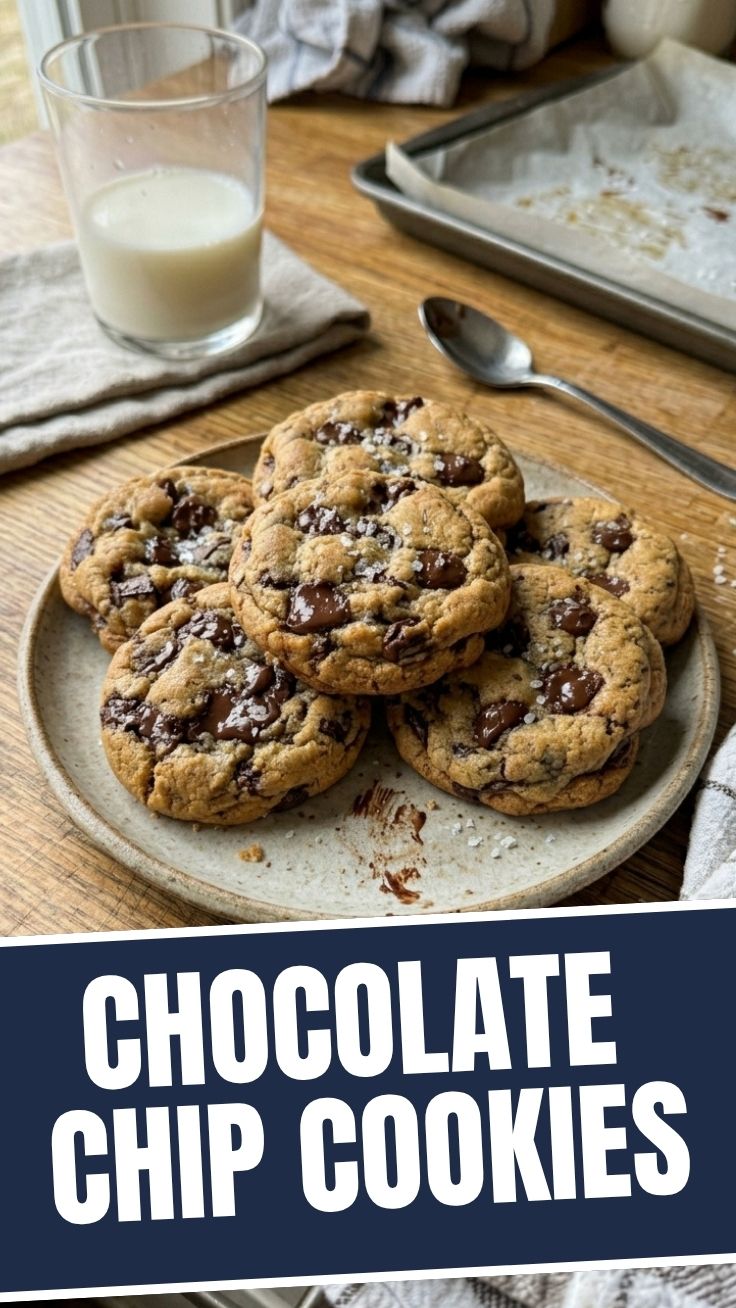
Have you ever wondered what truly makes a chocolate chip cookie irresistible? Is it the crisp edges, the chewy center, or those melted pockets of chocolate bliss? For many, the simple joy of biting into a freshly baked cookie is unparalleled, and preparing this beloved treat at home allows for a level of customization and freshness that store-bought options simply can’t match. Today, we’re diving deep into crafting the ultimate batch of Chocolate Chip Cookies – a timeless classic that brings warmth and happiness to any kitchen. This comprehensive guide will equip you with all the knowledge to master this delightful Chocolate Chip Cookie Recipe, ensuring each bite is pure perfection.
Ingredients & Kitchen Tools
To embark on your cookie-baking adventure, gather these essential items:
- 2 ¼ cups All-Purpose Flour: The structural backbone of your cookies. Measured precisely.
- 1 teaspoon Baking Soda: Helps them rise and achieve that soft, chewy texture.
- 1 teaspoon Salt: Balances sweetness and enhances flavor. A crucial, often underestimated ingredient.
- 1 cup (2 sticks) Unsalted Butter, softened: Gives richness and moisture. Softened to room temperature for proper creaming.
- ¾ cup Granulated Sugar: Provides sweetness and contributes to browning.
- ¾ cup Packed Light Brown Sugar: Adds moisture, chewiness, and a subtle caramel note.
- 2 large Eggs: Binds the ingredients and adds structure. Room temperature eggs emulsify better.
- 1 teaspoon Vanilla Extract: Essential for that classic cookie flavor. Pure extract is best.
- 2 cups Semi-Sweet Chocolate Chips: The star of the show! Feel free to mix with milk or dark chocolate for variety.
- Optional: ½ cup Chopped Nuts (walnuts, pecans): For added crunch and flavor variation.
Kitchen Tools:
- Large Mixing Bowls: For combining wet and dry ingredients.
- Electric Mixer (stand or hand-held): Makes creaming butter and sugars much easier.
- Measuring Cups & Spoons: Accuracy is key in baking!
- Rubber Spatula: For scraping bowls and folding.
- Baking Sheets: Light-colored sheets prevent over-browning on the bottom.
- Parchment Paper or Silicone Baking Mats: Prevents sticking and ensures even baking.
- Wire Rack: For cooling cookies completely.
Prep Time & Cooking Schedule
- Prep Time: 15-20 minutes
- Chill Time (Optional, but recommended): 30 minutes to 24 hours (chilling the dough deepens flavor and prevents spreading)
- Cook Time: 9-12 minutes per batch
Plan for approximately 15-20 minutes of active preparation. If you opt for chilling your dough (highly recommended for superior flavor and texture), factor in an additional 30 minutes to 24 hours in the refrigerator. This rest period allows the flavors to meld and the butter to firm up, resulting in a chewier cookie. Cooking time per batch is relatively quick, so ensure your oven is preheated and your baking sheets are ready.
Step-by-Step Instructions
1. Preheat & Prepare: Preheat your oven to 375°F (190°C). Line baking sheets with parchment paper or silicone mats.
2. Combine Dry Ingredients: In a medium bowl, whisk together the flour, baking soda, and salt. Set aside.
3. Cream Wet Ingredients: In a large bowl, using an electric mixer, cream together the softened butter, granulated sugar, and brown sugar on medium speed until light and fluffy, about 2-3 minutes. This aeration is crucial for the texture of your Chocolate Chip Cookies.
4. Add Eggs & Vanilla: Beat in the eggs one at a time, mixing well after each addition. Stir in the vanilla extract until just combined.
5. Gradually Add Dry to Wet: Gradually add the dry ingredient mixture to the wet ingredients, mixing on low speed until just combined. Be careful not to overmix; over-developing the gluten can lead to tough cookies.
6. Fold in Chips: Stir in the chocolate chips (and any optional nuts) until evenly distributed throughout the dough.
7. Chill (Optional, but recommended): Cover the dough and refrigerate for at least 30 minutes, or up to 24 hours. This significantly improves the flavor and texture of your Chocolate Chip Cookie Recipe.
8. Scoop & Bake: Drop rounded tablespoons of dough onto the prepared baking sheets, spacing them about 2 inches apart.
9. Bake: Bake for 9-12 minutes, or until the edges are golden brown and the centers are still slightly soft.
10. Cool: Let the cookies cool on the baking sheets for 2-3 minutes before transferring them to a wire rack to cool completely.
Nutritional Benefits & Advantages
While often seen as an indulgence, homemade chocolate chip cookies can offer some surprising benefits when enjoyed in moderation. The dark chocolate chips provide antioxidants, which help combat free radicals in the body. Furthermore, the act of baking itself can be a therapeutic and rewarding experience, contributing to mental well-being. Using real butter and quality ingredients means you’re avoiding artificial flavors or preservatives often found in commercial products, giving you more control over what you consume.
Tips, Variations & Cooking Advice
- Brown Butter: For a richer, nuttier flavor, brown your butter before adding it to the recipe. Cool it slightly before creaming with sugars.
- Salt Sprinkle: A pinch of flaky sea salt sprinkled on top of the cookies right after they come out of the oven enhances the sweetness of the chocolate.
- Mix-ins: Experiment with different types of chocolate (milk, dark, white, chocolate chunks), nuts (pecans, walnuts, macadamia), or even dried fruits.
- Gluten-Free Version: Substitute the all-purpose flour with a 1:1 gluten-free baking flour blend.
- Dairy-Free Option: Use a high-quality plant-based butter alternative and dairy-free chocolate chips.
- Size Matters: For uniform cookies, use a cookie scoop. For giant cookies, increase baking time slightly.
Common Mistakes to Avoid
- Over-mixing the Dough: Leads to tough, cakey cookies. Mix until just combined.
- Using Melted Butter: Softened, not melted, butter is crucial for proper creaming and texture.
- Over-baking: Cookies should look slightly underdone in the center when removed from the oven; they will continue to cook on the hot baking sheet.
- Not Chilling the Dough: Skipping this step can lead to flat, overly spread-out cookies with less developed flavor.
- Crowding the Baking Sheet: Gives uneven baking and can cause cookies to merge.
Storage & Meal Prep Tips
Store leftover cookies in an airtight container at room temperature for up to 3-4 days. To maintain freshness longer, you can freeze baked cookies for up to 2-3 months. Wrap them tightly in plastic wrap and then place them in a freezer-safe bag or container. Thaw at room temperature. You can also freeze unbaked cookie dough balls. Place scooped dough balls on a parchment-lined tray and freeze until solid, then transfer to a freezer-safe bag. Bake from frozen, adding an extra 2-3 minutes to the baking time.
Conclusion
Mastering the art of baking perfect Chocolate Chip Cookies is a truly rewarding endeavor. This guide, focusing on a superb Chocolate Chip Cookie Recipe, has provided you with all the necessary steps, tips, and insights to create a batch that will impress everyone. So, preheat your oven, gather your ingredients, and enjoy the delicious journey of creating these timeless treats. Don’t hesitate to experiment with variations and make this recipe your own!
FAQs
Q1: Why are my cookies flat and greasy?
A1: This often happens if your butter was too warm, if you didn’t chill your dough, or if your oven temperature was too low. Ensure butter is softened, not melted, and always chill your dough for best results.
Q2: Can I use self-rising flour instead of all-purpose flour?
A2: It’s not recommended as self-rising flour already contains baking powder and salt, which can interfere with the leavening proportions in this recipe. Stick to all-purpose flour and add baking soda and salt separately.
Q3: How do I get chewy centers and crispy edges?
A3: The combination of brown sugar for chewiness and white sugar for crispiness, along with not over-baking and a good chill time for the dough, will achieve this ideal texture.
Q4: Can I make the dough ahead of time?
A4: Absolutely! The dough can be stored in the refrigerator for up to 3 days, or frozen for several weeks. Baking from chilled or frozen dough often results in even more flavorful cookies.
Q5: What’s the best type of chocolate to use?
A5: Semi-sweet chocolate chips are classic, but a mix of semi-sweet and milk chocolate, or even dark chocolate chunks, can elevate the flavor profile. Choose good quality chocolate for the best taste experience.