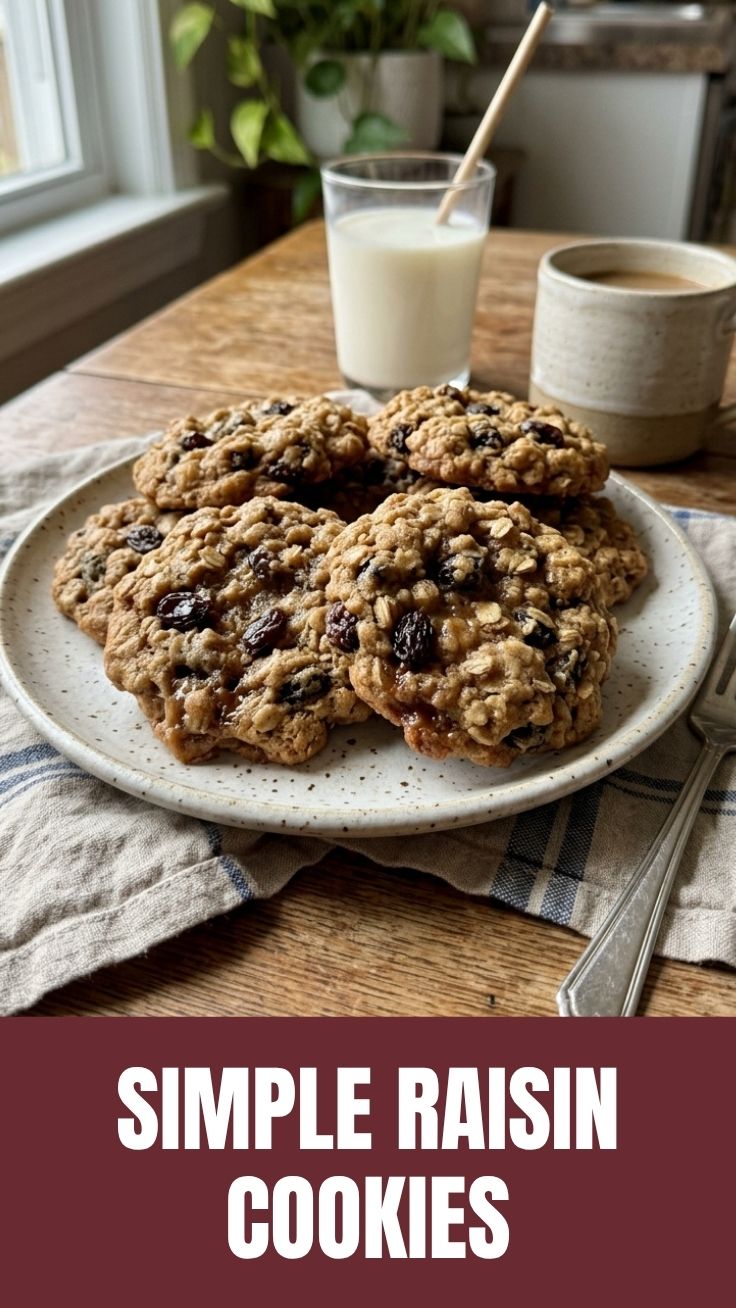
Unlocking the Secret to Perfect Oatmeal Raisin Cookies: Your Ultimate Guide
Ever wondered how to bake Oatmeal Raisin Cookies that are perfectly chewy, delightfully spiced, and bursting with plump, sweet raisins? Forget store-bought imitations; crafting these comforting treats at home isn’t just about saving money, it’s about infusing love and quality into every bite. Mastering this classic isn’t as daunting as it seems, and with our comprehensive guide, you’ll be whipping up batches of these timeless favorites in no time, easily surpassing any other cookie recipes you’ve tried. This post will transform your kitchen into a bakery of delicious possibilities.
Ingredients & Kitchen Tools
Crafting the perfect batch of Oatmeal Raisin Cookies requires a thoughtful selection of ingredients and the right tools. Here’s what you’ll need:
- 1 cup (2 sticks) Unsalted Butter, softened: Essential for tenderness and flavor. Softened butter creams easily with sugar.
- 1 cup Packed Light Brown Sugar: Provides a deep, molasses-like sweetness and contributes to the chewy texture.
- ½ cup Granulated Sugar: Balances the sweetness and helps with crisp edges.
- 2 Large Eggs: Bind the ingredients together and add moisture.
- 1 teaspoon Vanilla Extract: Enhances all the other flavors. Use pure vanilla for best results.
- 1 ½ cups All-Purpose Flour: The structural base of the cookies.
- 1 teaspoon Baking Soda: A leavening agent that helps the cookies rise and spread.
- ½ teaspoon Salt: Balances sweetness and enhances flavor.
- 1 teaspoon Ground Cinnamon: The quintessential spice for oatmeal cookies, adding warmth and aroma.
- ¼ teaspoon Ground Nutmeg (optional): A subtle addition that deepens the spice profile.
- 3 cups Rolled Oats (Old-Fashioned Oats): The star ingredient, providing the characteristic chewy texture. Avoid instant oats.
- 1 ½ cups Raisins: Plump dried grapes that add bursts of sweetness and chewiness. You can pre-soak them in warm water for 10 minutes then drain for extra plumpness.
Kitchen Tools:
- Large Mixing Bowls (2): For wet and dry ingredients.
- Electric Mixer (Stand or Handheld): For creaming butter and sugar efficiently. A whisk can work, but it’s more effort.
- Rubber Spatula: For scraping down bowls and folding ingredients.
- Measuring Cups & Spoons: For accurate ingredient measurements.
- Baking Sheets: Large, flat metal pans for baking the cookies.
- Parchment Paper or Silicone Baking Mats: Prevents sticking and ensures even baking.
- Wire Cooling Racks: Allows cookies to cool evenly and prevents sogginess.
- Cookie Scoop (1.5-2 tablespoon size): Ensures uniform cookie size for even baking.
Prep Time & Cooking Schedule
Prep Time: 20 minutes
Chill Time: 30 minutes (optional, but highly recommended for better texture)
Cook Time: 10-12 minutes per batch
Resting Time: 5 minutes on the baking sheet, 15 minutes on a wire rack
Allowing for the optional chill time helps the butter solidify, preventing excessive spreading and ensuring thicker, chewier cookies. Planning for multiple batches is key, especially if you’re making a larger quantity, as most ovens can only accommodate one baking sheet at a time for optimal airflow and even baking.
Step-by-Step Instructions
1. Prep the Oven & Baking Sheets: Preheat your oven to 375°F (190°C). Line several baking sheets with parchment paper or silicone mats. This prevents sticking and makes cleanup a breeze.
2. Combine Dry Ingredients: In a medium bowl, whisk together the all-purpose flour, baking soda, salt, ground cinnamon, and nutmeg (if using). Set aside.
3. Cream Wet Ingredients: In a large mixing bowl, using an electric mixer, cream together the softened unsalted butter, light brown sugar, and granulated sugar on medium speed until light and fluffy, about 2-3 minutes. This aeration is crucial for a tender crumb.
4. Add Eggs & Vanilla: Beat in the eggs one at a time, mixing well after each addition. Stir in the vanilla extract until just combined. Scrape down the sides of the bowl to ensure everything is incorporated.
5. Incorporate Dry Mix: Gradually add the dry ingredient mixture to the wet ingredients, mixing on low speed until just combined. Be careful not to overmix, as this can lead to tough cookies.
6. Fold in Oats & Raisins: Remove the bowl from the mixer and, using a rubber spatula, fold in the rolled oats and raisins until evenly distributed. This ensures that every bite of your Oatmeal Raisin Cookies is packed with flavor and texture.
7. Chill (Optional but Recommended): Cover the dough and refrigerate for at least 30 minutes. This step helps the flavors meld and prevents the cookies from spreading too thin, resulting in a chewier texture.
8. Scoop & Bake: Drop rounded tablespoons of dough (or use a cookie scoop) onto the prepared baking sheets, leaving about 2 inches between cookies.
9. Bake: Bake for 10-12 minutes, or until the edges are golden brown and the centers are set but still slightly soft. Ovens vary, so keep a close eye on them. Overbaking can lead to dry cookies.
10. Cool: Remove the baking sheets from the oven and let the cookies cool on the sheets for 5 minutes before transferring them to a wire rack to cool completely. Resist the urge to move them too soon; they firm up as they cool. Compared to many other cookie recipes, this cooling process is essential for the ideal chewy consistency.
Nutritional Benefits & Advantages
Beyond their incredible taste, these Oatmeal Raisin Cookies offer several nutritional advantages. Rolled oats are an excellent source of dietary fiber, particularly beta-glucan, which is known to help lower cholesterol levels and promote gut health. They also provide sustained energy release, making these cookies a more satisfying treat than those made with refined flours. Raisins contribute natural sweetness, iron, potassium, and antioxidants. While still a dessert, incorporating oats and fruit makes these a slightly more wholesome choice compared to many other indulgent cookie recipes.
Tips, Variations & Cooking Advice
- Spice It Up: Experiment with additional spices like ground cloves, allspice, or a touch of cardamom for a more complex flavor profile.
- Add Nuts: Toasted chopped walnuts or pecans can add a delightful crunch and nutty flavor.
- Chocolate Chips: For a twist, add white chocolate chips or dark chocolate chunks alongside or in place of some raisins.
- Gluten-Free: Use certified gluten-free rolled oats and a 1:1 gluten-free baking flour blend for a gluten-friendly version.
- Dairy-Free: Swap butter for a high-quality dairy-free butter alternative.
- Soak Raisins: If your raisins are a bit dry, soak them in warm water or even a splash of rum for 10 minutes before draining and adding to the dough. This makes them extra plump and juicy.
- Don’t Overmix: Overmixing develops gluten in the flour, leading to tough cookies. Mix until just combined.
- Chill the Dough: As mentioned, chilling is crucial for flavor development, less spread, and a chewier texture.
Common Mistakes to Avoid
- Overbaking: This is the most common mistake with oatmeal cookies. They should look slightly underdone in the middle when you pull them out; they will continue to cook on the hot baking sheet.
- Using Instant Oats: Instant oats are highly processed and absorb liquid too quickly, resulting in a mushy texture rather than the desired chewiness. Stick to old-fashioned rolled oats.
- Warm Butter: Using melted or overly warm butter will cause the cookies to spread excessively, resulting in thin, crispy cookies instead of chewy ones. Ensure your butter is softened, not melted.
- Not Lining Baking Sheets: Bare baking sheets can cause cookies to stick and burn, making removal difficult. Always use parchment paper or silicone mats.
Storage & Meal Prep Tips
Storage: Once completely cooled, store Oatmeal Raisin Cookies in an airtight container at room temperature for up to 3-5 days. If you want to keep them longer, add a slice of bread to the container; it helps keep them soft.
Freezing Baked Cookies: You can freeze cooled cookies in a freezer-safe container or bag for up to 3 months. Thaw at room temperature or gently warm in the microwave.
Freezing Dough: For easy meal prep, scoop the cookie dough onto a parchment-lined baking sheet and freeze until solid. Transfer the frozen dough balls to a freezer bag. When ready to bake, place frozen dough balls on a baking sheet and add 2-3 minutes to the baking time. This is a fantastic way to have fresh, warm cookies anytime!
Conclusion
Mastering these delicious Oatmeal Raisin Cookies offers a rewarding experience, elevating a classic treat from good to extraordinary. With the right ingredients, precise steps, and a few clever tips, you can consistently bake cookies that are perfectly chewy, perfectly spiced, and utterly irresistible. Don’t let the thought of baking intimidate you; follow this guide and discover the joy of homemade goodness. Give these amazing cookie recipes a try, share your delightful results, and let us know your favorite variations in the comments below!
FAQs
Q1: Can I use quick oats instead of rolled oats?
A1: While technically possible, we highly recommend using old-fashioned rolled oats for the best texture. Quick oats are more processed and will result in a less chewy, almost mushy cookie.
Q2: My cookies spread too much. What went wrong?
A2: Common culprits include using butter that was too warm or melted, not chilling the dough (if you opted for this step), or having an oven that isn’t at the correct temperature. Ensure butter is softened, not melted, and consider chilling your dough for at least 30 minutes.
Q3: How do I make my raisins extra plump?
A3: To plump up dried raisins, soak them in warm water, juice, or even rum for about 10-15 minutes before draining thoroughly and adding them to the dough. This adds moisture and enhances their flavor.
Q4: Can I reduce the sugar content?
A4: You can slightly reduce the total sugar by about ¼ cup without significantly impacting texture. However, sugar plays a vital role in both sweetness and structure, so drastic reductions may alter the cookies.
Q5: What’s the secret to getting a chewy cookie?
A5: Key factors for a chewy cookie are using brown sugar (which contains molasses), not overmixing the dough, using rolled oats, and most importantly, not overbaking them. Pull them from the oven when the edges are set and golden, but the centers still look slightly soft. They will firm up as they cool.