The Irresistible Charm of Homemade Frosted Sugar Cookies: Your Ultimate Guide
Ever wondered how to bake those perfectly soft, beautifully frosted cookies that taste as good as they look? There’s an undeniable magic to homemade Sugar Cookies with Frosting, a warmth and personalization that store-bought versions simply can’t replicate. Preparing them yourself allows for endless creativity, from custom shapes to vibrant decorations, making every batch a unique expression of your baking skills. This comprehensive guide will walk you through every step to achieve bakery-quality results right in your own kitchen, ensuring your Sugar Cookie Recipe becomes an instant classic in your repertoire.
Ingredients & Kitchen Tools
Crafting the perfect batch requires precise measurements and the right equipment. Here’s what you’ll need:
- Unsalted Butter (2 sticks/1 cup, softened): Essential for tender, flavorful cookies. Using unsalted allows you to control the salt content.
- Granulated Sugar (1 cup): Provides sweetness and a delicate crispness.
- Large Egg (1): Binds ingredients, adding richness and structure.
- Vanilla Extract (1 tsp): A foundational flavor enhancer. Don’t skip it!
- All-Purpose Flour (2 ¾ cups): The primary structural component. Sift it for airiness.
- Baking Powder (1 tsp): Helps the cookies rise slightly and achieve a softer texture.
- Salt (¼ tsp): Balances sweetness and enhances other flavors.
- Powdered Sugar (4 cups, for frosting): Creates a smooth, lump-free frosting.
- Milk (4-6 tbsp, for frosting): Thins the frosting to the desired consistency. Use whole milk for richness.
- Measuring Cups and Spoons: Accuracy is key in baking.
- Electric Mixer (stand or hand-held): For creaming butter and sugar, and whipping frosting.
- Large Mixing Bowls (2): One for dry, one for wet ingredients, and one for frosting.
- Rolling Pin: For achieving uniform cookie thickness.
- Cookie Cutters: Your choice of shapes!
- Baking Sheets: Non-stick or lined with parchment paper.
- Parchment Paper: Prevents sticking and makes cleanup a breeze.
- Spatula/Offset Spatula: For transferring cookies and spreading frosting.
- Wire Rack: For cooling cookies completely.
Prep Time & Cooking Schedule
- Prep Time: 30 minutes (for dough and frosting)
- Chill Time: 1-2 hours (essential for firm, rollable dough)
- Cook Time: 8-10 minutes per batch
- Cooling Time: 15-20 minutes
- Total Time: Approximately 2.5 – 3 hours (active and passive)
Plan to start your dough well in advance to allow for proper chilling. This is crucial for preventing the cookies from spreading too much in the oven and helps them hold their shape.
Step-by-Step Instructions
Let’s get baking! Follow these steps for perfect Sugar Cookies with Frosting every time.
1. Cream Butter and Sugar: In a large bowl, using an electric mixer, cream together the softened butter and granulated sugar until light and fluffy (about 2-3 minutes). This incorporates air, contributing to a tender cookie.
2. Add Wet Ingredients: Beat in the egg and vanilla extract until well combined, scraping down the sides of the bowl as needed.
3. Combine Dry Ingredients: In a separate medium bowl, whisk together the flour, baking powder, and salt.
4. Gradually Add Dry to Wet: Slowly add the dry ingredients to the wet ingredients, mixing on low speed until just combined. Be careful not to overmix, as this can lead to tough cookies. The dough will be thick.
5. Chill the Dough: Divide the dough in half, flatten each half into a disk, wrap tightly in plastic wrap, and refrigerate for at least 1-2 hours. This step is vital for easy rolling and to prevent spreading.
6. Preheat Oven & Prepare Work Surface: Preheat your oven to 375°F (190°C) and line baking sheets with parchment paper. Lightly flour a clean work surface.
7. Roll and Cut Cookies: Take one dough disk from the fridge. On the floured surface, roll the dough to about ¼ inch thickness. Use your favorite cookie cutters to cut out shapes. Gently transfer cookies to the prepared baking sheets. Reroll scraps and cut more cookies until all dough is used.
8. Bake: Bake for 8-10 minutes, or until the edges are lightly golden. The cookies should still look slightly soft in the center.
9. Cool: Let cookies cool on the baking sheet for 5 minutes before transferring them to a wire rack to cool completely.
10. Prepare the Frosting: While cookies cool, make the frosting. In a medium bowl, whisk together the powdered sugar and 4 tablespoons of milk until smooth. Add more milk, one tablespoon at a time, until you reach your desired consistency – thick enough to spread but thin enough to be smooth. Add a touch of vanilla extract for extra flavor. You now have a fantastic base for your Sugar Cookie Recipe.
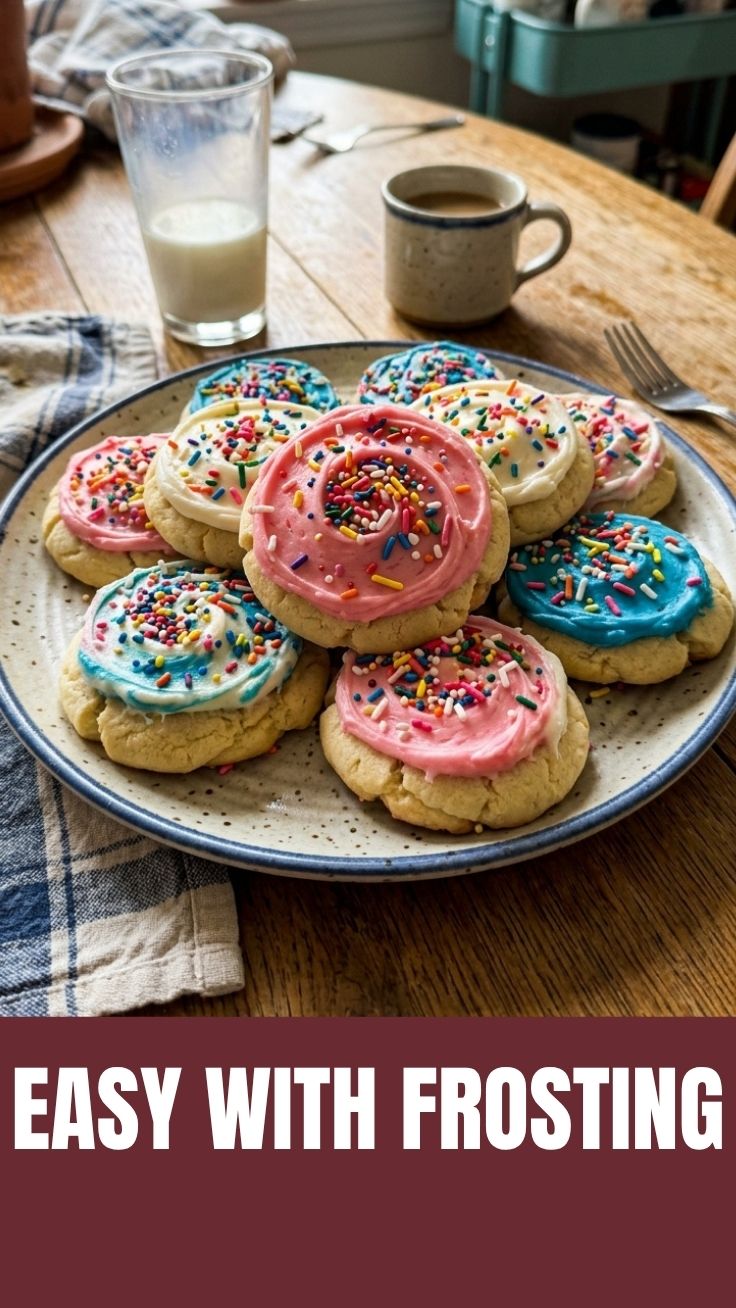
11. Frost & Decorate: Once cookies are completely cool, spread frosting evenly over each cookie. Decorate with sprinkles or edible glitter as desired. Allow frosting to set before stacking.
Nutritional Benefits & Advantages
While often seen as an indulgence, homemade sugar cookies can offer small advantages. The use of real butter provides a source of healthy fats and fat-soluble vitamins (A, D, E, K). They also offer a quick energy boost from carbohydrates. When made at home, you control the quality of ingredients, avoiding artificial flavors and preservatives often found in store-bought options. Plus, the act of baking can be a therapeutic and rewarding experience, boosting mood and fostering creativity.
Tips Variations & Cooking Advice
- Flavor Boosts: Add almond extract, lemon zest, or a pinch of nutmeg to the dough for different flavor profiles.
- Gluten-Free: Substitute the all-purpose flour with a 1:1 gluten-free baking mix. You might need to add an extra tablespoon or two of milk to the dough.
- Dairy-Free: Use plant-based butter (like vegan butter sticks) and plant-based milk (almond, oat) in both the cookies and frosting.
- Royal Icing: For detailed decorations and a harder finish, consider using royal icing instead of buttercream.
- Thick vs. Thin: For crispier cookies, roll the dough thinner (⅛ inch). For softer, chewier cookies, roll slightly thicker (3/8 inch).
- Cookie “Sandwiches”: Sandwich two cookies with a dollop of frosting in between for an extra decadent treat.
Common Mistakes to Avoid
- Overmixing the Dough: This develops gluten, leading to tough, chewy cookies. Mix until just combined.
- Not Chilling the Dough: Warm dough spreads excessively in the oven, losing its shape. Don’t skip the chill time!
- Over-flouring the Surface: Too much flour can make the cookies dry and dense. Use just enough to prevent sticking.
- Baking Too Long: Overbaked cookies are hard and dry. Pull them out when the edges are barely golden. They will continue to set as they cool.
- Frosting Warm Cookies: The frosting will melt and slide off if applied to warm cookies. Ensure they are completely cool.
Storage & Meal Prep Tips
Store leftover frosted sugar cookies in an airtight container at room temperature for up to 3-4 days. If your frosting uses a lot of dairy, or if your kitchen is very warm, consider refrigerating them. Unfrosted cookies can be stored in an airtight container for up to a week.
For meal prepping or future use, unbaked cookie dough can be wrapped tightly in plastic wrap and stored in the refrigerator for up to 3 days, or frozen for up to 3 months. Thaw frozen dough in the refrigerator overnight before rolling and baking. Baked unfrosted cookies can also be frozen in an airtight container for up to 2 months; thaw at room temperature before frosting.
Conclusion
Mastering the art of homemade Sugar Cookies with Frosting is an incredibly rewarding endeavor. With the right techniques and a touch of creativity, you can whip up batches of these delightful treats that are sure to impress. We hope this comprehensive guide inspires you to dive into your kitchen and perfect your very own Sugar Cookie Recipe. Don’t hesitate to experiment with flavors and decorations—the possibilities are endless! Share your creations with us in the comments below!
FAQs
Q1: Can I make the cookie dough ahead of time?
A1: Absolutely! You can make the dough up to 3 days in advance and store it tightly wrapped in the refrigerator. You can also freeze it for up to 3 months.
Q2: My cookies are spreading too much. What went wrong?
A2: The most common culprit is insufficient chilling time. Ensure your dough is thoroughly chilled (at least 1-2 hours). Also, make sure your butter wasn’t too soft when you started, as this can affect dough consistency.
Q3: How can I make my frosting thicker or thinner?
A3: To thicken frosting, gradually whisk in more powdered sugar. To thin it, add milk a teaspoon at a time until you reach your desired consistency.
Q4: Can I use salted butter instead of unsalted?
A4: Yes, but omit the added salt in the recipe to prevent the cookies from becoming too salty. If you do use salted butter and keep the salt, ensure it’s a very light pinch.