Unleash the Fiesta: Your Ultimate Guide to a Homemade Seven Layer Dip Masterpiece!
Ever wonder what makes a gathering truly unforgettable? Often, it’s the simple joy of sharing delicious, homemade food. And when it comes to crowd-pleasing appetizers, few dishes rival the vibrant layers and irresistible flavors of a perfectly crafted Seven Layer Dip. Forget bland, store-bought versions; preparing this iconic dip at home is not only incredibly rewarding but also allows you to customize every single layer to perfection. It’s an ideal centerpiece for any party, a guaranteed hit that brings smiles and satisfied murmurs. This blog post will guide you through creating a dip that’s bursting with fresh ingredients, a true celebration of Tex-Mex appetizers, and a testament to your culinary prowess.
Ingredients & Kitchen Tools
Gather your culinary arsenal for this delightful dip!
- Refried Beans (1 can, 16 oz): Creamy base. Opt for fat-free or vegetarian versions if preferred.
- Sour Cream (16 oz): Tangy, cooling layer. Greek yogurt is a healthier alternative.
- Taco Seasoning (1 packet, 1 oz): Adds authentic Tex-Mex flavor. Adjust to your spice preference.
- Avocados (2-3 ripe): Essential for fresh guacamole. Look for slightly soft avocados.
- Lime Juice (1-2 tbsp): Prevents avocado browning and adds zest. Freshly squeezed is best.
- Salsa (1 cup): A vibrant, flavorful layer. Choose your favorite mild, medium, or hot salsa.
- Cheddar Cheese (2 cups, shredded): Melty, savory goodness. Mexican blend cheese also works well.
- Black Olives (1 can, 2.25 oz, sliced): Briny addition for color and flavor.
- Green Onions (2-3, chopped): Fresh, mild onion flavor and garnish.
- Jalapeños (1-2, sliced, optional): For an extra kick. Remove seeds for less heat.
- Tortilla Chips or Crudités: For dipping!
Kitchen Tools:
- 9×13 inch Baking Dish or Large Serving Platter: For layering and serving.
- Mixing Bowls (2-3): For preparing individual layers.
- Spatula or Spreading Knife: For smooth, even layers.
- Potato Masher or Fork: For mashing avocados.
- Can Opener: For beans and olives.
- Knife and Cutting Board: For chopping vegetables.
Prep Time & Cooking Schedule
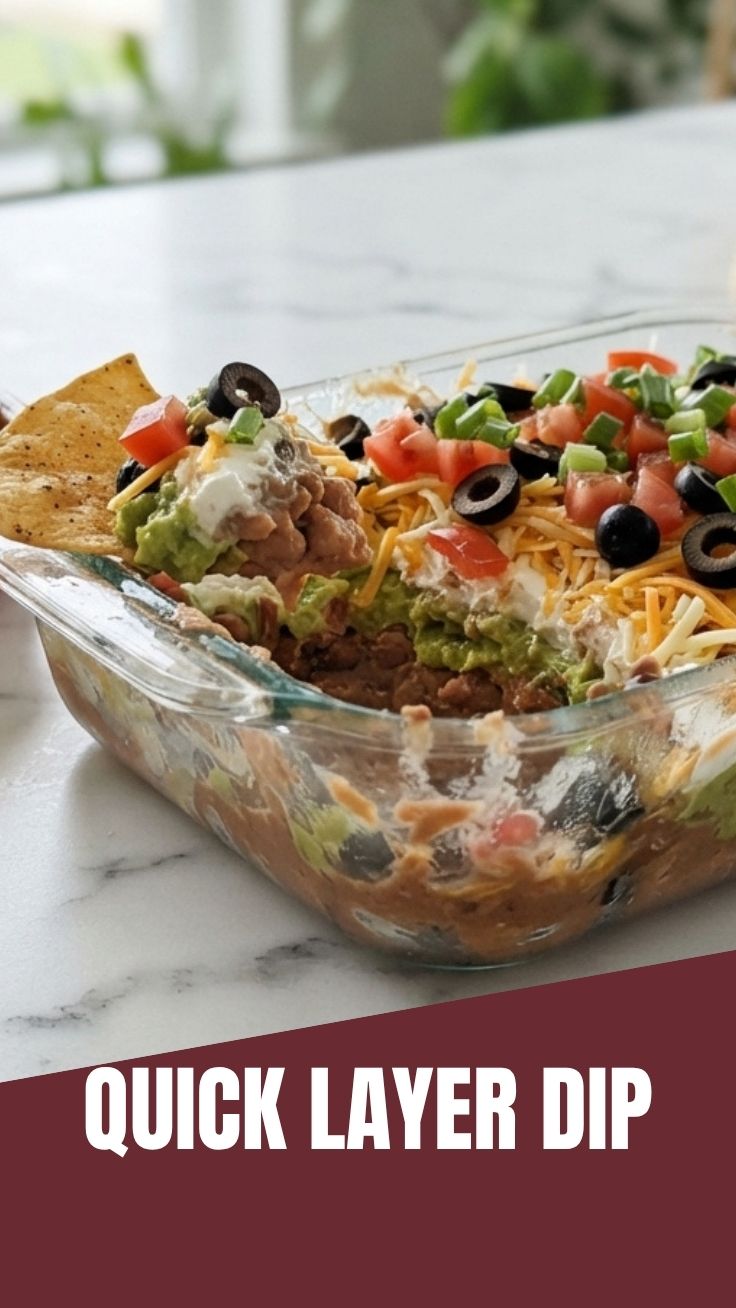
This recipe is a marvel of efficiency!
- Prep Time: 20-25 minutes
- Chill Time: 30 minutes (minimum, for flavors to meld and layers to set)
- Total Time: 50-55 minutes
This dip requires no cooking, making it an ideal last-minute appetizer. The chill time is crucial to allow the flavors to marry and prevent the layers from bleeding into each other too much when served. Plan to prepare it at least 30 minutes before serving, or even a few hours in advance for optimal flavor development.
Step-by-Step Instructions
Let’s build your magnificent Seven Layer Dip!
1. Prepare the Bean Layer: Spread the refried beans evenly as the first layer in your serving dish. This forms the foundational base of your dip.
2. Season the Sour Cream: In a mixing bowl, combine the sour cream and taco seasoning. Mix until well incorporated. This adds a crucial layer of zesty flavor that balances the richness of other ingredients.
3. Create the Guacamole: Mash the ripe avocados in a separate bowl. Stir in the lime juice, and season with a pinch of salt and pepper to taste. The lime juice is key to maintaining a vibrant green color and fresh taste.
4. Layer the Sour Cream: Carefully spread the seasoned sour cream over the refried beans. Use a spatula to ensure an even and gentle application to keep the layers distinct.
5. Add the Guacamole: Gently spread the guacamole over the sour cream layer. Don’t worry if it’s not perfectly smooth; a rustic look adds to its charm.
6. Spoon on the Salsa: Spoon the salsa over the guacamole. This vibrant layer adds a burst of freshness and acidity, making this one of the most beloved Tex-Mex appetizers.
7. Sprinkle the Cheese: Evenly distribute the shredded cheddar cheese over the salsa. This creates a delightful, cheesy texture.
8. Garnish with Olives & Onions: Finally, sprinkle the sliced black olives and chopped green onions over the cheese. If using, add sliced jalapeños for a spicy kick.
9. Chill and Serve: Cover the dish and refrigerate for at least 30 minutes to allow the flavors to meld and the dip to firm up slightly. Serve chilled with your favorite tortilla chips or fresh vegetables.
Nutritional Benefits & Advantages
This Seven Layer Dip isn’t just delicious; it also offers some healthy advantages! The avocado provides healthy monounsaturated fats, potassium, and vitamins K, C, and E. Black beans (the base for refried beans) are excellent sources of fiber and plant-based protein. Salsa adds vitamins and antioxidants from tomatoes and other vegetables. By making it at home, you control the sodium and fat content, allowing for healthier ingredient choices like fat-free refried beans or Greek yogurt instead of sour cream.
Tips, Variations & Cooking Advice
- Spice It Up: Add a pinch of cayenne pepper or a dash of hot sauce to your refried beans or sour cream layer for extra heat.
- Veggie Power: For an even healthier twist, add a layer of finely diced bell peppers or corn between the salsa and cheese.
- Dairy-Free Delight: Use dairy-free sour cream and shredded vegan cheese to make this dip suitable for those with dairy sensitivities. Ensure your refried beans are also dairy-free.
- Portion Control: Serve in individual cups for a party to ensure hygienic serving and easy portioning.
- Flavor Boost: Roast your corn and peppers before adding them for a smoky flavor.
Common Mistakes to Avoid
- Rushing the Chill: Don’t skip the refrigeration step! It’s crucial for the layers to set and for the flavors to fully develop and meld.
- Over-Mashing Guacamole: Aim for a chunky guacamole, not a smooth paste. This adds texture and visual appeal.
- Too Much Liquid: If your salsa is very watery, drain some of the liquid before adding it to prevent a soggy dip.
- Uneven Layers: Take your time to spread each layer evenly to ensure every scoop gets a taste of all seven delightful components.
Storage & Meal Prep Tips
This Seven Layer Dip is best enjoyed fresh, but leftovers can be stored. Cover tightly with plastic wrap, ensuring the wrap touches the surface of the dip to minimize air exposure, which can cause oxidation (especially with the avocado layer). Refrigerate for up to 2-3 days. It does not freeze well due to the dairy and fresh vegetable components. For meal prep, you can prepare the individual layers a day in advance and assemble just before serving.
Conclusion
There you have it – your comprehensive guide to creating a show-stopping Seven Layer Dip! This iconic appetizer is more than just a dish; it’s a celebration of fresh flavors, vibrant colors, and good company. By following these easy steps, you’ll master one of the most beloved Tex-Mex appetizers, impressing everyone with your culinary skills. Don’t be afraid to experiment with variations and make it your own. We encourage you to whip up a batch, share it with friends and family, and experience the joy of homemade goodness. Let us know in the comments below how your dip turned out! Happy dipping!
FAQs
Q1: Can I make Seven Layer Dip ahead of time?
A1: Yes, you can assemble the dip up to 24 hours in advance. For best results, add the guacamole and any fresh garnishes (like green onions and olives) closer to serving time to maintain freshness and prevent browning.
Q2: How do I prevent the guacamole from turning brown?
A2: Ensure you mix in plenty of lime juice when preparing the guacamole. You can also place plastic wrap directly onto the surface of the guacamole layer when storing to reduce air exposure.
Q3: What are some good substitutions for sour cream?
A3: Greek yogurt is an excellent healthier alternative to sour cream, offering a similar tangy flavor and creamy texture with less fat and more protein.
Q4: Can I add meat to this dip?
A4: Absolutely! A layer of seasoned ground beef or turkey, drained of excess fat, can be added after the refried beans for a heartier, more protein-rich dip.
Q5: What should I serve with Seven Layer Dip?
A5: Tortilla chips are the classic accompaniment, but you can also serve it with a variety of dippers like pita chips, vegetable sticks (carrots, celery, bell peppers, cucumber), or even crackers.