Master the Art of Homemade Apple Pie: Your Ultimate Guide
Ever wondered what makes a truly unforgettable dessert? Isn’t it that warm, comforting aroma and the burst of familiar flavors that transport you back to cherished memories? There’s something undeniably magical about a freshly baked Apple Pie, and mastering this classic at home is an incredibly rewarding experience. Forget store-bought imitations; crafting this iconic treat from scratch allows you to control every element, ensuring a personalized touch and unparalleled taste. This comprehensive guide will walk you through every step, transforming you into a pie-making pro and expanding your repertoire of delightful dessert recipes. Get ready to impress your family and friends with a pie that speaks volumes of homemade goodness!
Ingredients & Kitchen Tools
To embark on your delicious journey, gather these essentials. High-quality ingredients are paramount for the best results!
- For the Pie Crust (our favorite flaky recipe):
* 2 ½ cups All-purpose flour (for structure)
* 1 teaspoon Salt (enhances flavor)
* 1 cup (2 sticks) Unsalted butter, very cold and cut into ½-inch cubes (essential for flakiness)
* ½ cup Ice water (binds dough without overworking gluten)
- For the Apple Filling:
* 6-8 medium Apples, a mix of tart (Granny Smith) and sweet (Honeycrisp, Fuji) for balanced flavor and texture
* ¾ cup Granulated sugar (sweetener)
* ¼ cup Packed light brown sugar (adds depth and moisture)
* 2 tablespoons All-purpose flour or 1 tablespoon Cornstarch (thickens the filling)
* 1 teaspoon Ground cinnamon (classic warmth)
* ¼ teaspoon Ground nutmeg (subtle spice)
* ⅛ teaspoon Ground cloves (a hint of robust flavor)
* 2 tablespoons Lemon juice (prevents browning and brightens flavor)
* 2 tablespoons Unsalted butter, cut into small pieces (melts into the filling for richness)
- For the Egg Wash (optional, for golden crust):
* 1 large Egg, beaten (for shine and browning)
* 1 tablespoon Water or milk (thins the egg wash)
* 1 tablespoon Coarse sugar (for sparkle)
- Kitchen Tools:
* 9-inch Pie plate (the star of the show!)
* Large mixing bowls
* Pastry blender or food processor (for making pie crust)
* Rolling pin (for shaping the dough)
* Parchment paper or silicone baking mat (for easy cleanup and non-stick)
* Whisk
* Measuring cups and spoons
* Sharp knife and cutting board (for apples)
* Aluminum foil (for crust protection)
* Wire rack (for cooling)
Prep Time & Cooking Schedule
Planning is key for a seamless baking experience!
- Prep Time: 45 minutes (mostly for chilling dough and preparing apples)
- Chill Time (Dough): At least 1 hour, or up to 2 days (crucial for flaky crust)
- Cook Time: 50-60 minutes
- Resting Time (After Baking): At least 2-3 hours (allows filling to set completely)
Plan to start your pie early in the day, or even prepare the dough the day before. The extended resting time ensures a beautiful, sliceable pie, preventing a runny filling – patience truly is a virtue here!
Step-by-Step Instructions
Follow these detailed steps to create a show-stopping Apple Pie that will earn rave reviews.
1. Prepare the Pie Dough (Can be done 1-2 days in advance): In a large bowl, whisk together the flour and salt. Cut in the very cold butter using a pastry blender or your fingertips until the mixture resembles coarse meal with some pea-sized butter pieces. Gradually add ice water, 1 tablespoon at a time, mixing gently until the dough just comes together. Be careful not to overmix! Divide the dough in half, flatten each into a disk, wrap tightly in plastic, and chill for at least 1 hour.
2. Prepare the Apple Filling: Peel, core, and slice the apples into ¼-inch thick pieces. In a large bowl, combine the sliced apples with both sugars, flour (or cornstarch), cinnamon, nutmeg, cloves, and lemon juice. Toss gently to coat.
3. Assemble the Pie: Preheat your oven to 425°F (220°C). On a lightly floured surface, roll out one disk of dough into a 12-inch circle. Carefully transfer it to your 9-inch pie plate. Trim the edges, leaving about a ½-inch overhang.
4. Fill and Top: Pour the apple mixture into the dough-lined pie plate. Dot the top of the apples with the small pieces of butter. Roll out the second dough disk and place it over the filling. Trim the top crust, leaving about a 1-inch overhang.
5. Seal and Vent: Crimp the top and bottom crusts together to seal, using your fingers or a fork. Cut several slits in the top crust to allow steam to escape during baking. For a golden crust, whisk the egg and water/milk for the egg wash, brush it lightly over the top crust, and sprinkle with coarse sugar.
6. Bake: Place the pie on a baking sheet (to catch any drips). Bake at 425°F (220°C) for 15 minutes. Reduce the oven temperature to 375°F (190°C) and continue baking for 35-45 minutes more, or until the crust is golden brown and the filling is bubbling. If the edges of the crust start to brown too quickly, loosely cover them with aluminum foil.
7. Cool Completely: Transfer the baked pie to a wire rack and let it cool for at least 2-3 hours before slicing and serving. This cooling time is crucial for the filling to set properly, ensuring a perfect slice. This wonderful addition to your dessert recipes collection is almost ready!
Nutritional Benefits & Advantages
Beyond its delightful taste, homemade Apple Pie offers some surprising benefits. Apples are a fantastic source of dietary fiber, promoting digestive health and helping to regulate blood sugar. They also pack a punch of Vitamin C and various antioxidants, contributing to overall well-being. By making it yourself, you control the amount of sugar and fat, opting for high-quality ingredients free of artificial preservatives often found in commercial versions. Enjoying a slice of homemade pie can also be a wonderful comfort food, boosting mood and fostering connections with loved ones.
Tips, Variations & Cooking Advice
- Apples: Don’t limit yourself to just one type! A mix of tart (Granny Smith) and sweet (Honeycrisp, Fuji, Gala) apples creates a more complex and flavorful filling with varied textures.
- Crust Variations: Experiment with different crusts! A whole wheat crust adds a nutty flavor, or try a streusel topping for an extra layer of crunch. Gluten-free flour blends can also be substituted in the crust recipe.
- Spices: Feel free to adjust the spice blend to your preference. A pinch of ground ginger or cardamom can add an interesting twist.
- Dairy-Free: Use a good quality plant-based butter for the crust and filling to make this pie dairy-free.
- Serving Suggestions: Serve warm with a scoop of vanilla bean ice cream, a dollop of fresh whipped cream, or a drizzle of caramel sauce for an extra decadent treat.
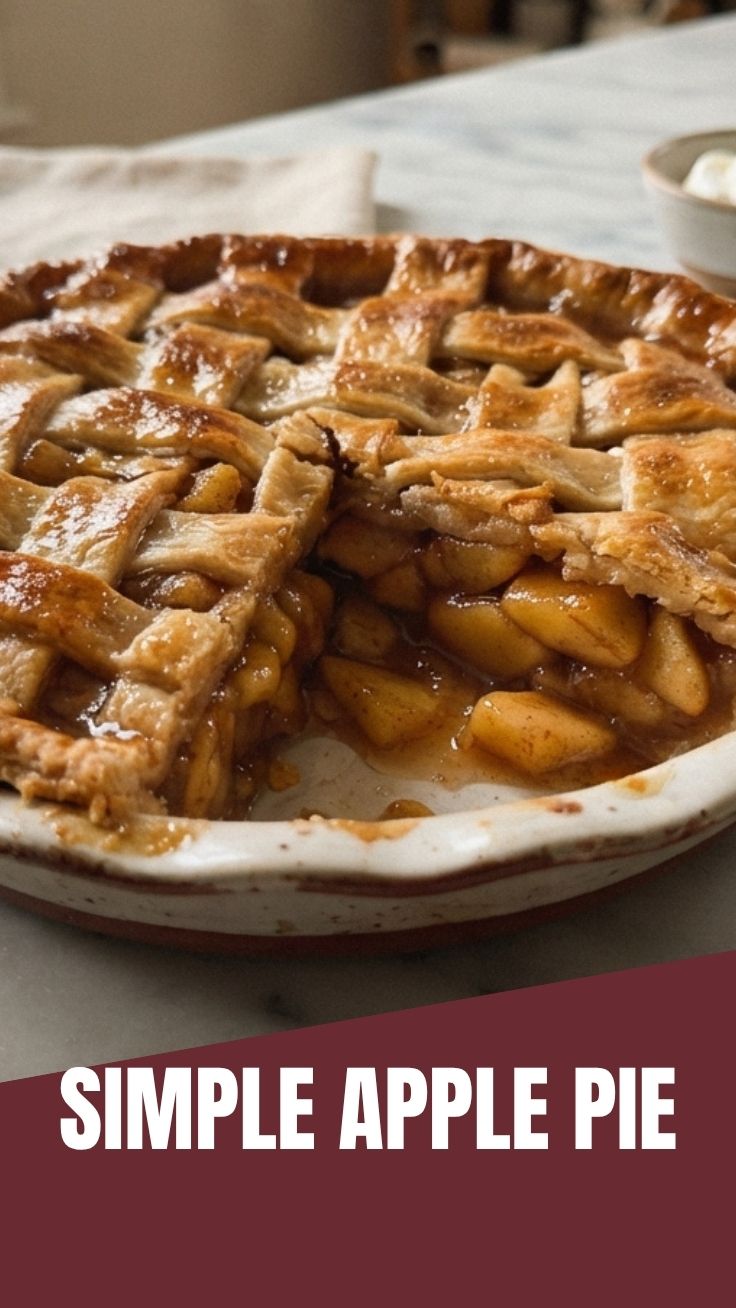
- Lattice Top: For an impressive presentation, try creating a lattice top crust instead of a simple solid one.
Common Mistakes to Avoid
- Overworking the Dough: This is the cardinal sin of pie making! Overworked dough develops too much gluten, resulting in a tough, un-flaky crust. Handle the dough as little as possible.
Warm Butter: For a truly flaky crust, the butter must* be very cold. This creates pockets of steam during baking, leading to delicious layers.
- Not Chilling the Dough Enough: Chilling allows the butter to firm up and the gluten to relax, both essential for a tender, flaky crust that’s easy to roll.
- Not Venting the Top Crust: Without slits, steam builds up, potentially causing the crust to crack or burst.
- Undercooking/Not Cooling Enough: An undercooked pie will have a soggy bottom and a runny filling. Cooling completely allows the filling to set, giving you picture-perfect slices.
Storage & Meal Prep Tips
Leftover Apple Pie is a joy!
- Countertop Storage: Covered loosely with foil or plastic wrap, the pie can be stored at room temperature for up to 2 days.
- Refrigeration: For longer storage (up to 4-5 days), refrigerate the pie.
- Freezing: Slice the cooled pie and freeze individual slices on a baking sheet until solid. Then transfer them to an airtight container or freezer bag for up to 3 months.
- Reheating: To enjoy warm, reheat slices in a preheated oven at 350°F (175°C) for 10-15 minutes, or until warmed through. Avoid microwaving, as it can make the crust soggy.
Conclusion
Crafting a homemade Apple Pie is more than just following a recipe; it’s an act of love and a delicious journey that results in a truly comforting and impressive dessert. By focusing on quality ingredients, paying attention to technique, and understanding the nuances of temperature and timing, you can achieve a pie with a perfectly flaky crust and a wonderfully spiced, tender apple filling. This isn’t just another item in your collection of dessert recipes; it’s a timeless classic that brings joy to every table. So, go ahead, bake this pie, share it with loved ones, and savor the sweet rewards of your culinary efforts! Don’t forget to share your pie-making adventures in the comments below!
FAQs
Q1: Can I use pre-made pie crust?
A: Absolutely! While homemade is recommended for flavor and flakiness, quality pre-made pie crusts are a convenient shortcut. Follow package directions for baking.
Q2: My pie crust sometimes gets soggy. How can I prevent this?
A: Ensure your apples are properly drained if they release a lot of liquid. You can also pre-bake (blind bake) the bottom crust for 10-15 minutes before adding the filling. Making sure your filling has enough thickener (flour/cornstarch) is also crucial, and allowing the pie to cool completely before slicing prevents a runny filling that can seep into the crust.
Q3: What’s the best way to tell if the apples are cooked through?
A: Gently insert a thin skewer or knife through a vent in the top crust into the filling. If it goes in easily with little resistance, the apples are tender. The filling should also be visibly bubbling.
Q4: Can I use frozen apples for this recipe?
A: Yes, you can. Thaw them completely, drain any excess liquid thoroughly, and pat them dry before mixing with the other filling ingredients. You might need to add an extra tablespoon of flour or cornstarch to account for residual moisture.