Unlock the Secrets to the Perfect Homemade Decadent Chocolate Cake
Have you ever craved a dessert so rich, so deeply satisfying, that it almost feels like a warm hug? There’s nothing quite like a slice of perfectly made Chocolate Cake. While many believe such culinary masterpieces are best left to professional bakers, I’m here to tell you that mastering a truly decadent chocolate frosting—and the cake it adorns—is entirely achievable in your own kitchen! Forget store-bought mixes; crafting this delight from scratch allows you to control the quality of ingredients, personalize flavors, and ultimately, present a dessert that not only tastes incredible but also carries the warmth of homemade goodness. This guide isn’t just about baking; it’s about creating memories, one delicious bite at a time. Through this post, you’ll discover how simple it is to prepare a truly exceptional Chocolate Cake that will impress without overwhelming your schedule.
Ingredients & Kitchen Tools
To embark on this delightful baking journey, gather the following:
- All-Purpose Flour (2 cups): The structural backbone of our cake. Sift for a lighter texture.
- Granulated Sugar (2 cups): Provides sweetness and moisture.
- Unsweetened Cocoa Powder (¾ cup): Essential for that deep chocolate flavor. Opt for Dutch-processed for a darker color and milder taste.
- Baking Soda (2 tsp): A leavening agent that helps the cake rise.
- Baking Powder (1 tsp): Another leavening agent, working in conjunction with baking soda for a tender crumb.
- Salt (1 tsp): Enhances all other flavors.
- Eggs (2 large): Binds ingredients and adds richness.
- Whole Milk (1 cup): Adds moisture and tenderness. Buttermilk can be substituted for a tangier, more moist cake.
- Vegetable Oil (½ cup): Contributes to a moist and tender texture.
- Vanilla Extract (2 tsp): Elevates the overall flavor profile.
- Boiling Water (1 cup): Activates the cocoa powder, deepening the chocolate flavor.
- Powdered Sugar (4 cups): For the frosting; sifted to prevent lumps.
- Unsalted Butter, softened (1 cup / 2 sticks): The creamy base for our rich chocolate frosting.
- Unsweetened Cocoa Powder (½ cup): For the frosting’s chocolatey depth.
- Heavy Cream (¼ cup, or more as needed): Adjusts frosting consistency.
- Mixing Bowls (large & medium): For combining wet and dry ingredients.
- Electric Mixer (stand or hand-held): Essential for creaming butter and sugar, and for whipping the frosting.
- 9-inch Round Cake Pans (2): For baking the cake layers. Grease and flour them thoroughly, or line with parchment paper.
- Spatula & Whisk: For mixing and scraping.
- Wire Rack: For cooling the cake layers.
- Measuring Cups & Spoons: Accuracy is key in baking.
Prep Time & Cooking Schedule
- Prep Time: 25 minutes
- Cook Time: 30-35 minutes
- Cooling Time: 1-2 hours (crucial for frosting!)
This recipe fits well into a weekend afternoon. You can bake the cake layers in the morning, let them cool completely, and then prepare and assemble the cake in the afternoon. The cooling time is non-negotiable; attempting to frost warm cake will lead to a melty, crumbly disaster. Plan ahead!
Step-by-Step Instructions
1. Preparation (10 mins): Preheat your oven to 350°F (175°C). Grease and flour two 9-inch round cake pans. In a large bowl, whisk together the flour, sugar, cocoa powder, baking soda, baking powder, and salt. This ensures even distribution of your dry ingredients.
2. Combine Wet Ingredients (5 mins): In a separate medium bowl, whisk the eggs, milk, vegetable oil, and vanilla extract until well combined and slightly frothy.
3. Integrate (5 mins): Gradually add the wet ingredients to the dry ingredients, mixing on low speed with an electric mixer until just combined. Don’t overmix; overworking the gluten can lead to a tough cake.
4. The “Secret” Ingredient (3 mins): Carefully stir in the boiling water. The batter will be thin, but this is normal and helps create a moist cake. This step also intensifies the chocolate flavor, making our Chocolate Cake truly exceptional.
5. Bake (30-35 mins): Divide the batter evenly between the prepared cake pans. Bake for 30-35 minutes, or until a wooden skewer inserted into the center comes out clean.
6. Cool (1-2 hours): Let the cakes cool in the pans for 10-15 minutes before inverting them onto a wire rack to cool completely. Patience here is paramount!
7. Prepare the Frosting (10-15 mins): While the cakes cool, prepare your chocolate frosting. In a large bowl, beat the softened butter with an electric mixer until creamy (about 2 minutes). Gradually add the sifted powdered sugar and cocoa powder, alternating with splashes of heavy cream. Beat until smooth, light, and fluffy, adding more cream if needed to reach desired consistency.
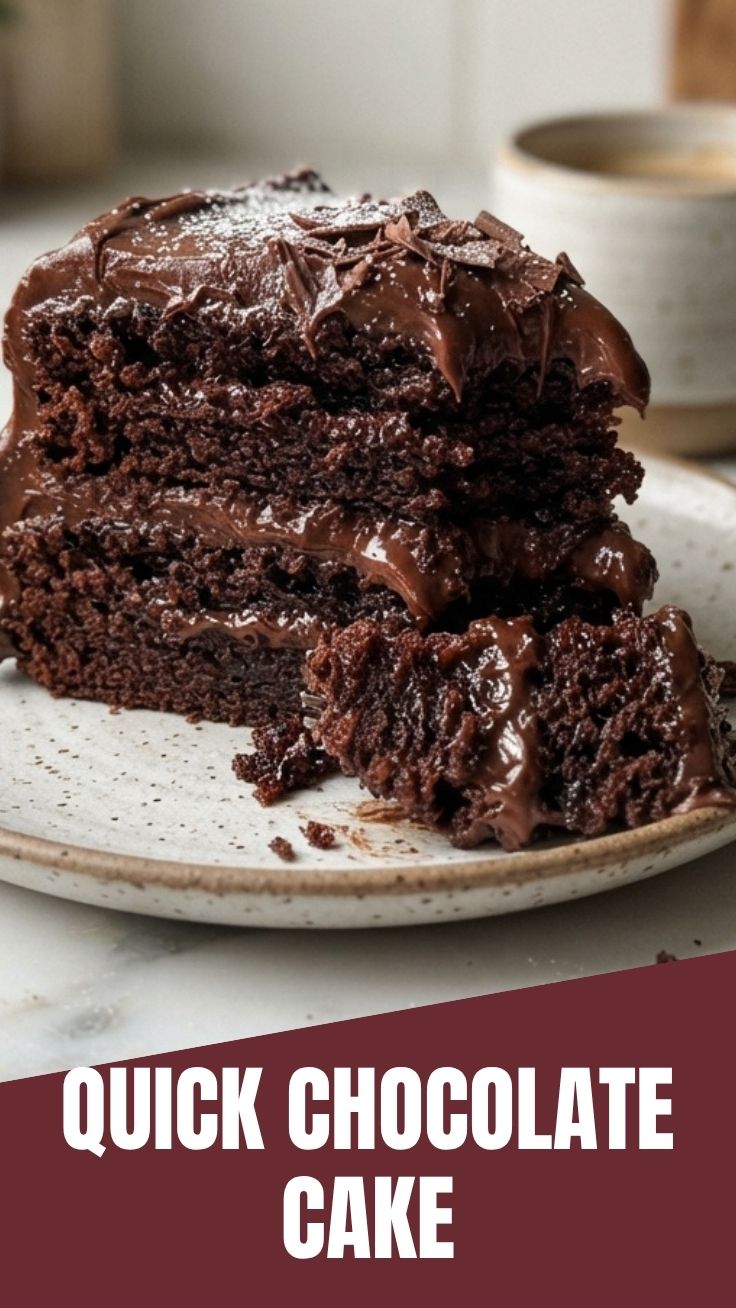
8. Assemble & Frost (15-20 mins): Once the cakes are completely cool, place one layer on your serving plate. Spread about a third of the frosting evenly over the top. Place the second layer on top and frost the entire cake, including the sides, with the remaining frosting.
Nutritional Benefits & Advantages
While often considered an indulgence, homemade Chocolate Cake, when made with quality ingredients, offers some surprising benefits. Dark cocoa powder, for instance, is rich in antioxidants. Making it at home allows you to control sugar levels and avoid artificial preservatives found in commercial cakes. You can also opt for whole wheat flour for added fiber or choose organic ingredients, contributing to a healthier dessert profile.
Tips, Variations & Cooking Advice
- Coffee Boost: Add 1 tsp instant espresso powder to the boiling water for an even deeper chocolate flavor without making the cake taste like coffee.
- Dairy-Free: Substitute milk with dairy-free alternatives like almond or soy milk, and use a plant-based butter for the frosting.
- Gluten-Free: Use a 1:1 gluten-free baking flour blend.
- Flavor Variations: Swirl in a few tablespoons of raspberry preserves between the layers for a Black Forest twist, or add a hint of mint extract to the frosting for a refreshing touch.
- Bundt Cake: This recipe can be adapted for a Bundt pan. Bake for 45-55 minutes.
Common Mistakes to Avoid
- Overmixing the Batter: Leads to a tough, dense cake. Mix only until ingredients are just combined.
- Underbaking: Results in a gooey center (unless you’re aiming for a lava cake!). Always test with a skewer.
- Frosting a Warm Cake: The frosting will melt and slide off. Always allow cakes to cool completely.
- Not Sifting Dry Ingredients: Can lead to lumps in your cake and frosting.
Storage & Meal Prep Tips
Store frosted Chocolate Cake at room temperature in an airtight container for up to 3 days, or in the refrigerator for up to 5 days. If refrigerating, let it come to room temperature for about 30 minutes before serving for the best texture and flavor. Unfrosted cake layers can be wrapped tightly in plastic wrap and frozen for up to 2 months. Thaw overnight in the refrigerator before frosting.
Conclusion
Creating a magnificent Chocolate Cake from scratch is a truly rewarding experience. From the enticing aroma that fills your kitchen to the first decadent bite, this recipe promises to deliver a dessert that’s both impressive and comforting. With our straightforward instructions and tips for achieving that perfect, velvety chocolate frosting, you’re well on your way to becoming a baking maestro. Don’t hesitate to embark on this delicious adventure; I encourage you to try this recipe, share your creations, and savor every moment of baking and indulgence. Happy baking!
FAQs
- Q: Can I use different sized cake pans?
A: Yes, but adjust baking time accordingly. Smaller pans will require more time, larger pans less. Always test for doneness with a skewer.
- Q: My frosting is too thick/thin. How do I fix it?
A: If too thick, add heavy cream (or milk) one tablespoon at a time until desired consistency. If too thin, add more sifted powdered sugar until thickened.
- Q: What if I don’t have an electric mixer for the frosting?
A: You can make frosting by hand with a whisk, but it will require more effort and time to get it light and fluffy. Ensure your butter is very soft.
- Q: Can I make the cake batter ahead of time?
A: It’s best to bake the cake batter immediately after mixing for optimal leavening and texture. However, the dry ingredients can be pre-mixed.
- Q: How do I get neat, even cake layers?
A: Use a serrated knife to level any domed tops of your cooled cake layers. A cake leveler tool also works wonderfully for this.