Bake Your Best Cheesecake: A Step-by-Step Guide to Homemade Perfection
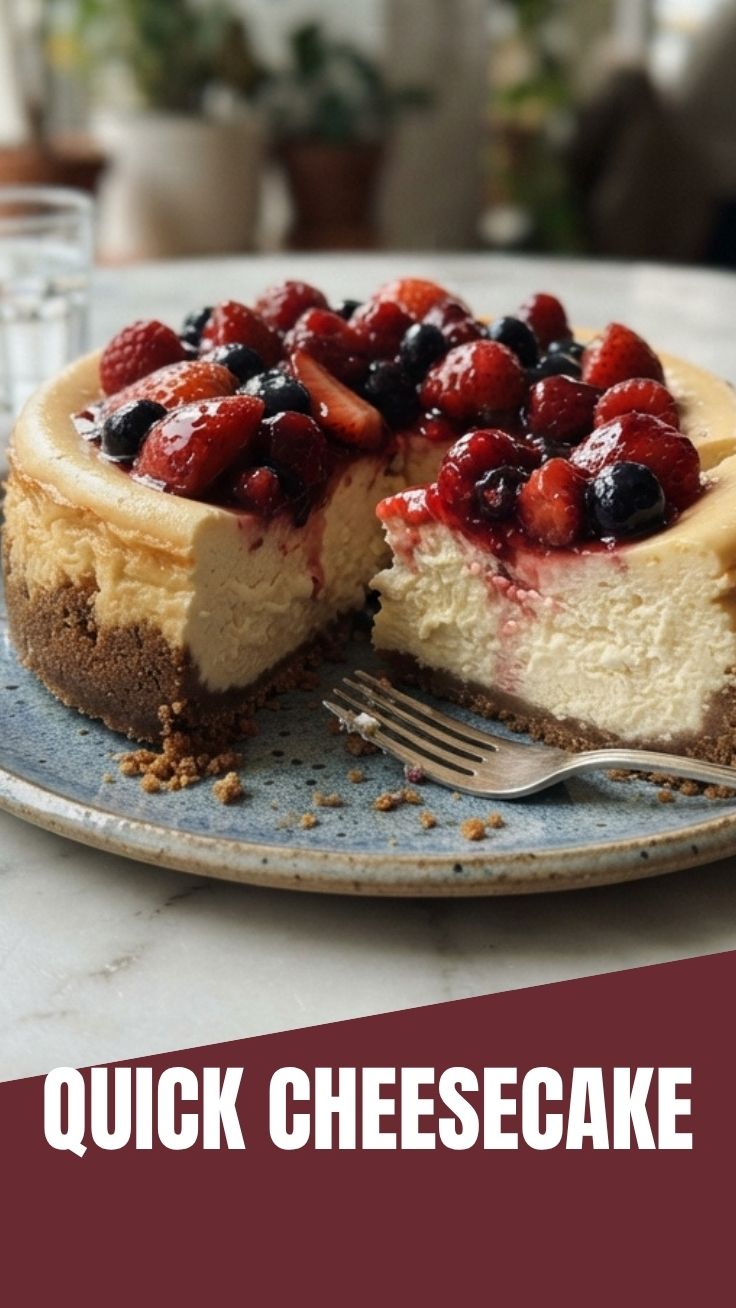
Ever wondered how to achieve that perfectly creamy, decadent Cheesecake, rivaling your favorite bakery’s masterpiece? Crafting a homemade cheesecake isn’t just about following a recipe; it’s about embracing a culinary journey that rewards you with an incredibly satisfying dessert, tailor-made to your preferences. Forget those store-bought imitations; whipping up your own allows for a personalized touch, whether you prefer a classic New York style or a vibrant, fruit-infused rendition with a hint of blueberry. This comprehensive guide will empower you to create a show-stopping cheesecake that impresses everyone, making you wonder why you ever bought one pre-made.
Ingredients & Kitchen Tools
To embark on your cheesecake adventure, gather the following:
Ingredients:
- For the Crust:
2 cups graham cracker crumbs: You can also use digestive biscuits or vanilla wafers for a different flavor profile.*
1/2 cup unsalted butter, melted: Adds richness and binds the crust together.*
1/4 cup granulated sugar: Enhances the sweetness of the crust.*
- For the Filling:
32 oz (4 blocks) cream cheese, full-fat, softened: Essential for that signature creamy texture. Ensure it’s at room temperature for smooth mixing.*
1 1/2 cups granulated sugar: Sweetens the rich cream cheese base.*
1/4 cup all-purpose flour: Helps prevent cracking and gives the cheesecake a smoother texture.*
1 teaspoon vanilla extract: A classic flavor enhancer; use good quality for best results.*
4 large eggs, room temperature: Bind the filling and contribute to its silky texture.*
1 cup sour cream, full-fat, room temperature: Adds tanginess and additional creaminess.*
Zest of 1 lemon (optional): Brightens the flavor profile, especially if making a fruit-based cheesecake.*
Kitchen Tools:
9-inch springform pan: Crucial for easy removal and pristine presentation.*
Aluminum foil (heavy-duty): For wrapping the springform pan to prevent water bath leakage.*
Large roasting pan (for water bath): Ensures even, gentle baking.*
Electric mixer (stand or hand-held): For smooth, lump-free cream cheese filling.*
Mixing bowls: Various sizes for ingredients and mixing.*
Rubber spatula: For scraping bowls and folding ingredients gently.*
Measuring cups and spoons: For accurate ingredient proportions.*
Parchment paper: Optional, for lining the bottom of the springform pan to prevent sticking.*
Prep Time & Cooking Schedule
Planning is key to cheesecake success!
- Prep Time: 30 minutes
- Baking Time: 60-75 minutes (plus 1 hour for cooling in the oven)
- Chilling Time: Minimum 6 hours, preferably overnight
To help you plan, start your cheesecake preparation the day before you intend to serve it. This allows ample chilling time, which is crucial for the cheesecake to set properly and develop its full flavor. The baking and cooling phases take a significant amount of time, so ensure you have a free afternoon.
Step-by-Step Instructions
1. Prepare the Crust (Pre-bake Optional):
* Preheat oven to 350°F (175°C).
* In a medium bowl, combine graham cracker crumbs, melted butter, and granulated sugar. Mix until well combined.
* Press the mixture evenly into the bottom of a 9-inch springform pan. You can use the bottom of a glass to really compact it.
For a firmer crust, bake for 10 minutes. Let cool. This step helps prevent a soggy crust.*
2. Prepare the Water Bath:
* Wrap the outside of your springform pan tightly with several layers of heavy-duty aluminum foil to prevent water from seeping in during baking. Ensure it extends well above the pan’s rim.
3. Make the Cheesecake Filling:
* In a large bowl, using an electric mixer on medium speed, beat the softened cream cheese until smooth and creamy (about 2-3 minutes). Scrape down the sides of the bowl.
Gradually add the granulated sugar and flour, beating until just combined. Overmixing at this stage can incorporate too much air, leading to cracks.*
* Beat in the vanilla extract and lemon zest (if using).
* Add the eggs one at a time, beating on low speed after each addition until just incorporated. Do not overmix.
* Gently fold in the sour cream with a rubber spatula until fully combined. Your perfect Cheesecake filling should be silky.
4. Bake the Cheesecake:
* Pour the prepared filling over the cooled crust in the springform pan.
* Place the foil-wrapped springform pan into the larger roasting pan.
Carefully fill the roasting pan with hot water, reaching about halfway up the sides of the springform pan. This water bath is essential for moist, crack-free baking.*
* Transfer to the preheated oven and bake for 60-75 minutes, or until the edges are set but the center still slightly jiggles when gently shaken.
* Turn off the oven, crack the door open, and let the cheesecake cool in the water bath in the oven for 1 hour. This slow cooling prevents drastic temperature changes that can cause cracks, especially important if you’re adding a topping like blueberry compote.
5. Chill and Serve:
* Remove the cheesecake from the water bath and the roasting pan. Carefully remove the foil.
* Let it cool completely on a wire rack at room temperature.
* Once cool, cover loosely with plastic wrap and refrigerate for a minimum of 6 hours, or preferably overnight, for optimal setting and flavor development.
* Before serving, run a thin knife around the edge of the pan before releasing the springform sides.
Nutritional Benefits & Advantages
Beyond its delicious taste, a homemade Cheesecake offers several advantages. Full-fat dairy products provide essential vitamins like A, D, E, and K, along with calcium and protein (from cream cheese and eggs). While an indulgent treat, homemade versions allow you to control sugar levels and ingredient quality, avoiding high-fructose corn syrup and artificial additives often found in store-bought options. Incorporating a fruit topping like a homemade blueberry sauce adds antioxidants and natural sweetness, making it a more wholesome indulgence.
Tips, Variations & Cooking Advice
- Flavor Variations: Swirl in fruit purees, melted chocolate, coffee, or citrus zests for endless flavor possibilities.
- Crust Alternatives: Experiment with gingersnaps, shortbread, or even gluten-free cookies for a unique twist.
- Toppings Galore: Beyond fruit sauces, try chocolate ganache, whipped cream, caramel, or chopped nuts.
- Mini Cheesecakes: Bake in a muffin tin lined with paper liners for individual portions, adjusting baking time accordingly.
- Dairy-Free: Use vegan cream cheese and sour cream alternatives, being mindful of their different properties.
Common Mistakes to Avoid
- Overmixing: Incorporating too much air, especially after adding eggs, can lead to cracking during baking and cooling. Mix just until combined.
- Cold Ingredients: Cold cream cheese and eggs are difficult to mix evenly, creating lumps. Ensure all dairy and eggs are at room temperature.
- Skipping the Water Bath: This is non-negotiable for a creamy cheesecake with an even, velvety texture and no cracks.
- Rushing Cooling/Chilling: Rapid temperature changes will cause your cheesecake to crack. Allow it to cool gradually in the oven, then completely at room temperature, before chilling thoroughly.
- Not Greasing/Lining the Pan: This can make removal difficult, risking a broken crust or side.
Storage & Meal Prep Tips
Leftover Cheesecake should be stored tightly covered with plastic wrap in the refrigerator for up to 5-7 days. For longer storage, slices can be individually wrapped in plastic wrap and then foil, then frozen for up to 1 month. Thaw frozen cheesecake overnight in the refrigerator before serving. Do not reheat, as this will alter the texture. This dessert is perfect for making ahead, as its flavor and texture actually improve after a day or two in the fridge.
Conclusion
Mastering the art of homemade Cheesecake is a truly rewarding kitchen endeavor. By following these detailed steps and embracing the nuances of temperature control and gentle mixing, you’ll achieve a dessert that is consistently smooth, rich, and utterly delicious. Whether enjoyed plain or adorned with a vibrant blueberry topping, your efforts will undeniably yield a magnificent creation that’s far superior to any store-bought alternative. So, gather your ingredients, clear your schedule, and prepare to delight your taste buds with your very own perfect cheesecake. Don’t be shy – share your baking triumphs in the comments below!
FAQs
Q1: Why did my cheesecake crack on top?
A1: Cracking is most often due to overbaking, overmixing (incorporating too much air), or rapid temperature changes during cooling. Ensure you use a water bath, don’t overmix, and cool the cheesecake slowly in the oven.
Q2: Can I use low-fat cream cheese?
A2: While technically possible, full-fat cream cheese is highly recommended. Low-fat varieties have a higher water content and lower fat, which can result in a less creamy, drier, or rubbery texture.
Q3: How do I know when the cheesecake is done baking?
A3: The edges should be set, but the center 2-3 inches should still have a slight jiggle to them when gently shaken. It will continue to cook and set as it cools.
Q4: Can I make this gluten-free?
A4: Absolutely! Simply substitute regular graham cracker crumbs with gluten-free graham cracker crumbs or use a gluten-free cookie for the crust. The filling inherently contains no gluten.