Unlocking the Secrets to the Perfect Homemade Milkshake!
Ever dreamt of that perfectly thick, wonderfully creamy Milkshake, bursting with flavor, just like the ones from your favorite diner, but made right in your own kitchen? Well, dream no more! Preparing a luscious, homemade Milkshake is not only incredibly satisfying but also allows you to control the ingredients, ensuring a healthier and more personalized treat. Forget artificial flavors and excessive sugar; today, we’re diving into the art of crafting your ultimate creamy indulgence, along with fantastic milkshake recipes that will delight your taste buds and impress your friends. With our expert guidance, you’ll transform simple ingredients into a sensational dessert – and quickly become a connoisseur of delightful milkshake recipes.
Ingredients & Kitchen Tools
Crafting an exceptional Milkshake requires a few key items and a bit of culinary flair. Here’s what you’ll need:
- Premium Vanilla Bean Ice Cream (2 cups): The foundation of any great milkshake. Choose a high-quality brand for superior flavor and texture. For a lighter option, use low-fat frozen yogurt or a dairy-free vanilla alternative.
- Whole Milk (1/2 cup): Provides creaminess and helps achieve the perfect consistency. Adjust to desired thickness. Almond milk, soy milk, or oat milk work well for dairy-free versions.
- Sweetener (1-2 tablespoons, optional): Granulated sugar, maple syrup, honey, or agave nectar, based on your preference and the sweetness of your ice cream.
- Flavor Extracts (1/2 teaspoon, optional): Vanilla extract enhances the natural flavors; almond, peppermint, or coffee extracts offer exciting variations.
- Toppings (optional): Whipped cream, chocolate syrup, sprinkles, chopped nuts, fresh fruit, or a cherry on top for that classic diner look.
Kitchen Tools:
- Blender (high-powered recommended): Essential for smooth, lump-free blending.
- Measuring Cups and Spoons: For accurate ingredient proportions.
- Tall Glasses: For serving your magnificent creation.
- Straws (reusable preferred): To enjoy every last drop!
- Spatula: For scraping down the sides of the blender and ensuring all ingredients are incorporated.
Prep Time & Cooking Schedule
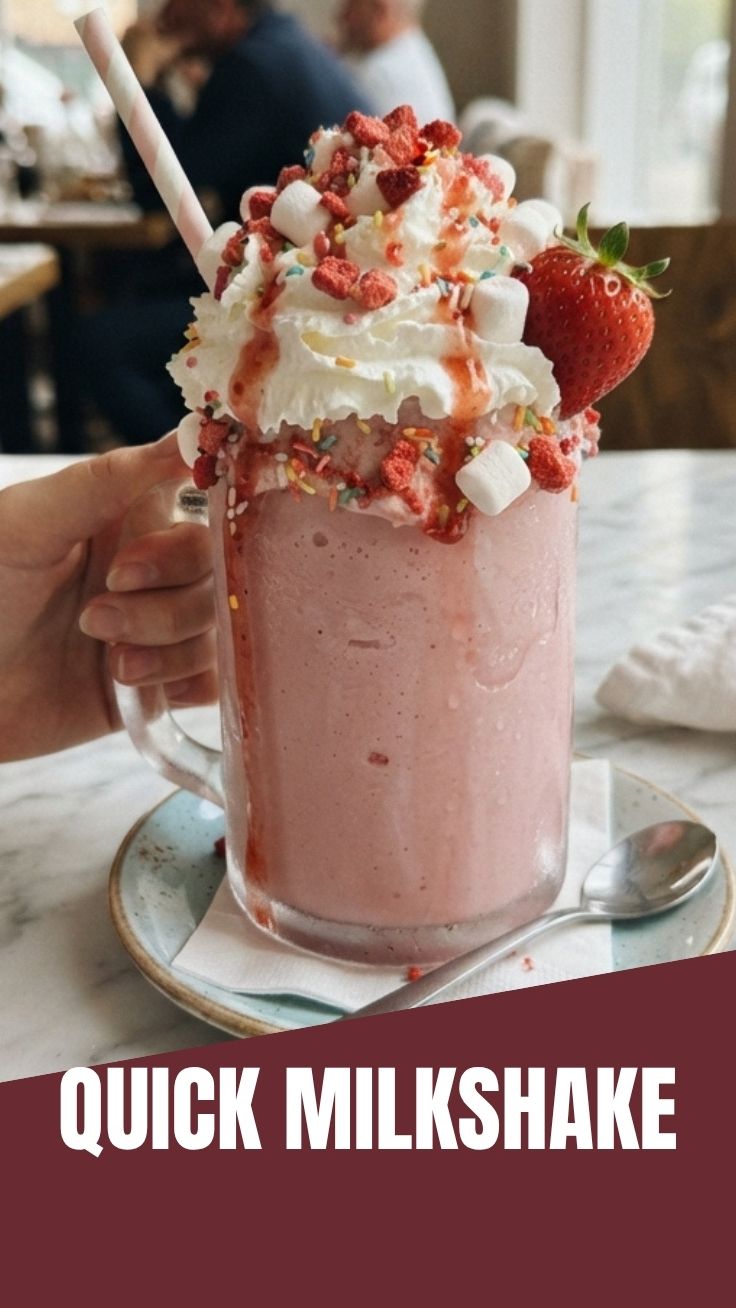
Good news! Assembling a heavenly Milkshake is remarkably quick.
- Prep Time: 5 minutes
- Cooking/Blending Time: 2-3 minutes
- Total Time: Approximately 10 minutes
This means you can whip up this delightful treat almost instantly, making it perfect for a spontaneous craving or an impromptu dessert. Don’t worry about resting or marinating times here; the quicker you enjoy it, the better!
Step-by-Step Instructions
Follow these simple steps to create an unbelievably delicious Milkshake:
1. Gather Your Ingredients: Ensure your ice cream is slightly softened for easier blending. This avoids over-blending and keeps your milkshake delightfully thick.
2. Combine in Blender: Add the softened ice cream, whole milk, and any optional sweeteners or flavor extracts (like vanilla) into your blender. Start with less milk and add more if needed to reach your desired consistency.
3. Blend Until Smooth: Secure the lid and blend on medium-high speed until the mixture is smooth and creamy. Scrape down the sides of the blender with a spatula if necessary to ensure all ingredients are well combined. Aim for a thick, pourable consistency – not too thin, not too thick. This is where you master the art of fine milkshake recipes.
4. Pour and Serve: Pour the freshly blended Milkshake into your tall glasses.
5. Garnish (Optional): Top with whipped cream, a drizzle of chocolate syrup, sprinkles, or any other desired garnishes for an extra touch of indulgence. Serve immediately and enjoy!
Nutritional Benefits & Advantages
Beyond its delicious taste, a homemade Milkshake offers several advantages. By using high-quality ice cream and fresh milk, you get a good source of calcium, which is vital for bone health. Depending on your choice of milk, you can also benefit from vitamins D and B12. Customizing your milkshake allows you to reduce added sugars and incorporate healthier alternatives, like fresh fruit, making it a more nutritious treat than many store-bought options. For instance, adding a handful of berries can boost your antioxidant intake!
Tips, Variations & Cooking Advice
- Flavor Variations:
* Chocolate: Add 2 tablespoons of cocoa powder or chocolate syrup.
* Fruit: Blend in 1/2 cup of fresh or frozen berries, bananas, or mango for a fruity twist.
* Coffee: Add 1 tablespoon of instant coffee granules or a shot of espresso for a delightful pick-me-up.
* Mint Chocolate Chip: Add a few drops of peppermint extract and a handful of chocolate chips.
- Texture Adjustments: For a thicker milkshake, use less milk or add a handful of ice cubes. For a thinner consistency, add more milk a tablespoon at a time.
- Dietary Adaptations:
* Dairy-Free: Use dairy-free ice cream (like coconut, almond, or soy-based) and dairy-free milk.
* Vegan: Ensure all ingredients, especially ice cream, are certified vegan.
- Ingredient Quality: The quality of your ice cream significantly impacts the final taste. Invest in a good brand!
Common Mistakes to Avoid
- Over-blending: Blending for too long can melt the ice cream and result in a thinner, less creamy milkshake. Blend just until smooth.
- Using rock-hard ice cream: This makes blending difficult and can strain your blender. Let your ice cream soften slightly (5-10 minutes out of the freezer) before blending.
- Adding too much milk at once: Start with less milk and gradually add more to achieve your desired thickness. It’s easier to thin out a thick milkshake than to thicken a runny one.
- Neglecting temperature: Warm ingredients will lead to a watery milkshake. Ensure your milk is cold and your ice cream is still mostly frozen.
Storage & Meal Prep Tips
A freshly made Milkshake is best enjoyed immediately. However, if you have leftovers or want to prepare ahead, here are some tips:
- Refrigeration: While not ideal, a milkshake can be stored in an airtight container in the refrigerator for up to 1-2 hours. It will likely separate and lose some of its thick texture, but a quick stir or re-blend can help.
- Freezing: You can freeze leftover milkshake in an airtight container for a “milkshake ice cream” consistency. It will become very hard, so you’ll need to let it thaw for about 15-20 minutes at room temperature before enjoying with a spoon. This is a great way to enjoy your specific milkshake recipes later.
- Serving Tip: For the best experience, always make your milkshake fresh.
Conclusion
Crafting the ultimate homemade Milkshake is a delightful, straightforward process that promises rich rewards. By focusing on fresh, quality ingredients and following our clear steps, you can create a treat that rivals any diner-style indulgence, all while having fun experimenting with various milkshake recipes. Don’t be afraid to personalize your creation – that’s the beauty of homemade! We encourage you to try this recipe, share your delicious results on social media, and explore more exciting culinary adventures on our blog. Happy blending!
FAQs
Q1: Can I use low-fat milk for my milkshake?
A1: Yes, you can. Low-fat milk will result in a slightly less creamy consistency but is a good option if you’re looking to reduce fat content. Regular whole milk offers the richest texture.
Q2: My milkshake is too thin. How can I fix it?
A2: If your milkshake is too thin, add a few more scoops of ice cream or a handful of ice cubes and re-blend briefly. This will help thicken it up.
Q3: Can I make this milkshake without a blender?
A3: While a blender is highly recommended for the smoothest consistency, you can try using a food processor for a similar effect, or a stick blender if your container is deep enough. Mashing ice cream with softened ingredients by hand might work in a pinch for a very rustic, chunky version.
Q4: What are some kid-friendly variations?
A4: Kids often love fruit-flavored milkshakes! Try blending in fresh bananas, strawberries, or even a spoonful of peanut butter with some chocolate syrup for a fun, satisfying treat. Add colorful sprinkles for extra appeal.
Q5: How can I make my milkshake taste more like a diner’s?
A5: The secret often lies in premium, full-fat ice cream and using a touch of good quality vanilla extract. Some diners also use a splash of malt powder for a distinctive flavor. Experiment with these additions to elevate your homemade Milkshake!