Sure, here is your blog post incorporating all your requirements:
—
Unlock the Secrets to Perfect Homemade Garlic Bread in Just 30 Minutes!
Are you tired of bland, store-bought garlic bread that crumbles disappointingly? Imagine sinking your teeth into a warm, crusty slice, bursting with aromatic garlic butter and perfectly toasted to a golden crisp. Preparing this classic at home isn’t just about saving money; it’s about crafting an unparalleled culinary experience that elevates any meal. This comprehensive guide will transform you into a garlic bread virtuoso, no matter your skill level. We’ll dive deep into creating the ultimate homemade garlic bread masterpiece, a perfect companion for pasta dishes, soups, or even as a standalone snack.
Ingredients & Kitchen Tools
Gathering the right components is the first step to success. Here’s what you’ll need:
- 1 Loaf of Artisanal Bread: (e.g., French baguette, Italian loaf, sourdough) – Choose a good quality, crusty bread that can hold up to the butter.
- 1 Head of Garlic: (about 6-8 cloves) – Fresh garlic is non-negotiable for superior flavor.
- 1/2 Cup Unsalted Butter: (softened) – Using unsalted butter allows you to control the salt content.
- 2 Tablespoons Fresh Parsley: (finely chopped) – Adds a pop of color and fresh herbaceousness.
- 1/2 Teaspoon Salt: (fine sea salt or kosher salt) – Enhances the garlic and butter flavors.
- 1/4 Teaspoon Black Pepper: (freshly ground) – A touch of spice to balance the richness.
- Optional: 1/4 Cup Grated Parmesan Cheese: – For an extra layer of savory goodness.
- Optional: 1 Tablespoon Olive Oil: – Can be brushed on bread before baking for extra crispness.
Kitchen Tools:
- Baking Sheet: Essential for even toasting.
- Aluminum Foil or Parchment Paper: For easy cleanup and preventing sticking.
- Small Mixing Bowl: To combine the butter mixture.
- Garlic Press or Microplane: For finely minced garlic.
- Sharp Serrated Knife: For slicing the bread without tearing.
- Pastry Brush: For easy and even application of the butter mixture.
Prep Time & Cooking Schedule
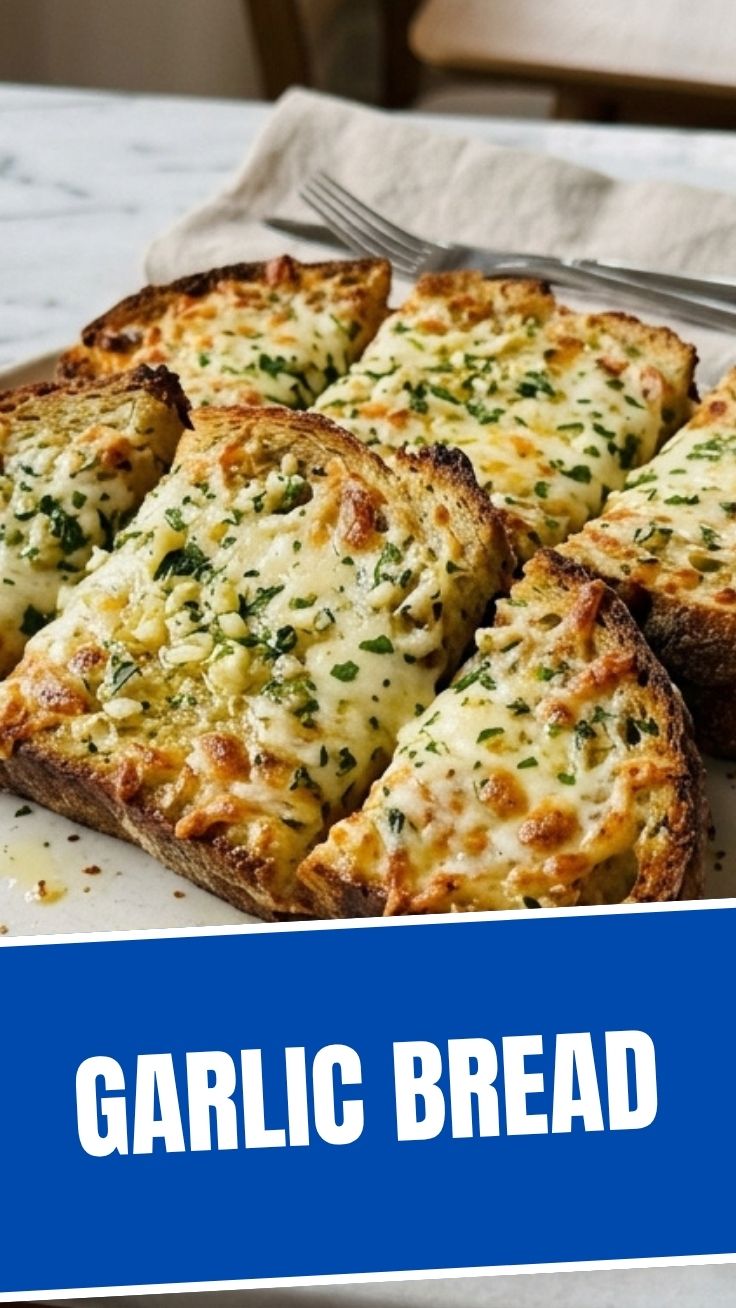
This recipe is surprisingly quick, making it perfect for weeknight meals or last-minute entertaining.
- Prep Time: 10 minutes
- Cook Time: 15-20 minutes
- Total Time: 25-30 minutes
Plan to start your garlic bread about 25-30 minutes before you want to serve it, allowing time for perfect golden-brown results. There’s no resting or marinating time required, so it’s a straightforward process from start to finish.
Step-by-Step Instructions
Follow these steps for irresistible Garlic Bread every time:
1. Preheat Oven & Prep Baking Sheet: Preheat your oven to 375°F (190°C). Line a baking sheet with aluminum foil or parchment paper for easy cleanup.
2. Prepare the Garlic Butter: In a small mixing bowl, combine the softened butter, finely minced fresh garlic, chopped parsley, salt, and black pepper. If using, stir in the grated Parmesan cheese. Mix until all ingredients are well incorporated, forming a fragrant Garlic Butter masterpiece.
3. Slice the Bread: Using a serrated knife, slice the bread horizontally down the middle, creating two long halves. Alternatively, you can slice the bread into 1-inch thick pieces, making sure not to cut all the way through, keeping the bottom intact. This method creates individual slices that are easier to serve.
4. Spread the Garlic Butter: Evenly spread the garlic butter mixture generously over the cut sides of the bread. Ensure good coverage, especially getting into all the nooks and crannies.
5. Bake to Perfection: Place the buttered bread halves onto the prepared baking sheet, butter-side up. Bake for 10-12 minutes, or until the edges are golden brown and the butter is sizzling.
6. Broil for Crispness (Optional but Recommended): For an extra crispy top, switch your oven to broil for 1-2 minutes, watching carefully to prevent burning. The bread should turn a beautiful golden toasted color.
7. Serve Immediately: Remove from the oven, slice into desired portions (if not already pre-sliced), and serve warm.
Nutritional Benefits & Advantages
Beyond its incredible taste, homemade garlic bread offers some surprising benefits. Fresh garlic is known for its immune-boosting properties and contains antioxidants. Using high-quality bread can provide complex carbohydrates for sustained energy. By making it at home, you control the ingredients, avoiding artificial preservatives and excessive sodium often found in store-bought versions. You can also adjust the amount of butter to suit your dietary needs, making it a more wholesome indulgence.
Tips, Variations & Cooking Advice
- Spice It Up: Add a pinch of red pepper flakes to the garlic butter for a subtle kick.
- Cheesy Delight: Experiment with different cheeses like mozzarella, provolone, or a blend of Italian cheeses for a gooey cheese pull. Sprinkle over the buttered bread during the last 5 minutes of baking.
- Herbal Infusion: Incorporate other fresh herbs like chives, oregano, or rosemary into your garlic butter for varied flavor profiles.
- Gluten-Free Option: Simply use your favorite gluten-free baguette or loaf. The method remains the same.
- Dairy-Free Option: Substitute regular butter with a high-quality dairy-free butter alternative.
- Grilling Garlic Bread: For a smoky flavor, wrap the buttered bread in foil and grill over medium heat for 5-7 minutes, flipping once.
Common Mistakes to Avoid
- Using Cold Butter: Softened butter is crucial for a smooth, even application. Cold butter will be clumpy and hard to spread.
- Under-mincing Garlic: Large pieces of raw garlic can be overpowering or bitter. Finely mince or press your garlic for the best flavor distribution.
- Over-broiling: Broiling can go from perfect to burnt in seconds. Stay by the oven and watch closely!
- Not Using Fresh Garlic: Garlic powder or pre-minced garlic in a jar simply won’t yield the same vibrant, pungent flavor. Fresh is always best.
- Forgetting Salt: Salt is an essential flavor enhancer. Without it, your garlic butter will taste flat.
Storage & Meal Prep Tips
Leftover garlic bread can be stored in an airtight container or wrapped tightly in aluminum foil at room temperature for up to 2 days, or in the refrigerator for up to 4 days.
Reheating: For best results, reheat in a preheated oven at 350°F (175°C) for 5-7 minutes, or until warmed through and crisp. You can also toast slices in a toaster oven. Avoid the microwave, as it can make the bread soggy.
Freezing: For longer storage, wrap individual slices or halves tightly in plastic wrap, then an additional layer of aluminum foil. Freeze for up to 1 month. Reheat directly from frozen in the oven at 375°F (190°C) for 15-20 minutes, or until heated through and crispy.
Conclusion
Mastering homemade Garlic Bread is a truly rewarding culinary endeavor that brings joy to any meal. With our detailed guide, from preparing the luscious Garlic Butter to achieving that perfect golden crisp, you’re now equipped to create a fantastic accompaniment that outshines any store-bought version. We encourage you to try this recipe tonight and experience the delightful aroma and taste for yourself. Share your creations in the comments below, and let us know your favorite ways to enjoy this delicious classic!
FAQs
Q1: Can I use pre-minced garlic?
A1: While fresh garlic provides the best flavor, if you’re in a pinch, you can use high-quality pre-minced garlic from a jar. Just be aware the flavor might not be as intense.
Q2: What’s the best type of bread for garlic bread?
A2: A sturdy, crusty bread like a French baguette, Italian loaf, or sourdough works best as it won’t get too soggy and holds its shape well.
Q3: How can I prevent my garlic bread from getting soggy?
A3: Ensure your butter is softened, not melted, and spread it evenly. Bake at the recommended temperature. If freezing, wrap tightly to prevent freezer burn and thaw slightly before reheating to encourage crisping.
Q4: Can I make the garlic butter ahead of time?
A4: Absolutely! The garlic butter mixture can be prepared up to 3 days in advance and stored in an airtight container in the refrigerator. Let it soften at room temperature for about 15-20 minutes before spreading.
Q5: Is it possible to grill garlic bread instead of baking?
A5: Yes! Butter your bread, wrap it securely in heavy-duty aluminum foil, and grill over medium heat for 5-7 minutes, flipping once, until golden brown and heated through.