Flaky, Golden, and Utterly Irresistible: Your Guide to Perfect Homemade Biscuits from Scratch!
Have you ever savored a perfectly golden, impossibly flaky biscuit, so tender it practically melts in your mouth? The kind that makes you question every dry, crumbly version you’ve ever encountered? Well, prepare to elevate your baking game! While store-bought options might offer convenience, there’s an unparalleled joy and flavor in creating these breakfast (or any-meal!) heroes from scratch. This comprehensive guide will walk you through every step to achieving bakery-quality biscuits, ensuring they’re so good, you might even consider them delightful little savory cookies. Say goodbye to dense hockey pucks and hello to light, airy perfection, often found alongside your morning coffee or as a side to a hearty dinner.
Ingredients & Kitchen Tools
To embark on your biscuit-making adventure, gather these essentials:
- All-Purpose Flour (2 cups): The structural backbone of your biscuits. Opt for unbleached for best results.
- Baking Powder (1 tablespoon): Provides the lift and fluffiness, ensuring a light texture.
- Baking Soda (1/2 teaspoon): Reacts with the buttermilk for extra rise and tenderness.
- Salt (1/2 teaspoon): Enhances flavor and balances sweetness.
- Unsalted Butter (1/2 cup, 8 tablespoons), very cold: Essential for flakiness. Cut into small cubes or grate it for easier incorporation.
- Buttermilk (3/4 cup), very cold: Adds tang, moisture, and reacts with the leavening agents. If you don’t have buttermilk, you can make your own by adding 1 tablespoon of lemon juice or white vinegar to regular milk and letting it sit for 5-10 minutes.
- Optional: Sugar (1 teaspoon): For a hint of sweetness, especially if you prefer slightly sweeter biscuits, almost like cookies.
- Large Mixing Bowl: For combining dry and wet ingredients.
- Pastry Blender, two forks, or your fingertips: For cutting butter into flour.
- Rolling Pin: To achieve the desired thickness for your dough.
- Biscuit Cutter (2.5-inch to 3-inch): For perfectly round biscuits. A drinking glass rim works in a pinch.
- Baking Sheet: Lined with parchment paper for easy cleanup and even baking.
- Pastry Brush (optional): For applying an egg wash or melted butter for a golden top.
Prep Time & Cooking Schedule
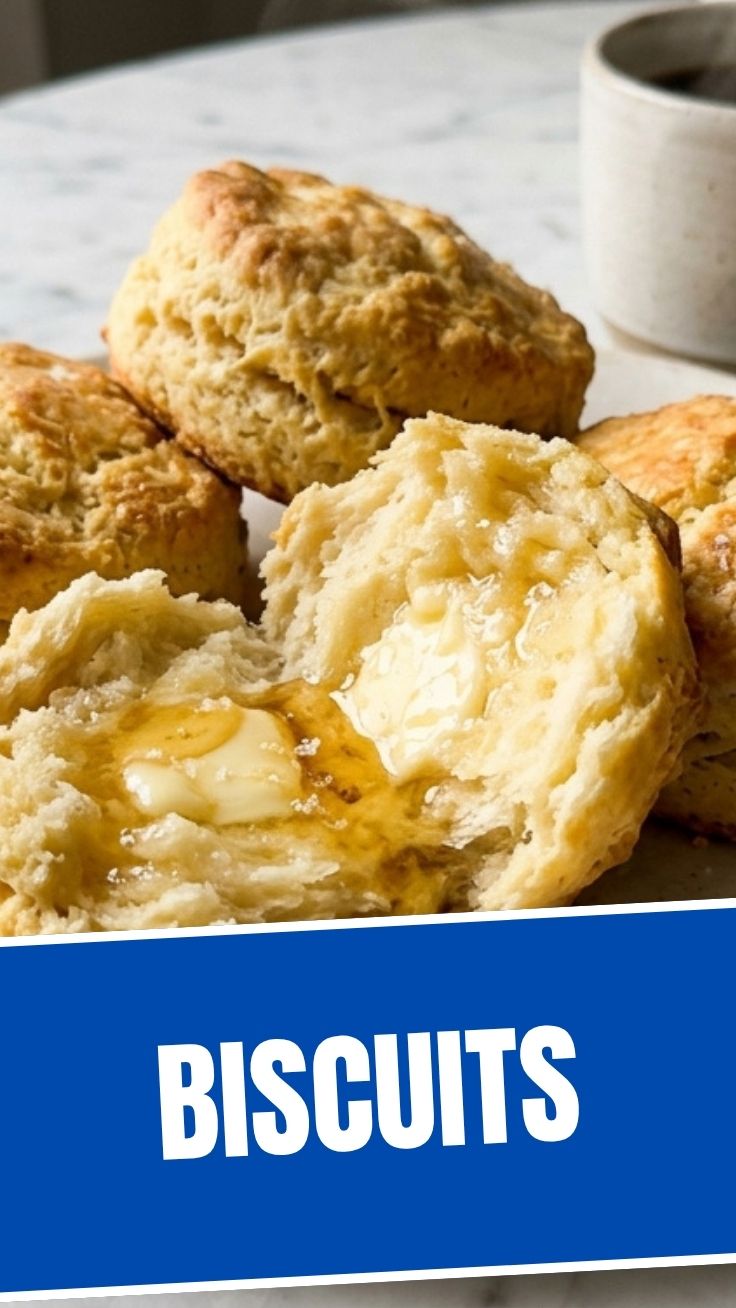
- Prep Time: 15-20 minutes
- Chill Time (Dough): 15-20 minutes (optional but recommended for flakier results)
- Cook Time: 12-15 minutes
This recipe is surprisingly quick, making it ideal for a weekend breakfast or a last-minute addition to dinner. The optional chill time allows the butter to firm up again, leading to more distinct layers when baked.
Step-by-Step Instructions
1. Preheat and Prepare: Preheat your oven to 425°F (220°C). Line a baking sheet with parchment paper.
2. Combine Dry Ingredients: In a large bowl, whisk together the flour, baking powder, baking soda, and salt. If using, add the sugar here as well. This ensures even distribution of leavening agents, vital for those perfect fluffy biscuits.
3. Cut in the Butter: Add the very cold, cubed butter to the dry ingredients. Using a pastry blender, two forks, or even your fingertips, cut the butter into the flour mixture until it resembles coarse crumbs with some pea-sized pieces remaining. The colder the butter, the flakier your biscuits will be. Avoid overworking, as this can melt the butter.
4. Add Buttermilk: Pour the cold buttermilk into the flour mixture. Stir with a spoon or your hand just until the dough comes together. It will be shaggy and slightly sticky – resist the urge to overmix! This is a crucial step for tender results that won’t feel like dense cookies.
5. Knead and Fold (Minimal): Turn the dough out onto a lightly floured surface. Gently pat it into a rough rectangle, about 3/4 to 1 inch thick. Fold the dough in thirds (like a letter), rotate it 90 degrees, and repeat the patting and folding process 2-3 more times. This creates layers without overdeveloping the gluten.
6. Cut the Biscuits: Gently press the dough to 1-inch thickness. Dip your biscuit cutter in flour (to prevent sticking) and press straight down into the dough – do not twist! Twisting seals the edges and prevents the biscuits from rising properly. Reroll scraps only once or twice, as overworked dough yields tougher biscuits.
7. Bake to Golden Perfection: Place the cut biscuits on the prepared baking sheet, either touching for softer sides or slightly separated for crispier edges. Bake for 12-15 minutes, or until golden brown on top and bottom. If desired, brush the tops with a little melted butter after about 10 minutes for an extra golden sheen.
8. Cool and Serve: Remove from the oven and let cool slightly on the baking sheet before serving.
Nutritional Benefits & Advantages
Homemade biscuits, when made with quality ingredients, offer more than just comfort. They provide a source of carbohydrates for energy and can be a good vehicle for incorporating healthy fats from butter (in moderation). Using buttermilk adds beneficial probiotics. Compared to many processed baked goods, you control the sugar, salt, and fat content, avoiding artificial flavors and preservatives. Plus, the satisfaction of creating something delicious from scratch is a nutrient in itself!
Tips, Variations & Cooking Advice
- Keep Ingredients Cold: This is the golden rule for flaky biscuits. Cold butter creates pockets of steam, which lead to layers.
- Don’t Overmix: Overmixing develops gluten, resulting in tough biscuits. A shaggy dough is a happy dough.
- Additions: Fold in grated sharp cheddar cheese and a pinch of cayenne pepper for savory cheese biscuits. For a touch of sweetness reminiscent of cookies, add a tablespoon of sugar to the dry ingredients and a handful of dried cranberries.
- Gluten-Free: Substitute gluten-free all-purpose flour blend (one that contains xanthan gum) cup-for-cup. The texture might be slightly different but still delicious.
- Dairy-Free: Use plant-based butter alternatives and a non-dairy “buttermilk” (e.g., almond milk with lemon juice).
- Buttermilk Substitute: As mentioned, 1 tablespoon of lemon juice or white vinegar mixed with enough regular milk to make ¾ cup, left to sit for 5-10 minutes, works well.
Common Mistakes to Avoid
- Warm Butter: This is the arch-nemesis of flaky biscuits. Ensure your butter is ice cold.
- Twisting the Cutter: Leads to sealed edges and poor rise. Press straight down.
- Overworking the Dough: Develops gluten, resulting in tough biscuits. Handle the dough as little as possible.
- Incorrect Oven Temperature: Too low, and the butter melts out before the biscuits set; too high, and they burn on the outside before cooking through.
Storage & Meal Prep Tips
Homemade biscuits are best enjoyed fresh from the oven. However, leftovers can be stored in an airtight container at room temperature for 1-2 days, or in the refrigerator for up to 3-4 days. To reheat, wrap them in foil and warm them in a 300°F (150°C) oven for about 10 minutes, or microwave briefly until heated through (though this may make them less crispy).
For meal prep, you can cut the unbaked biscuits, place them on a parchment-lined baking sheet, and freeze until solid. Once frozen, transfer them to a freezer-safe bag. Bake from frozen, adding an extra 5-10 minutes to the baking time.
Conclusion
Mastering homemade biscuits is a truly rewarding culinary achievement. With a few simple techniques and some cold ingredients, you can consistently produce tender, flaky biscuits that rival the best bakeries. Whether you enjoy them with butter and jam, soaking up a hearty gravy, or simply as a satisfying snack, these delightful creations are far superior to any pre-made alternative. So go ahead, don your apron, and bake a batch – you might find them as surprisingly addictive as your favorite cookies! We encourage you to try this recipe and share your golden results in the comments below.
FAQs
Q1: My biscuits are tough, what went wrong?
A1: This usually indicates overmixing the dough. Handle it as little as possible to prevent gluten development.
Q2: Can I use regular milk instead of buttermilk?
A2: Yes, you can make a buttermilk substitute by adding 1 tablespoon of lemon juice or white vinegar to ¾ cup of regular milk and letting it sit for 5-10 minutes before using.
Q3: How do I get those beautiful flaky layers?
A3: The key is very cold butter, cut into small pieces, and minimally working the dough. The folding technique also helps create layers.
Q4: Can I add herbs to my biscuits?
A4: Absolutely! Fresh or dried herbs like chives, rosemary, or thyme can be added to the dry ingredients for a savory twist. Fresh garlic powder also works wonderfully.