Bake Like a Boss: Your Ultimate Guide to Fudgy, Irresistible Brownies
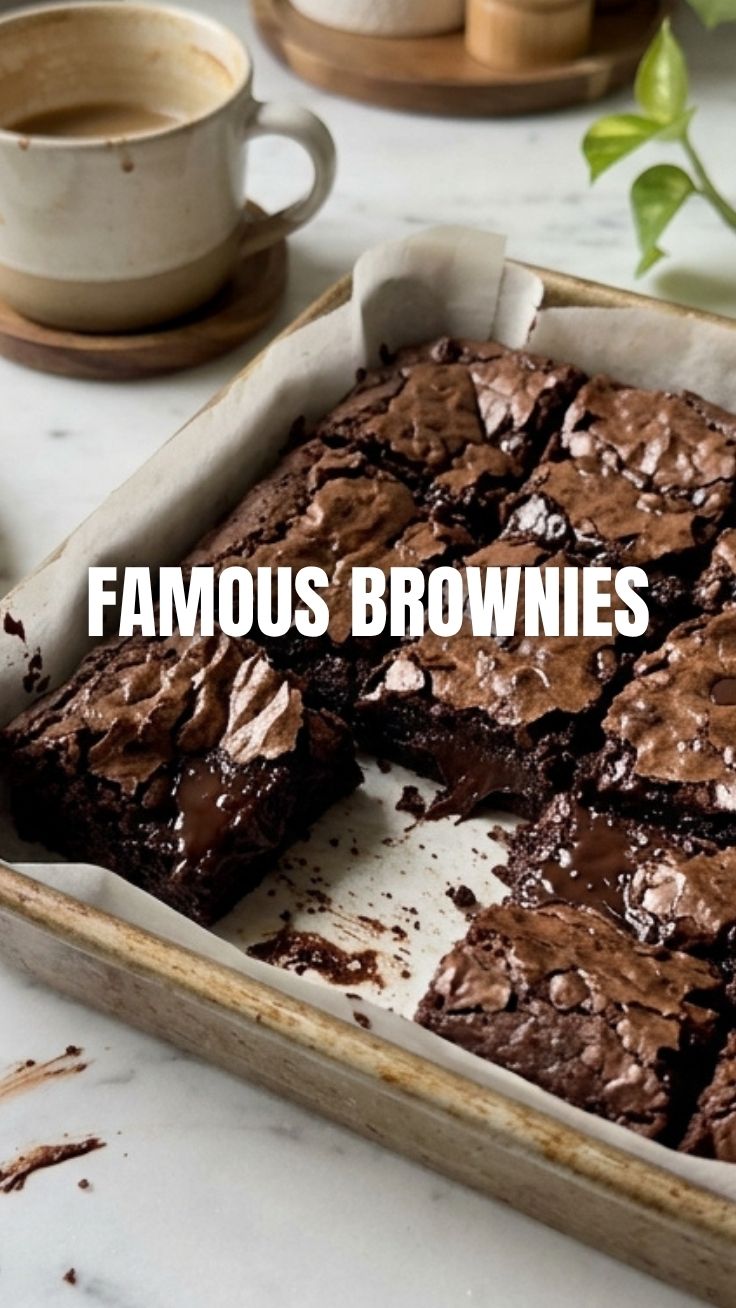
Ever wondered how some people consistently bake those perfectly fudgy, intensely chocolatey chocolate brownies that melt in your mouth? The secret isn’t a mystical baking gene; it’s a combination of precise techniques and quality ingredients. Forget those dry, crumbly imposters! Today, we’re diving deep into crafting the ultimate brownie experience right in your own kitchen. Baking at home allows for unparalleled control over ingredients, ensuring a wholesome treat free from artificial additives, and lets you customize the flavor profile to your heart’s content. Get ready to impress your friends and family with a batch of homemade brownies that are simply divine.
Ingredients & Kitchen Tools
Gather your culinary arsenal! Quality ingredients are the foundation of exceptional Brownies.
- Unsalted Butter (1 cup / 226g): Essential for richness and flavor. Unsalted allows you to control the salt content.
- Granulated Sugar (2 cups / 400g): Provides sweetness and contributes to the fudgy texture.
- Large Eggs (4): Binds ingredients, adds structure, and creates moistness. Room temperature eggs emulsify better.
- Vanilla Extract (2 tsp): Enhances all the other flavors. Use good quality extract.
- All-Purpose Flour (1 cup / 125g): Provides structure without making the brownies too cakey. Don’t overmix!
- Unsweetened Cocoa Powder (¾ cup / 75g): The star for deep chocolate flavor. Dutch-processed gives a darker, mellower chocolate taste.
- Salt (½ tsp): Balances sweetness and amplifies chocolate flavor.
- Chocolate Chips or Chunks (1 cup / 170g): For extra pockets of melted chocolate. Dark, semi-sweet, or even milk chocolate work well.
- 9×13 inch Baking Pan: A standard size for brownies.
- Parchment Paper: Lines the pan for easy removal and cleanup.
- Mixing Bowls (large and medium): For wet and dry ingredients.
- Whisk: For combining dry ingredients.
- Rubber Spatula: For folding and scraping.
- Saucepan (small): For melting butter.
- Oven: Preheat to 350°F (175°C).
Prep Time & Cooking Schedule
- Prep Time: 15 minutes
- Cook Time: 25-30 minutes
- Cooling Time: At least 30 minutes (preferably 1-2 hours for perfect fudginess)
This recipe is relatively quick to prepare, making it a perfect last-minute treat. The longest part is the cooling time, which is crucial for achieving that signature fudgy texture and clean cuts. Plan to bake these ahead of time if you want perfectly set squares.
Step-by-Step Instructions
1. Preheat and Prepare: Preheat your oven to 350°F (175°C). Line a 9×13 inch baking pan with parchment paper, leaving an overhang on the sides for easy lifting later. This simple step is your best friend for spotless pan removal and clean-cut Brownies.
2. Melt the Butter: In a small saucepan over medium-low heat, melt the unsalted butter. Once melted, remove from heat and let it cool slightly for a few minutes.
3. Combine Wet Ingredients: In a large mixing bowl, combine the granulated sugar with the slightly cooled melted butter. Whisk until well combined.
4. Add Eggs and Vanilla: Beat in the eggs, one at a time, ensuring each is fully incorporated before adding the next. Stir in the vanilla extract. The mixture should become glossy and light in color. This aeration is key for the chewiness of your chocolate brownies.
5. Mix Dry Ingredients: In a separate medium bowl, whisk together the all-purpose flour, unsweetened cocoa powder, and salt. Ensure there are no lumps.
6. Combine Wet and Dry: Gradually add the dry ingredients to the wet ingredients, mixing with a rubber spatula until just combined. Be careful not to overmix, as this can lead to tough brownies.
7. Fold in Chocolate Chips: Gently fold in the chocolate chips or chunks.
8. Bake: Pour the batter into your prepared baking pan and spread evenly. Bake for 25-30 minutes, or until a toothpick inserted into the center comes out with moist crumbs, but not wet batter. Overbaking is the enemy of fudgy brownies!
9. Cool Completely: Remove the pan from the oven and let the brownies cool completely in the pan on a wire rack. This can take 1-2 hours. Resist the urge to cut them while warm!
Nutritional Benefits & Advantages
These homemade Brownies, while undeniably a treat, also offer some surprising benefits. Dark cocoa powder, a primary ingredient, is rich in antioxidants, particularly flavonoids, which are known to support heart health and reduce inflammation. Eggs provide protein and essential vitamins, contributing to satiety. By making them at home, you avoid high-fructose corn syrup and artificial trans fats often found in store-bought versions. Plus, the sheer joy and satisfaction of a homemade treat contribute positively to mental well-being!
Tips Variations & Cooking Advice
- Fudgier VS Cakey: For ultimate fudginess, slightly underbake them. For a more cake-like texture, bake a few minutes longer.
- Coffee Boost: Add 1 teaspoon of instant espresso powder to the dry ingredients to enhance the chocolate flavor without a coffee taste.
- Nutty Goodness: Fold in ½ cup of chopped walnuts or pecans with the chocolate chips for added crunch and flavor.
- Salted Caramel Swirl: Drizzle homemade or store-bought salted caramel over the batter before baking and swirl gently with a knife.
- Gluten-Free: Substitute the all-purpose flour with a 1:1 gluten-free baking blend that contains xanthan gum.
- Dairy-Free: Use a good quality dairy-free butter substitute and ensure your chocolate chips are dairy-free.
Common Mistakes to Avoid
- Overmixing the Batter: This develops the gluten in the flour, resulting in tough, dry brownies instead of fudgy ones. Mix only until just combined.
- Overbaking: The most common culprit for dry, cakey brownies. Brownies continue to cook slightly after being removed from the oven. Aim for moist crumbs, not liquid batter, on a toothpick test.
- Cutting While Warm: This is a cardinal sin! Warm brownies are messy, crumbly, and won’t hold their shape. Patience is key for clean, fudgy squares.
- Not Lining the Pan: Makes removal a nightmare and cleanup a chore. Always use parchment paper!
- Using Too Little Cocoa Powder: Skimping on cocoa leads to bland, less intensely flavored brownies. Don’t be shy!
Storage & Meal Prep Tips
Once completely cooled, store your Brownies in an airtight container at room temperature for up to 3-4 days. For longer storage, you can refrigerate them for up to a week; they’ll become firmer but still delicious. For extended freshness, individual slices can be wrapped in plastic wrap and then foil, and frozen for up to 3 months. Thaw at room temperature or gently warm in the microwave for a just-baked feel.
Conclusion
Baking the perfect batch of fudgy, delectable Brownies is a truly rewarding experience, and with these tips and a little practice, you’ll be a pro in no time. From the precise measurements to the crucial cooling time, each step plays a vital role in creating that irresistible texture and deep chocolate flavor. So go ahead, whip up a batch of these glorious chocolate brownies and savor every rich, fudgy bite. Share your baking triumphs with us in the comments below!
FAQs
Q1: My brownies are too cakey. What went wrong?
A: Most likely, they were overbaked or the batter was overmixed, developing too much gluten. Stick to the baking time and gentle mixing.
Q2: Can I substitute oil for butter?
A: Yes, you can. Use the same amount of a neutral-flavored oil (like vegetable or canola oil). The texture might be slightly chewier, but they will still be delicious.
Q3: How do I get clean cuts?
A: Ensure the brownies are completely cooled. For extra neatness, you can chill them in the refrigerator for 30 minutes before cutting. Use a large, sharp knife and wipe it clean between cuts.
Q4: Can I use different types of chocolate?
A: Absolutely! Experiment with dark, semi-sweet, milk, or white chocolate chips/chunks. You can also mix and match for a layered flavor profile.