Craving Comfort? Unlock the Magic of Homemade Pumpkin Spice
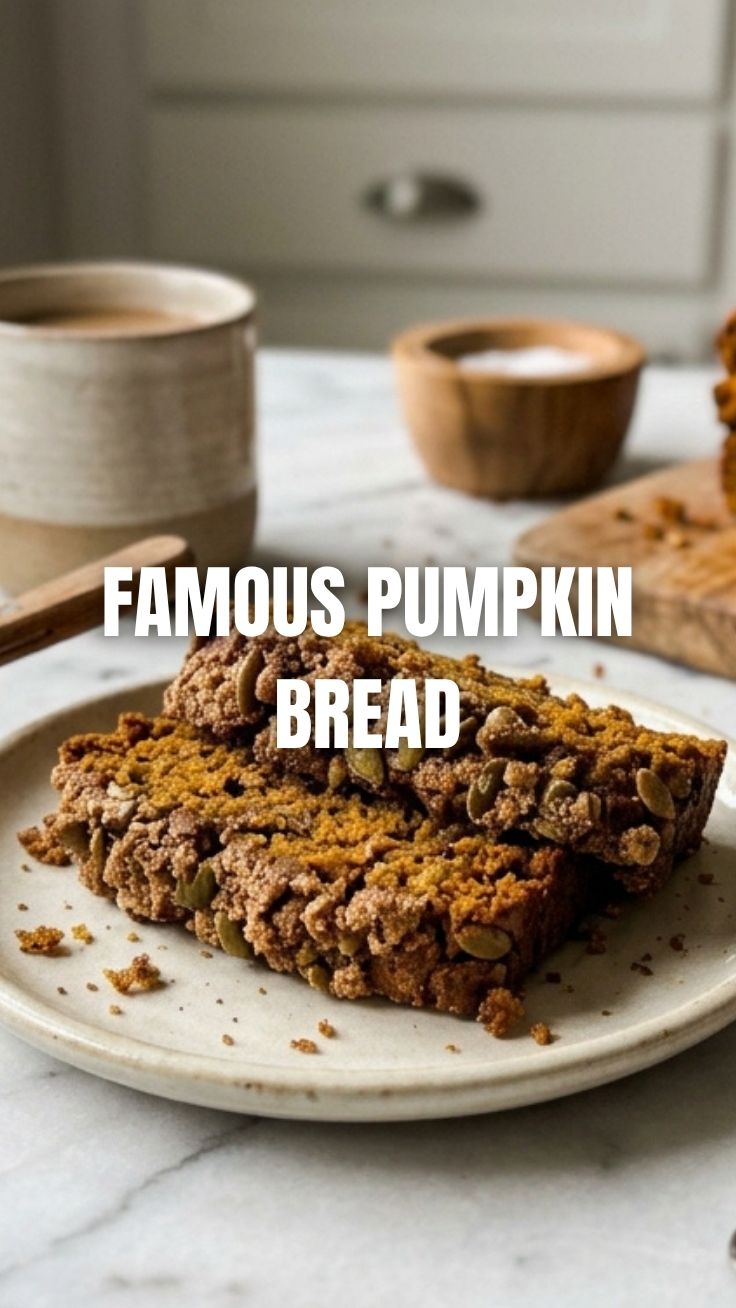
Ever wonder what truly defines autumn? For many, it’s the comforting aroma of freshly baked goods wafting from the kitchen. And when it comes to fall flavors, few things capture the essence of the season quite like a perfectly spiced Pumpkin Bread. This isn’t just about baking; it’s about crafting an experience, a moment of warm indulgence that brings joy to any occasion. Preparing this delightful treat at home isn’t just about saving money – it’s about controlling the quality of your ingredients, customizing the spice profile to your exact liking, and filling your home with an irresistible fragrance that store-bought versions simply can’t replicate. Forget those dry, flavorless imitations; today, we’re diving into the secrets behind a moist, tender, and incredibly aromatic Pumpkin Loaf that will have everyone asking for your recipe. Get ready to embrace the cozy side of baking and elevate your autumn experience!
Ingredients & Kitchen Tools
Gathering your mise en place is the first step to baking success. Here’s what you’ll need:
- 1 ½ cups all-purpose flour: The foundational structure for our bread. (Substitute with a 1:1 gluten-free flour blend for a GF version.)
- 1 teaspoon baking soda: Essential for a light and airy texture.
- ½ teaspoon salt: Balances the sweetness and enhances flavor.
- 1 teaspoon ground cinnamon: The quintessential pumpkin spice flavor.
- ½ teaspoon ground nutmeg: Adds warmth and depth.
- ¼ teaspoon ground cloves: Aromatic and perfectly complements cinnamon and nutmeg.
- ¼ teaspoon ground ginger: A subtle zing that brightens the spice profile.
- 1 cup granulated sugar: Provides sweetness and helps with browning. (Reduce by ¼ cup for a less sweet option.)
- ½ cup packed light brown sugar: Adds moisture and a rich, molasses-like flavor.
- ½ cup vegetable oil: Ensures a moist crumb. (Can substitute with melted coconut oil or unsalted butter.)
- 2 large eggs: Binds the ingredients and adds richness.
- 1 (15-ounce) can pumpkin puree: The star of the show. (Ensure it’s 100% pumpkin, not pumpkin pie filling.)
- ½ cup milk: Adds moisture and tenderness. (Any milk, dairy or non-dairy, works.)
- 1 teaspoon vanilla extract: Enhances all the other flavors.
- Optional Mix-ins: 1 cup chopped pecans or walnuts, ½ cup chocolate chips, ½ cup dried cranberries.
Kitchen Tools:
- 9×5-inch loaf pan: The ideal size for our bread.
- Large mixing bowl: For combining wet ingredients.
- Medium mixing bowl: For whisking dry ingredients.
- Whisk: For thorough mixing.
- Rubber spatula: For folding and scraping the bowl.
- Measuring cups and spoons: For precise ingredient amounts.
- Wire rack: For cooling the baked bread.
Prep Time & Cooking Schedule
- Prep Time: 15 minutes (This includes gathering ingredients and preheating your oven.)
- Cook Time: 55-65 minutes (Baking time can vary slightly depending on your oven.)
- Resting Time: 15-20 minutes in the pan, then fully cool on a wire rack (Crucial for the bread to set and for easy slicing.)
This recipe is perfect for a weekend baking project or to prep on a weeknight and enjoy over several days. The aroma alone is worth the effort!
Step-by-Step Instructions
1. Prep Your Oven and Pan: Preheat your oven to 350°F (175°C). Grease and flour your 9×5-inch loaf pan, or line it with parchment paper for easy removal.
2. Combine Dry Ingredients: In a medium bowl, whisk together the flour, baking soda, salt, cinnamon, nutmeg, cloves, and ginger. This ensures the spices and leavening agents are evenly distributed throughout your Pumpkin Bread.
3. Mix Wet Ingredients: In a large bowl, whisk together the granulated sugar, brown sugar, vegetable oil, eggs, pumpkin puree, milk, and vanilla extract until well combined and smooth.
4. Combine Wet and Dry: Gradually add the dry ingredients to the wet ingredients, mixing with your rubber spatula until just combined. Be careful not to overmix, as this can lead to a tough Pumpkin Loaf. If adding optional mix-ins, gently fold them in now.
5. Bake: Pour the batter into your prepared loaf pan and smooth the top. Bake for 55-65 minutes, or until a wooden skewer inserted into the center comes out clean.
6. Cool: Let the bread cool in the pan for 15-20 minutes before carefully inverting it onto a wire rack to cool completely. Slicing warm bread can cause it to crumble, so patience is key!
Nutritional Benefits & Advantages
Beyond its delicious taste, this pumpkin-infused treat offers some notable advantages. Pumpkin is a nutritional powerhouse, rich in Vitamin A (from beta-carotene), which is vital for vision and immune function. It’s also a good source of fiber, aiding digestion and promoting a feeling of fullness. Our recipe uses healthy oils and whole ingredients, minimizing processed additives. While it contains sugar, a homemade version allows for moderation compared to commercially produced goods. Enjoy a slice as a satisfying breakfast, a wholesome snack, or a delightful dessert!
Tips, Variations & Cooking Advice
- For Extra Flavor: Toast your nuts before adding them for a deeper, more robust flavor.
- Spice It Up (or Down): Adjust the amount of spices to your preference. Love ginger? Add a bit more! Not a fan of cloves? Reduce the amount slightly.
- Citrus Zest: A teaspoon of orange or lemon zest added to the wet ingredients brightens the entire flavor profile.
- Glaze it! For a decadent touch, whisk together powdered sugar, a splash of milk, and a tiny bit of vanilla extract to drizzle over the cooled loaf.
- Muffin Magic: You can easily adapt this recipe for muffins! Fill muffin tins two-thirds full and bake for 20-25 minutes, or until a tester comes out clean.
Common Mistakes to Avoid
- Overmixing the Batter: This is the cardinal sin of quick bread baking! Overmixing develops gluten, leading to a tough and dense loaf. Mix until just combined.
- Using Pumpkin Pie Filling: Pumpkin puree and pumpkin pie filling are NOT the same. Pie filling contains added sugars and spices, which will throw off the flavor and texture of this recipe. Always check the label.
- Not Cooling Completely: Slicing into a warm loaf can cause it to crumble and become gummy. Let it cool on a wire rack for at least 15-20 minutes in the pan, then fully on the rack.
- Incorrect Pan Size: Using a pan that’s too small can cause the batter to overflow, while a pan that’s too large might result in a dry, flat bread. Stick to the 9×5-inch pan.
Storage & Meal Prep Tips
Your homemade Pumpkin Bread is a fantastic make-ahead option!
- Countertop Storage: Store cooled bread in an airtight container at room temperature for up to 3-4 days. This allows the flavors to meld beautifully.
- Refrigeration: For longer storage, refrigerate the bread in an airtight container for up to a week.
- Freezing: This bread freezes beautifully! Wrap individual slices or the entire cooled loaf tightly in plastic wrap, then an additional layer of aluminum foil. Freeze for up to 3 months. Thaw at room temperature or gently warm in the microwave or oven.
- Reheating: A quick zap in the microwave for 15-30 seconds per slice, or a few minutes in a toaster oven, brings back that delightful warmth and aroma.
Conclusion
There you have it – a foolproof guide to crafting the ultimate Pumpkin Bread. This recipe promises not just a delicious treat, but an experience that embodies the warmth and comfort of autumn. From the intoxicating aroma that fills your kitchen to the first tender bite, every step of preparing this Pumpkin Loaf is a joy. So, roll up your sleeves, gather your ingredients, and immerse yourself in the magic of homemade fall baking. Don’t be shy – bake a loaf (or two!), share your culinary triumph in the comments below, or explore our other seasonal delights!
FAQs
Q: Can I use fresh pumpkin instead of canned puree?
A: Yes, absolutely! You’ll need about 1 ½ cups of cooked and pureed fresh pumpkin for this recipe. Ensure it’s well-drained to avoid adding excess moisture.
Q: My bread is browning too quickly on top. What should I do?
A: If the top is browning too fast, loosely tent a piece of aluminum foil over the loaf to prevent further browning while the inside continues to cook.
Q: Can I make this dairy-free?
A: Yes, easily! Use a non-dairy milk alternative (like almond, soy, or oat milk) and substitute the vegetable oil with another plant-based oil if desired.
Q: How do I know when the bread is perfectly baked?
A: The best way is the skewer test. Insert a wooden skewer or toothpick into the center of the loaf; if it comes out clean with no wet batter, your bread is done.