Mastering the Art of Rustic Desserts: Your Guide to the Perfect Homemade Apple Crisp
Ever wondered if you could recreate that comforting, fragrant aroma of a perfect fall dessert right in your own kitchen? The answer, unequivocally, is yes! There’s an unparalleled joy in preparing a classic like Apple Crisp from scratch. This isn’t just about baking; it’s about crafting a heartwarming experience, transforming simple ingredients into a symphony of flavors and textures. While many love the elaborate construction of a homemade Apple Pie, the humble apple crisp offers a more casual yet equally satisfying dessert experience, making it an invaluable addition to any home cook’s repertoire. Let’s delve into how you can achieve this culinary feat with ease and confidence.
Ingredients & Kitchen Tools
To embark on this delightful baking journey, gather the following:
Ingredients:
- For the Filling:
* 6-8 medium baking apples: (e.g., Honeycrisp, Granny Smith, Fuji) – A mix offers a balanced sweetness and tartness. Peel, core, and slice them about ¼ inch thick.
* ½ cup granulated sugar: Adjust to your apple’s sweetness.
* 2 tablespoons all-purpose flour: (or cornstarch for gluten-free) – Helps thicken the juices.
* 1 teaspoon ground cinnamon: The quintessential apple spice.
* ¼ teaspoon ground nutmeg: Adds a warm, aromatic note.
* Pinch of salt: Enhances all the flavors.
* 1 tablespoon lemon juice: Prevents browning and brightens the flavor.
- For the Topping:
* 1 cup all-purpose flour: (or gluten-free blend) – The base for the crisp.
* ½ cup packed light brown sugar: Adds a rich, caramel-like sweetness.
* ½ cup rolled oats: (not instant) – Provides texture and chewiness.
* ½ teaspoon ground cinnamon: Echoes the filling’s spice.
* ¼ teaspoon salt: Balances the sweetness.
* ½ cup (1 stick) unsalted butter: Chilled and cut into small cubes – crucial for flakiness.
Kitchen Tools:
- 9×13 inch baking dish: (or similar 2-qt capacity) – The perfect size for an ample crisp.
- Large mixing bowl: For tossing apples and preparing the topping.
- Pastry blender or your fingertips: For incorporating butter into the topping.
- Vegetable peeler and corer: For efficient apple prep.
- Sharp knife and cutting board: For slicing apples.
Prep Time & Cooking Schedule
- Prep time: 25 minutes
- Cook time: 45-55 minutes
- Resting time: 15 minutes before serving (allows juices to set)
This recipe is ideal for a weekend baking project or a comforting weeknight dessert. The resting time ensures the filling isn’t too runny when served, making for a perfectly structured slice.
Step-by-Step Instructions
1. Preheat & Prep Baking Dish: Preheat your oven to 375°F (190°C). Lightly grease your 9×13 inch baking dish. This prevents sticking and makes for easier serving.
2. Prepare the Apple Filling: In a large mixing bowl, combine the sliced apples, granulated sugar, flour, cinnamon, nutmeg, salt, and lemon juice. Toss gently until the apples are evenly coated. Ensure the flour is distributed to prevent clumping. Pour the seasoned apples into the prepared baking dish, spreading them into an even layer. This layer is the heart of your perfect Apple Crisp, so make sure it’s packed just right.
3. Craft the Crisp Topping: In the same (or another) large bowl, whisk together the flour, brown sugar, rolled oats, cinnamon, and salt for the topping. Add the chilled, cubed butter. Using a pastry blender or your fingertips, work the butter into the dry ingredients until the mixture resembles coarse crumbs with some pea-sized pieces remaining. Avoid overmixing, as this can make the topping tough.
4. Assemble and Bake: Evenly sprinkle the crisp topping over the apple mixture in the baking dish. Place the baking dish on a baking sheet (to catch any potential overflow). Bake for 45-55 minutes, or until the topping is golden brown and the filling is bubbling thickly. The delicious aroma filling your kitchen will tell you it’s almost ready – a simpler pleasure than waiting for a classic Apple Pie
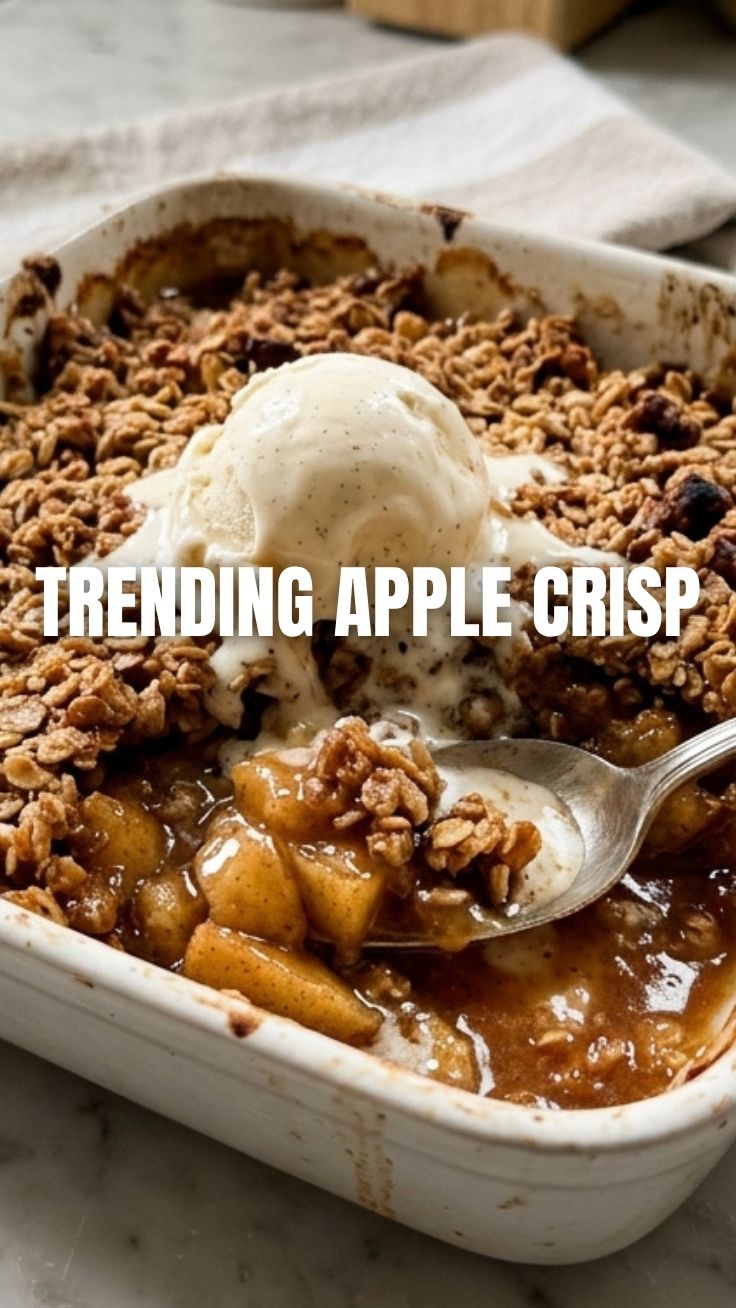
5. Rest and Serve: Once out of the oven, let the apple crisp rest for at least 15 minutes before serving. This allows the juices to thicken and prevents the top from crumbling excessively. Serve warm, perhaps with a scoop of vanilla bean ice cream or a dollop of fresh whipped cream.
Nutritional Benefits & Advantages
Apples are a fantastic source of dietary fiber, especially pectin, which aids digestion and can help regulate blood sugar levels. They are rich in antioxidants like Vitamin C and various polyphenols, contributing to overall health and reducing oxidative stress. By making your crisp at home, you control the sugar content, avoiding excessive amounts often found in store-bought versions. The oats in the topping add soluble fiber, further boosting its nutritional profile and providing sustained energy.
Tips, Variations & Cooking Advice
- Apple Choice: Don’t be afraid to mix and match! A combination of sweet and tart apples (e.g., Honeycrisp and Granny Smith) creates the most balanced flavor profile.
- Gluten-Free Version: Substitute all-purpose flour with a 1:1 gluten-free baking blend in both the filling and topping. Ensure your oats are certified gluten-free.
- Dairy-Free Option: Use a high-quality plant-based butter alternative for the topping.
- Nutty Boost: Add ½ cup of chopped pecans or walnuts to the topping for extra crunch and flavor.
- Spice It Up: Incorporate a pinch of ground ginger or cardamom for a more complex spice blend.
- Prevent Soggy Bottom: If you’re concerned about a soggy bottom, lightly pre-bake the apples for 10-15 minutes before adding the topping.
Common Mistakes to Avoid
- Undercooked Apples: Ensure apples are tender when pierced with a fork before removing from the oven. If they’re visible bubbling, that’s a good sign they’re cooked through.
- Dry Topping: Not enough butter or overworking the butter can lead to a dry, crumbly topping. Aim for pea-sized clumps.
- Too Much Liquid: Overly juicy apples can make the filling watery. Ensure you use the specified amount of flour as a thickener. If your apples are particularly juicy, you might add an extra teaspoon of flour.
- Not Letting it Rest: Serving immediately can result in a runny filling. Patience is key for that perfect slice!
Storage & Meal Prep Tips
Leftover apple crisp keeps well. Cover it tightly with plastic wrap or aluminum foil and store at room temperature for up to 2 days, or in the refrigerator for up to 5 days. For longer storage, freeze individual portions in airtight containers for up to 3 months. To reheat, warm in a preheated oven at 350°F (175°C) until heated through and the topping is crisp again (about 15-20 minutes for refrigerated, longer for frozen). Microwave reheating is possible but may soften the topping.
Conclusion
Creating a homemade Apple Crisp is more than just following a recipe; it’s about embracing the warmth and comfort that only a freshly baked dessert can bring. This guide empowers you to bake a perfect crisp, rivaling even the most intricate Apple Pie in its ability to delight. We encourage you to try this recipe and experience the simple magic for yourself. Share your baking triumphs with us or explore our other delightful dessert recipes designed to bring joy to your kitchen!
FAQs
Q1: Can I use different fruits for this recipe?
A1: Absolutely! While apples are classic, this crisp recipe works beautifully with pears, peaches, berries, or a combination of fruits. Adjust sugar content based on the sweetness of your chosen fruit.
Q2: How do I know when the crisp is fully baked?
A2: The topping should be golden brown and crisp, and the apple filling should be visibly bubbling with thick juices around the edges of the dish. You can also insert a knife into the filling to check if the apples are tender.
Q3: What’s the secret to a perfectly crumbly topping?
A3: The key is chilled butter and not overmixing. The butter should be cut into small pieces and worked into the dry ingredients until it resembles coarse crumbs with some pea-sized pieces remaining. This creates steam pockets that lead to a light, crisp texture.
Q4: Can I make this ahead of time?
A4: You can assemble the crisp (without baking) and refrigerate it for up to 24 hours. Add an extra 10-15 minutes to the baking time if baking from chilled. Alternatively, bake it fully and then reheat as instructed.
Q5: My crisp topping browned too quickly, but the apples aren’t cooked. What went wrong?
A5: Your oven might be running hot, or the crisp was placed too close to the heating element. Loosely tent the crisp with aluminum foil for the remainder of the baking time to prevent further browning while allowing the apples to cook through.