Embrace Autumn’s Sweetness: Crafting the Perfect Homemade Apple Pie
Ever wondered what makes a truly unforgettable dessert? It’s often the warmth, the aroma, and the love baked into every bite. Today, we’re diving into the delightful world of crafting your very own homemade Apple Pie. Forget store-bought imitations; there’s an unparalleled satisfaction in creating this classic treat from scratch. Not only does it fill your home with an irresistible scent, but it also allows you to control the quality of ingredients, making it a healthier and more personalized indulgence. The secret to its flaky foundation often lies in a well-executed Apple Pie Crust, a cornerstone we’ll master together. Prepare to elevate your baking skills and delight your taste buds with this iconic American dessert.
Ingredients & Kitchen Tools
- For the Apple Pie Filling:
6-8 medium baking apples (Granny Smith, Honeycrisp, Braeburn, or a mix) – Known for retaining shape and flavor when baked.*
½ cup granulated sugar – For sweetness.*
¼ cup packed light brown sugar – Adds a deeper, caramel-like flavor.*
2 tablespoons all-purpose flour or cornstarch – Thickens the filling.*
1 teaspoon ground cinnamon – Classic apple pie spice.*
¼ teaspoon ground nutmeg – Adds warmth and depth.*
⅛ teaspoon ground cloves (optional) – For an extra spicy kick.*
1 tablespoon lemon juice – Brightens flavor and prevents browning.*
2 tablespoons unsalted butter, cubed – Enriches the filling.*
- For the Apple Pie Crust:
2 ½ cups all-purpose flour, plus more for dusting – The base of our flaky crust.*
1 teaspoon salt – Enhances flavor.*
1 cup (2 sticks) unsalted butter, very cold and cubed – Essential for flakiness.*
½ cup ice water, plus more if needed – Binds the dough without over-developing gluten.*
- For the Egg Wash & Topping:
1 large egg, beaten – For a golden-brown crust.*
1 tablespoon milk or cream – Adds richness to the wash.*
1-2 tablespoons coarse sugar (optional) – For a sparkling finish.*
- Kitchen Tools:
9-inch pie plate – The perfect vessel for your pie.*
Large mixing bowls – For apples and dough.*
Pastry blender or food processor – For cutting butter into flour.*
Rolling pin – To achieve an even crust thickness.*
Parchment paper or silicone baking mat – Prevents sticking.*
Paring knife and apple peeler – For apple prep.*
Whisk – For combining dry ingredients.*
Prep Time & Cooking Schedule
- Prep Time: Approximately 45-60 minutes (including apple peeling and crust preparation).
- Chill Time (Crust): 30 minutes in the refrigerator, or 15 minutes in the freezer. This is crucial for a flaky crust.
- Cook Time: 50-60 minutes at 425°F (220°C), then 35-45 minutes at 375°F (190°C).
- Resting Time: At least 2-3 hours on a cooling rack. This allows the filling to set properly, preventing a runny pie. Patience is key for a perfect slice!
Step-by-Step Instructions
1. Prepare the Dough: In a large bowl, whisk together flour and salt for the Apple Pie Crust. Cut in the cold butter using a pastry blender or your fingertips until the mixture resembles coarse crumbs with some pea-sized butter pieces. Gradually add ice water, 1 tablespoon at a time, mixing until just combined. The dough should hold together when squeezed but not be sticky. Divide the dough in half, flatten into discs, wrap in plastic, and chill for at least 30 minutes.
2. Make the Apple Filling: Peel, core, and slice your apples into uniform ¼-inch pieces. In a large bowl, toss the sliced apples with granulated sugar, brown sugar, flour (or cornstarch), cinnamon, nutmeg, cloves (if using), and lemon juice until well coated.
3. Assemble the Pie: On a lightly floured surface, roll out one disc of chilled dough into a 12-inch circle. Carefully transfer it to your 9-inch pie plate. Trim the edges, leaving about a ½-inch overhang.
4. Add the Filling: Pour the apple mixture into the crust, mounding it slightly in the center. Dot the top of the apples with the cubed butter.
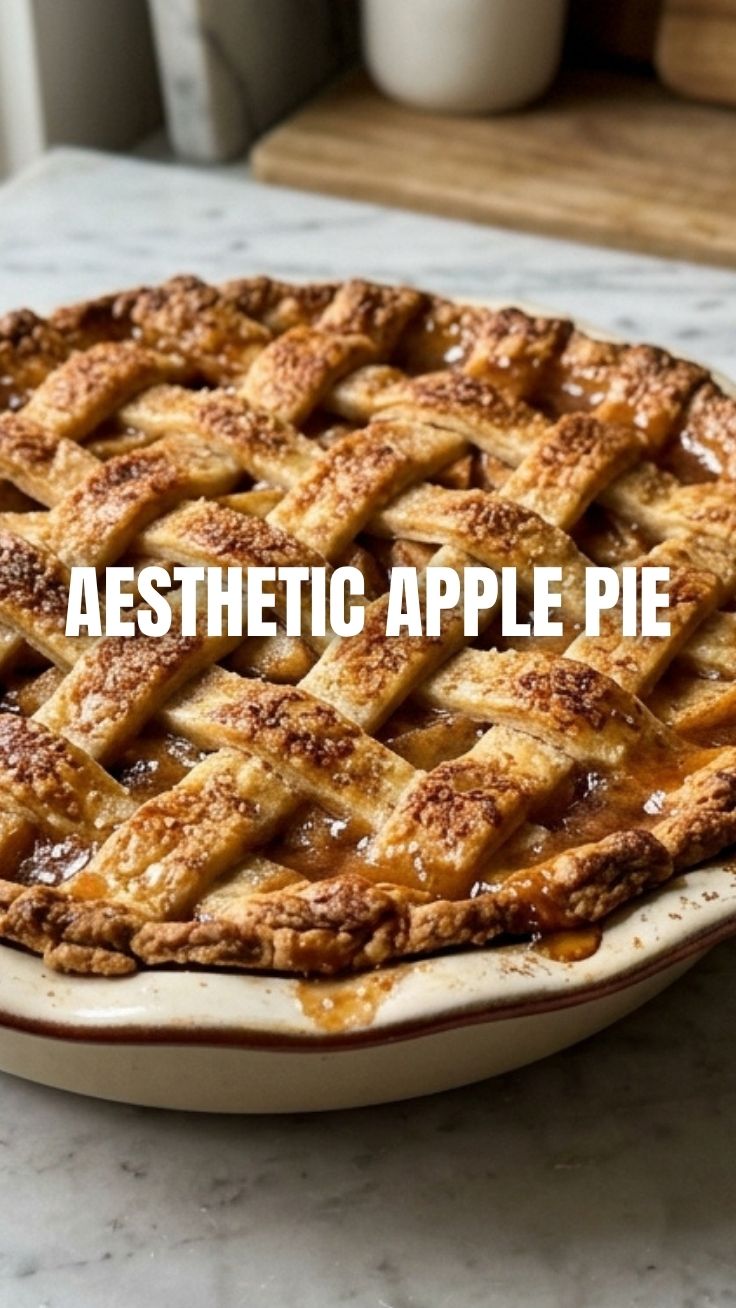
5. Top the Pie: Roll out the second disc of dough. You can either place it directly over the filling, cut vents for steam, or create a decorative lattice top. Place the top crust over the filling, trim the edges, and crimp the top and bottom crusts together to seal.
6. Egg Wash and Bake: In a small bowl, whisk together the egg and milk for the egg wash. Brush the top of the Apple Pie with the egg wash and sprinkle with coarse sugar if desired.
7. Bake: Preheat your oven to 425°F (220°C). Bake for 15-20 minutes, or until the crust is lightly golden. Reduce the oven temperature to 375°F (190°C), cover the edges of the pie with foil to prevent over-browning, and continue baking for another 35-45 minutes, or until the filling is bubbly and the apples are tender when pierced with a knife.
8. Cool: Transfer the pie to a wire rack and let it cool completely for at least 2-3 hours before slicing. This is crucial for the filling to set.
Nutritional Benefits & Advantages
Apples, the star of our show, are rich in dietary fiber, including pectin, which aids digestion and can help regulate blood sugar levels. They are also packed with antioxidants like Vitamin C, crucial for immune health, and various polyphenols that contribute to cardiovascular wellness. While a homemade Apple Pie is a treat, making it from scratch allows you to use fresh, whole ingredients, avoiding the preservatives and excessive sugars often found in commercially prepared desserts.
Tips, Variations & Cooking Advice
- Apple Blend: For the best flavor and texture, use a mix of tart and sweet apples. Granny Smith offers tartness and holds its shape, while Honeycrisp or Fuji provide sweetness and a softer bite.
- Crust Perfection: For an extra flaky Apple Pie Crust, keep your butter and water as cold as possible. You can even cube the butter and freeze it for 15 minutes before using.
- Flavor Boosts: Add a splash of vanilla extract, a tablespoon of bourbon, or a pinch of ground ginger to the apple filling for an extra layer of complexity.
- Gluten-Free Option: Substitute all-purpose flour in the crust with a 1:1 gluten-free baking blend that contains xanthan gum.
- Dairy-Free: Use a plant-based butter substitute for the crust and filling.
- Preventing a Soggy Bottom: Preheat your pie plate in the oven before adding the crust, or sprinkle a thin layer of breadcrumbs or crushed cornflakes on the bottom crust before adding the filling.
Common Mistakes to Avoid
- Overworking the Dough: This develops gluten, leading to a tough, bready crust instead of a tender, flaky one. Mix just until combined.
- Not Chilling the Dough Enough: Cold butter creates steam in the oven, essential for flakiness. Warm dough results in a greasy, tough crust.
- Under-baking: A pale crust means the pie hasn’t baked long enough. The bottom crust especially needs sufficient time to cook through.
- Cutting Too Soon: The filling needs adequate time to cool and set. Cutting into a hot pie will result in a runny, messy slice.
Storage & Meal Prep Tips
Leftover Apple Pie can be stored at room temperature, loosely covered, for up to 2 days. For longer storage, refrigerate the pie, covered, for up to 5 days. You can also freeze individual slices or the entire baked pie, wrapped tightly in plastic wrap and then foil, for up to 3 months. Thaw frozen pie in the refrigerator overnight and reheat in a 350°F (175°C) oven for about 20-30 minutes, or until warmed through.
Conclusion
Crafting a homemade Apple Pie is more than just baking; it’s an experience that engages all your senses and culminates in a truly comforting dessert. From the meticulous preparation of a perfect Apple Pie Crust to the fragrant, spiced apple filling, each step contributes to a culinary masterpiece. We hope this guide empowers you to bake with confidence and joy. Don’t be afraid to experiment and make this recipe your own. Share your delicious creations with us in the comments below, or tell us your favorite apple pie memories!
FAQs
Q1: How do I prevent my bottom crust from getting soggy?
A1: Ensure your pie bakes long enough to allow the bottom crust to crisp. You can also pre-bake the bottom crust (blind bake) for 10-15 minutes before adding the filling, or sprinkle a thin layer of breadcrumbs on the bottom before adding apples.
Q2: Can I use frozen apples for this recipe?
A2: While fresh apples are preferred, you can use frozen. Thaw them completely and drain any excess liquid to prevent a watery filling. You might need to add an extra tablespoon of flour or cornstarch to thicken the filling.
Q3: What’s the best way to get a perfectly flaky crust?
A3: The key is very cold butter, minimal handling of the dough, and insufficient water. The cold butter creates steam pockets during baking, resulting in flakiness.
Q4: How important is letting the pie cool completely?
A4: Extremely important! Cooling allows the starches in the pie filling to set, resulting in clean, firm slices. Cutting a hot pie will yield a runny, inconsistent mess.
Q5: Can I prepare the pie ahead of time?
A5: You can prepare the dough up to 2-3 days in advance and store it in the refrigerator. The apple filling can also be mixed a few hours ahead, but it’s best to assemble and bake the pie closer to serving for optimal freshness.