Unlock the Secret to Creamy, Homemade Hummus: Your Guide to a Mediterranean Delight!
Ever wondered if you could recreate that incredibly smooth, lusciously creamy Hummus you find in your favorite Mediterranean restaurant right in your own kitchen? The answer is a resounding yes! Preparing homemade Hummus recipe isn’t just about saving a few bucks; it’s about controlling the quality of your ingredients, customizing flavors to your exact preference, and experiencing the unparalleled freshness that only a from-scratch dish can offer. This classic Middle Eastern dip, beloved for its versatility and nutritional prowess, is surprisingly simple to master. By following our detailed guide, you’ll soon be whipping up a batch of this velvety chickpea dip that will impress even the most discerning palates. Get ready to elevate your snacking game and delve into the delightful world of homemade hummus!
Ingredients & Kitchen Tools
To embark on your hummus-making journey, gather these essential items:
- 1 (15-ounce) can chickpeas (garbanzo beans): Drained and rinsed thoroughly, these are the heart of your hummus. For extra creaminess, some prefer to remove the skins (optional but recommended!).
- 1/2 cup tahini: A paste made from toasted ground sesame seeds, crucial for the authentic flavor and texture. Look for a good quality, runny tahini.
- 1/4 cup fresh lemon juice: Essential for brightness and acidity. Always use freshly squeezed for the best results.
- 2-3 tablespoons cold water: Adjusts consistency to achieve that perfect creaminess. Start with less and add more as needed.
- 2 cloves garlic: Minced, provides a pungent aromatic kick. Adjust to your preference.
- 1/2 teaspoon ground cumin: Adds warmth and depth to the flavor profile.
- 1/2 teaspoon salt: Enhances all the other flavors. Adjust to taste.
- Pinch of smoked paprika or sumac (for garnish): Adds a beautiful color and a hint of smoky or tangy flavor.
- Extra virgin olive oil (for drizzling): A finishing touch that adds richness and shine.
Kitchen Tools:
- Food processor or high-speed blender: Absolutely necessary for achieving a super smooth and creamy texture.
- Fine-mesh sieve (optional): For rinsing chickpeas and potentially removing skins.
- Measuring cups and spoons: For accurate ingredient proportions.
- Rubber spatula: For scraping down the sides of the food processor.
Prep Time & Cooking Schedule
- Prep Time: 10-15 minutes (this includes rinsing chickpeas and gathering ingredients).
- Cook Time: 0 minutes (no cooking required for the hummus itself!).
- Resting Time: 30 minutes (optional but recommended) to allow flavors to meld and for the hummus to chill, resulting in a more refined taste.
This recipe is incredibly quick and perfect for a last-minute gathering or a spontaneous craving. Plan to make it slightly ahead of time if you prefer it chilled.
Step-by-Step Instructions
1. Prepare the Chickpeas: Drain and rinse the canned chickpeas thoroughly under cold water. If you desire extra smooth hummus, gently rub the chickpeas between your palms or on a clean kitchen towel to remove their skins. This step, while optional, makes a significant difference in the final texture of your Hummus.
2. Combine ingredients in Food Processor: In the bowl of your food processor, add the tahini and fresh lemon juice. Process for about 1 minute until the mixture becomes thick and creamy, almost like a whipped paste. This step helps emulsify the tahini and lemon juice, leading to a lighter, airier hummus.
3. Add Garlic, Cumin, and Salt: Add the minced garlic, ground cumin, and salt to the tahini-lemon mixture. Process for another 30 seconds until well combined.
4. Add Chickpeas: Add the drained chickpeas to the food processor. Process for 1-2 minutes, scraping down the sides of the bowl as needed, until the mixture is mostly smooth.
5. Achieve Creaminess with Cold Water: With the food processor running, gradually add the cold water, one tablespoon at a time, until the Hummus recipe reaches your desired consistency – smooth, light, and spreadable. You might not need all the water, or you might need a little more depending on your tahini and chickpea brand. Continue processing until it’s incredibly silky.
6. Taste and Adjust: Taste the hummus and adjust seasonings as needed. You might want more salt, lemon, or even a dash more cumin.
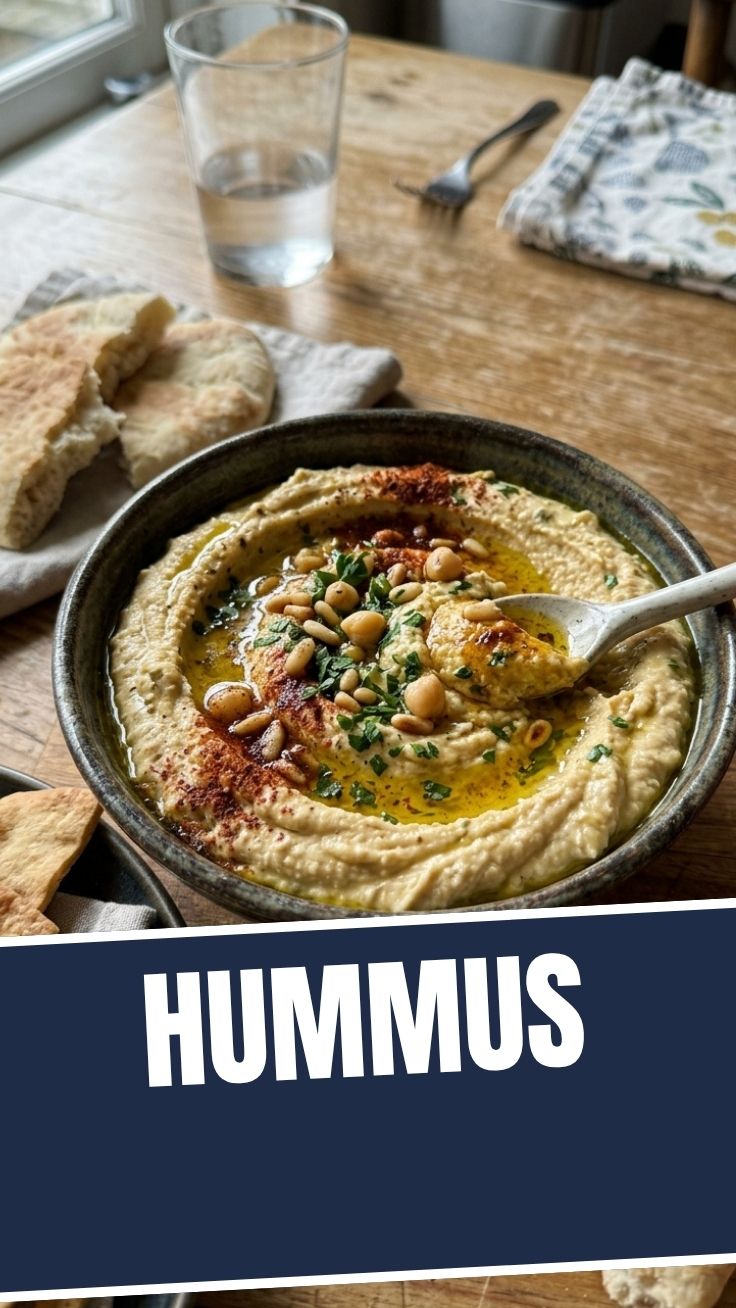
7. Serve & Garnish: Transfer the hummus to a serving bowl. Create a shallow well in the center with the back of a spoon, drizzle generously with extra virgin olive oil, and sprinkle with smoked paprika or sumac. Serve immediately or chill for better flavor.
Nutritional Benefits & Advantages
This homemade dip isn’t just delicious; it’s a nutritional powerhouse! Chickpeas are an excellent source of plant-based protein and dietary fiber, promoting satiety and aiding digestion. Tahini provides healthy fats, calcium, iron, and magnesium. Lemon juice adds Vitamin C, while garlic offers antioxidant and anti-inflammatory properties. Overall, hummus is a heart-healthy, gluten-free, and often vegan-friendly option that supports sustained energy and can be a fantastic part of a balanced diet.
Tips, Variations & Cooking Advice
- Roasted Garlic Hummus: Roast a head of garlic until soft, then squeeze the cloves into the food processor instead of raw garlic for a sweeter, milder flavor.
- Spicy Hummus: Add a pinch of cayenne pepper, a dash of hot sauce, or a roasted jalapeño to the mix.
- Herbed Hummus: Incorporate fresh herbs like parsley, cilantro, or mint for a vibrant twist.
- Sun-dried Tomato Hummus: Add 1/4 cup of oil-packed sun-dried tomatoes (drained) for a rich, tangy flavor.
- Beet Hummus: Roast a small beet, then blend it with the other ingredients for a vibrant, earthy, and naturally sweet variation.
- Storage Tip: If the hummus thickens too much in the fridge, add a tablespoon of cold water and stir well to loosen it before serving.
Common Mistakes to Avoid
- Not Processing Long Enough: The key to creamy hummus is patience! Process for several minutes, scraping down the sides, to achieve that silky smooth texture.
- Using Too Little Tahini: Don’t skimp on the tahini; it’s crucial for the authentic flavor and emulsification.
- Not Adjusting Water: Gradually add cold water until you reach your desired consistency. Too much too soon can make it runny, while too little leaves it thick.
- Skipping Lemon Juice: Fresh lemon juice is non-negotiable for brightness and balance.
- Not Peeling Chickpea Skins (for purists): If you’re aiming for ultimate creaminess, take the extra step to remove the chickpea skins.
Storage & Meal Prep Tips
Homemade hummus stores beautifully. Transfer it to an airtight container and store in the refrigerator for up to 5-7 days. To prevent it from drying out, you can drizzle a thin layer of olive oil over the top before sealing. Hummus can also be frozen for up to one month. Thaw in the refrigerator overnight, then stir in a tablespoon of cold water if needed to restore its creamy texture. It’s an excellent component for meal prepping, ready to be paired with veggies, pita, or as a spread for sandwiches and wraps.
Conclusion
Mastering this incredibly versatile and healthy Hummus at home opens up a world of culinary possibilities. From a simple snack to a delicious accompaniment, this creamy chickpea dip is a testament to the power of fresh, quality ingredients. We hope this comprehensive guide inspires you to create your own batches of this delightful Hummus recipe. Don’t hesitate to experiment with the variations and customize it to your taste. Share your results with us and happy dipping!
FAQs
Q1: Can I use dried chickpeas instead of canned?
A1: Yes, absolutely! Soak dried chickpeas overnight, then boil them until very tender (much softer than you’d normally cook them) before proceeding with the recipe. This often yields an even creamier result.
Q2: My hummus is too thick, what should I do?
A2: Add a tablespoon of cold water at a time to your hummus while blending until it reaches your desired consistency. You can also add a little more lemon juice for extra tang.
Q3: How do I make my hummus extra smooth without peeling chickpeas?
A3: Ensure your tahini and lemon juice are processed well first, then add the chickpeas and process for a good 3-5 minutes, adding cold water gradually. A high-speed blender often achieves a smoother texture than a food processor.
Q4: What are some good pairings for hummus?
A4: Hummus pairs wonderfully with warm pita bread, fresh vegetable sticks (carrots, celery, bell peppers, cucumbers), crackers, as a spread on sandwiches or wraps, or dolloped onto salads and grain bowls.
Q5: My hummus tastes bitter, why?
A5: Bitterness often comes from low-quality tahini. Ensure you’re using a good quality, well-stirred tahini. Also, too much garlic can sometimes contribute to bitterness; adjust the amount to your preference.