Master the Art of Perfect Roast Chicken: Your Ultimate Guide to Juiciness and Flavor
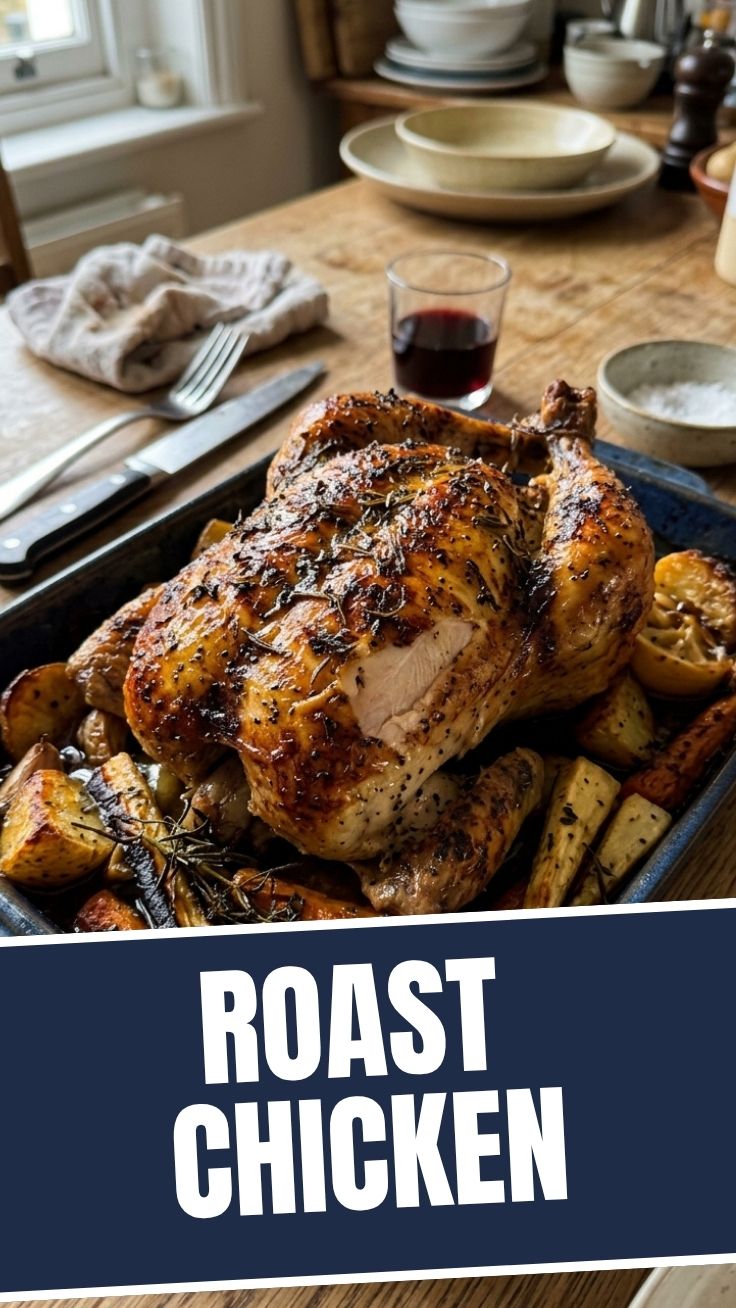
Ever wondered if you could achieve that restaurant-quality, succulent Roast Chicken right in your own kitchen? The kind with unbelievably crispy skin, tender, flavorful meat, and an aroma that fills your home with warmth? Absolutely! Preparing this classic dish at home isn’t just about saving money; it’s about crafting a personalized meal that rivals any gourmet offering, allowing you to control every ingredient and imbue it with your unique touch. Forget dry, bland poultry; this comprehensive guide will equip you with the knowledge and techniques to consistently deliver an exceptional culinary experience. Moreover, for those who love experimenting with different preparations, mastering this foundational recipe opens the door to a world of exciting Chicken Recipes variations, transforming weeknight dinners into special occasions.
Ingredients & Kitchen Tools
- 1 whole chicken (3-4 lbs): Opt for a fresh, free-range chicken for best flavor and texture.
- 2 lemons: One sliced for the cavity, one quartered for roasting. Enhances aroma and brightness.
- 1 head garlic: Cloves separated but unpeeled. Adds a sweet, mellow flavor when roasted.
- Fresh herbs (rosemary, thyme, sage): A small bunch of each. Essential for an aromatic, traditional roast.
- 1 large onion: Quartered. Provides a flavorful base and moisture.
- 2 tablespoons olive oil: For coating the chicken, promoting crispy skin.
- 1 tablespoon salt: Coarse sea salt or kosher salt. Essential for seasoning and brining.
- 1 teaspoon black pepper: Freshly ground for best flavor.
- Optional vegetables (carrots, potatoes, parsnips): Cut into 1-inch chunks. Can be roasted alongside the chicken for a complete meal.
- Roasting Pan: A sturdy, oven-safe pan large enough to hold the chicken without crowding.
- Meat Thermometer: Crucial for ensuring the chicken is cooked to a safe internal temperature.
- Twine (optional): For trussing the chicken, promoting even cooking.
- Basting Brush (optional): For applying pan juices or melted butter during roasting.
Prep Time & Cooking Schedule
- Prep Time: 20 minutes (includes trussing and seasoning)
- Active Cook Time: 1 hour 15 minutes to 1 hour 45 minutes (depending on chicken size)
- Resting Time: 15-20 minutes
Planning is key for a perfectly cooked bird. Start your prep about two hours before you want to serve, allowing ample time for the chicken to come to room temperature after seasoning, which leads to more even cooking. Factor in the resting time after roasting; this crucial step allows the juices to redistribute, ensuring every slice is incredibly moist and tender.
Step-by-Step Instructions
1. Preheat & Prep: Preheat your oven to 425°F (220°C). Remove the chicken from its packaging, pat it thoroughly dry with paper towels (this is critical for crispy skin!), and remove any giblets from the cavity.
2. Season: Drizzle the chicken with olive oil and rub it generously over the entire bird. In a small bowl, combine salt and pepper, then sprinkle it all over the chicken, inside and out. Don’t be shy; adequate seasoning is vital for flavor.
3. Stuff & Truss (Optional): Stuff the chicken cavity with one sliced lemon, half the garlic cloves, and a handful of fresh herbs. If desired, truss the chicken by tying the legs together with kitchen twine and tucking the wing tips under the body. This helps the chicken cook more uniformly.
4. Arrange Pan: Place the remaining lemon quarters, garlic cloves, onion chunks, and optional vegetables at the bottom of your roasting pan. This creates a flavorful bed for the chicken and a delicious base for pan juices.
5. Roast: Place the seasoned chicken breast-side up on top of the vegetables in the roasting pan. Transfer to the preheated oven.
6. Initial High Heat Roasting: Roast at 425°F (220°C) for 20 minutes. This high heat helps to achieve that coveted crispy skin.
7. Reduce Heat & Continue Roasting: Reduce the oven temperature to 375°F (190°C) and continue roasting for another 55-90 minutes, depending on the size of your bird. The internal temperature of the thickest part of the thigh (without touching the bone) should reach 165°F (74°C). For the most accurate result for your delicious Roast Chicken, always use a meat thermometer. About halfway through the second roasting phase, you can baste the chicken with pan juices if you wish, though it’s not strictly necessary for a moist bird. Mastering this technique, along with exploring other mouth-watering Chicken Recipes, will make you a kitchen superstar.
8. Rest: Once cooked, remove the chicken from the oven, transfer it to a cutting board, and tent it loosely with foil. Let it rest for 15-20 minutes before carving. This resting period is critical for juicy results.
Nutritional Benefits & Advantages
Chicken is an excellent source of lean protein, essential for muscle repair and growth. Roasting, especially with skin removed, is a healthier cooking method as it doesn’t add excess fat, compared to frying. The herbs like rosemary and thyme provide antioxidants, while garlic and lemon boost immunity and add vibrant flavor without relying on unhealthy additives. Incorporating root vegetables in the roasting pan also adds valuable fiber, vitamins, and minerals, making this a balanced and wholesome meal.
Tips, Variations & Cooking Advice
- Flavor Boost: Consider rubbing a paste of softened butter, minced garlic, and herbs under the chicken skin for extra flavor and moisture.
- Spice It Up: For a spicier kick, add a pinch of smoked paprika or cayenne pepper to your seasoning blend.
- Citrus Swap: Instead of lemon, try oranges or limes in the cavity for a different aromatic profile.
- Brining: For an exceptionally moist chicken, consider a dry brine (salt rubbed all over the bird and left in the fridge overnight) or a wet brine (submerging in salted water) a day before roasting.
- Vegetable Medley: Feel free to experiment with other hard vegetables like sweet potatoes, Brussels sprouts, or even apple wedges for an autumn twist.
- Gluten-Free/Dairy-Free: This recipe is naturally gluten-free. For dairy-free, simply ensure no dairy-based butter is used for basting.
Common Mistakes to Avoid
- Not Patting Dry: Skipping this step means the skin won’t crisp up properly. Moisture on the skin prevents browning.
- Overcooking: The most common culprit for dry chicken. Always use a meat thermometer!
- Not Resting: Carving immediately after roasting causes all the juices to escape, resulting in a less tender bird.
- Crowding the Pan: If roasting vegetables, ensure they have enough space in the pan to roast rather than steam. Use two pans if necessary.
- Under-Seasoning: Chicken loves salt and pepper. Don’t be timid with your seasoning.
Storage & Meal Prep Tips
Leftover Roast Chicken can be stored in an airtight container in the refrigerator for up to 3-4 days. For longer storage, debone the chicken and freeze the meat for up to 3 months. To reheat, gently warm in the oven at 300°F (150°C), covered with foil to prevent drying out, or briefly in a microwave. The carcass can be used to make a flavorful chicken stock or broth, perfect for soups and sauces, extending the value of your initial preparation. This makes it an excellent candidate for meal prep, providing versatile leftovers for sandwiches, salads, or quick weeknight dinners.
Conclusion
Mastering the art of a perfect Roast Chicken is a culinary milestone that brings immense satisfaction and delicious rewards. With this guide, you now possess the knowledge and techniques to achieve a moist, flavorful, and beautifully crispy bird every time. Don’t let the idea of roasting a whole chicken intimidate you; embrace the process and enjoy the incredible aroma and taste that will fill your home. Experiment with the tips and variations, and soon you’ll be creating your own signature Chicken Recipes, delighting family and friends alike. Try this recipe this week and share your results – happy roasting!
FAQs
Q1: How do I know if my chicken is cooked through without a thermometer?
A1: While a thermometer is highly recommended, you can check doneness by piercing the thickest part of the thigh with a knife. The juices should run clear. If they are pink or cloudy, continue cooking.
Q2: My chicken skin isn’t getting crispy. What am I doing wrong?
A2: Ensure the chicken is thoroughly patted dry before roasting. The high initial heat setting (425°F/220°C) is also crucial. Avoid basting too frequently, as this can add moisture back to the skin.
Q3: Can I roast a larger chicken with this recipe?
A3: Yes, but you’ll need to adjust the cooking time. A general rule of thumb is 20 minutes per pound at 375°F (190°C) after the initial high-heat roast. Always rely on a meat thermometer for accuracy.
Q4: What can I do with the pan drippings?
A4: The pan drippings are liquid gold! You can skim off excess fat and use them to make a savory gravy, incorporating flour or cornstarch for thickening, or simply drizzle them over the carved chicken before serving.
Q5: Can I prepare the chicken ahead of time?
A5: You can season the chicken up to 24 hours in advance and keep it refrigerated. Bring it to room temperature for about an hour before roasting for best results.