Bake the Perfect Apple Pie: A Homemade Classic
Is there anything more comforting than the aroma of a freshly baked Apple Pie wafting through your home? While store-bought versions can be convenient, few things compare to the satisfaction and flavor of a homemade pie. In this comprehensive guide, we’ll dive deep into the art of Baking a classic apple pie, transforming simple ingredients into a warm, inviting dessert that will impress everyone. Get ready to embark on a culinary journey that will fill your kitchen with warmth and your taste buds with pure delight.
Ingredients & Kitchen Tools
Crafting the perfect apple pie requires a thoughtful selection of ingredients and the right tools.
- For the Pie Crust:
* 2 ½ cups all-purpose flour: Provides structure and a tender crumb.
* 1 teaspoon salt: Enhances flavor and balances sweetness.
* 1 cup (2 sticks) unsalted butter, very cold and cut into ½-inch cubes: Essential for a flaky crust.
* ½ cup ice water: Binds the dough without overdeveloping gluten.
* 1 tablespoon white vinegar (optional): Helps tenderize the crust.
- For the Apple Filling:
* 6-8 medium baking apples (e.g., Granny Smith, Honeycrisp, Braeburn), peeled, cored, and sliced ¼-inch thick: Choose firm, tart apples for best results.
* ¾ cup granulated sugar: Sweetens the filling. Adjust to your apple’s tartness.
* 2 tablespoons all-purpose flour (or cornstarch): Thickens the filling.
* 1 teaspoon ground cinnamon: Classic warming spice for apple pie.
* ¼ teaspoon ground nutmeg: Adds depth to the spice blend.
* 1 tablespoon fresh lemon juice: Brightens the flavors and prevents apples from browning.
* 2 tablespoons unsalted butter, cut into small pieces: Adds richness and a glossy finish.
- Egg Wash (Optional):
* 1 egg yolk beaten with 1 tablespoon milk: Gives the crust a golden sheen.
- Kitchen Tools:
* 9-inch pie plate: The ideal size for this recipe.
* Pastry blender or food processor: For cutting butter into flour.
* Rolling pin: For rolling out the pie crust.
* Large mixing bowls: For preparing dough and filling.
* Paring knife: For peeling and coring apples.
* Measuring cups and spoons: For accurate ingredient quantities.
Prep Time & Cooking Schedule
Planning is key to a perfectly baked pie!
- Prep Time: 45 minutes (includes making the crust and preparing the filling).
- Chill Time (for crust): 60 minutes minimum (or overnight). This is crucial for a flaky crust and prevents shrinking.
- Cook Time: 50-60 minutes.
- Resting Time (after baking): 2-3 hours. This allows the filling to set properly, preventing a watery pie when sliced. Don’t rush this step!
Step-by-Step Instructions
Follow these detailed steps to create a show-stopping Apple Pie that will earn rave reviews. From crafting a flaky crust to achieving a perfectly spiced filling, we’ll guide you through each stage of the Baking process.
1. Prepare the Pie Crust (can be done a day ahead): In a large bowl, whisk together flour and salt. Cut in the cold butter using a pastry blender or your fingertips until the mixture resembles coarse crumbs with some pea-sized butter pieces. Gradually add ice water, one tablespoon at a time, mixing until just combined. The dough should still be a bit shaggy. Divide the dough in half, flatten each into a disk, wrap in plastic, and chill for at least 30 minutes, or up to 2 days.
2. Prepare the Apple Filling: In a large bowl, combine the sliced apples, granulated sugar, flour (or cornstarch), cinnamon, nutmeg, and lemon juice. Toss gently to coat all the apples evenly. Set aside.
3. Assemble the Pie: On a lightly floured surface, roll out one disk of dough into a 12-inch circle. Carefully transfer it to your 9-inch pie plate. Trim the edges, leaving about a ½-inch overhang.
4. Add Filling and Top Crust: Pour the apple filling into the pie crust, mounding it slightly in the center. Dot the top of the filling with the small pieces of butter. Roll out the second disk of dough. You can either place it over the filling as a solid top crust, or cut it into strips for a lattice design.
5. Seal and Crimp: If using a solid top crust, align it over the filling, trim the edges, and crimp the top and bottom crusts together to seal. If making a lattice, carefully weave the strips over the filling, then crimp the edges to seal.
6. Vent and Egg Wash (Optional): Cut several slits in the top crust (if not lattice) to allow steam to escape. For a golden crust, brush the top with an egg wash (beaten egg yolk and milk).
7. Bake the Pie: Preheat oven to 425°F (220°C). Place the pie on a baking sheet (to catch any drips) and bake for 15 minutes. Reduce the oven temperature to 375°F (190°C) and continue baking for 35-45 minutes more, or until the crust is golden brown and the filling is bubbly. If the crust browns too quickly, loosely tent with aluminum foil.
8. Cool: Transfer the baked pie to a wire rack and let it cool for at least 2-3 hours before slicing and serving. This is vital for the filling to set properly.
Nutritional Benefits & Advantages
Apples, the star of this dish, are a good source of dietary fiber, especially pectin, which supports digestive health and can help regulate blood sugar levels. They also provide vitamin C, an essential antioxidant. While Apple Pie is a treat, using fresh, wholesome ingredients and controlling sugar levels can make it a more nutritious choice than many other desserts. Homemade versions also avoid artificial preservatives found in commercial pies.
Tips, Variations & Cooking Advice
- Apple Choice: For complex flavor and texture, use a mix of tart (Granny Smith) and sweet-crisp (Honeycrisp, Fuji) apples.
- Thicker Filling: If you prefer an extra-thick filling, increase the flour or cornstarch in the filling by an additional tablespoon.
- Flavor Boosts: Add a pinch of allspice or ginger to the filling, or a teaspoon of vanilla extract. A splash of bourbon or brandy can also elevate the apple flavor.
- Gluten-Free: Substitute the all-purpose flour in the crust with a gluten-free pie crust blend and use an equal amount for the filling thickener.
- Lactose-Free/Dairy-Free: Use a dairy-free butter substitute for both the crust and dotting the filling.
- Pie Protector: To prevent the crust edge from burning, use a pie crust shield or a strip of aluminum foil around the perimeter for the last 20-30 minutes of baking.
Common Mistakes to Avoid
- Warm Butter in Crust: Using warm butter will result in a tough, un-flaky crust. Always use very cold butter and handle the dough minimally.
- Not Chilling the Dough: Insufficient chilling leads to a shrinking crust and makes the dough harder to work with.
- Over-mixing the Dough: Overworking the dough develops gluten, leading to a tough crust. Mix just until combined.
- Not Slicing Apples Uniformly: Unevenly sliced apples will cook at different rates, leading to some mushy and some firm pieces.
- Not Pacing Baking Temperatures: Starting hot then reducing temperature helps set the crust and then cooks the filling thoroughly without burning the top.
- Cutting Too Soon: Slicing a pie before it has properly cooled will result in a runny, messy filling. Patience is a virtue here!
Storage & Meal Prep Tips
- Storage: Fully cooled Apple Pie can be stored at room temperature, loosely covered with foil or plastic wrap, for up to 2 days. For longer storage, refrigerate for up to 5 days.
- Freezing: You can freeze an unbaked pie! Assemble the pie, but do not egg wash. Wrap it tightly in several layers of plastic wrap and then foil. Freeze for up to 3 months. To bake, unwrap and bake from frozen at the specified temperatures, adding about 15-25 minutes to the baking time, and tenting if necessary.
- Reheating Leftovers: Reheat slices in a preheated oven at 300°F (150°C) for 10-15 minutes, or until warmed through, to restore a crispy crust. Microwaving will warm it but can make the crust soggy.
Conclusion
Creating a homemade Apple Pie is a rewarding experience, transforming simple ingredients into a timeless dessert. Mastering the art of Baking this classic not only yields a delicious treat but also fills your home with an irresistible aroma that evokes warmth and nostalgia. We encourage you to try this recipe and savor the delightful flavors and textures of a truly exceptional homemade pie. Share your baking triumphs with us – we’d love to see your beautiful creations!
FAQs
- Q: Can I use pre-made pie crust?
* A: Yes, you can use store-bought pre-made pie crusts to save time. Just ensure you use two crusts (one for the bottom, one for the top).
- Q: My crust is burning before the apples are soft. What should I do?
* A: Loosely tent the entire pie with aluminum foil or specifically cover the edges with a pie crust shield (or foil strips) to prevent over-browning while the apples finish cooking.
- Q: How do I know when the apples are cooked through?
* A: You should see the filling bubbling up vigorously through the vents or lattice. You can also carefully insert a thin sharp knife into one of the vents; if it goes in easily, the apples are tender.
- Q: Can I reduce the sugar in the filling?
* A: Absolutely! If your apples are naturally very sweet or you prefer a less sweet pie, you can reduce the sugar by ¼ cup. Taste a raw slice of apple mixture before baking to assess sweetness.
- Q: What’s the best way to serve apple pie?
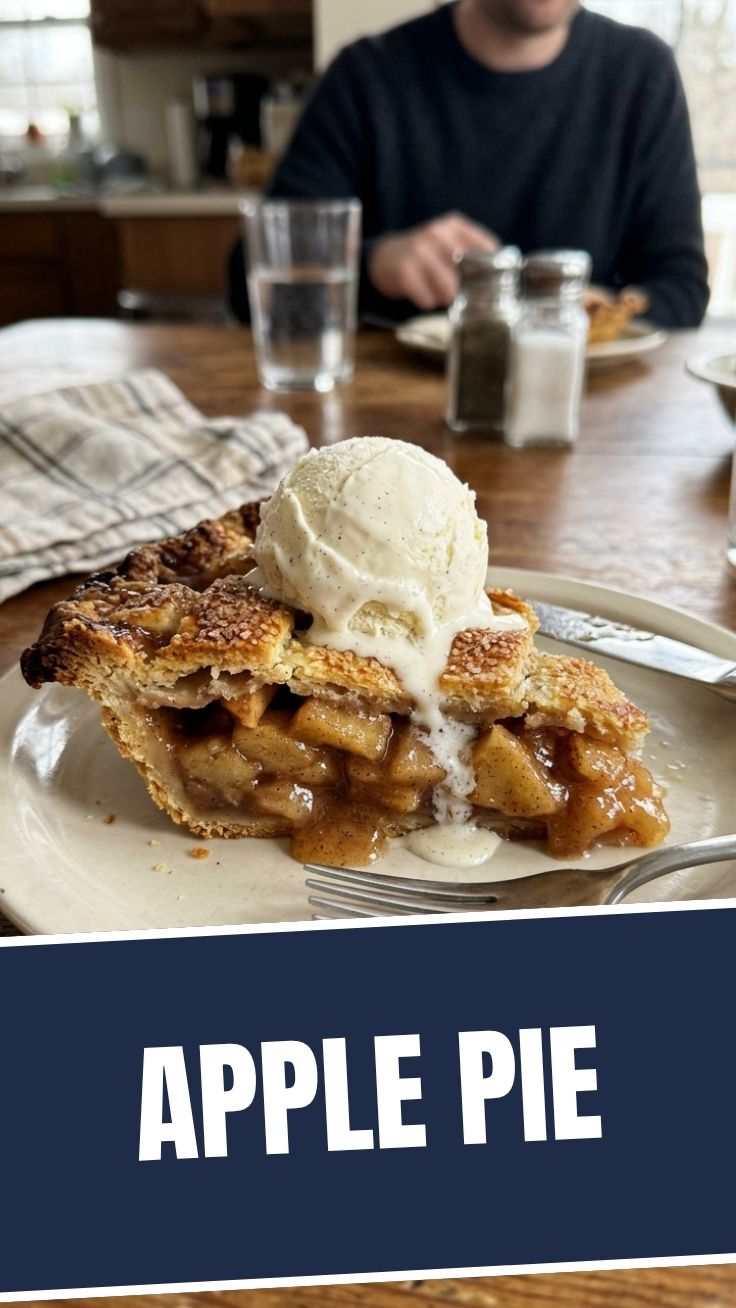
* A: While delicious on its own, it’s heavenly served slightly warm with a scoop of vanilla ice cream, a dollop of whipped cream, or a slice of sharp cheddar cheese.