Master the Grill: The Ultimate Guide to Perfect BBQ Ribs Every Time
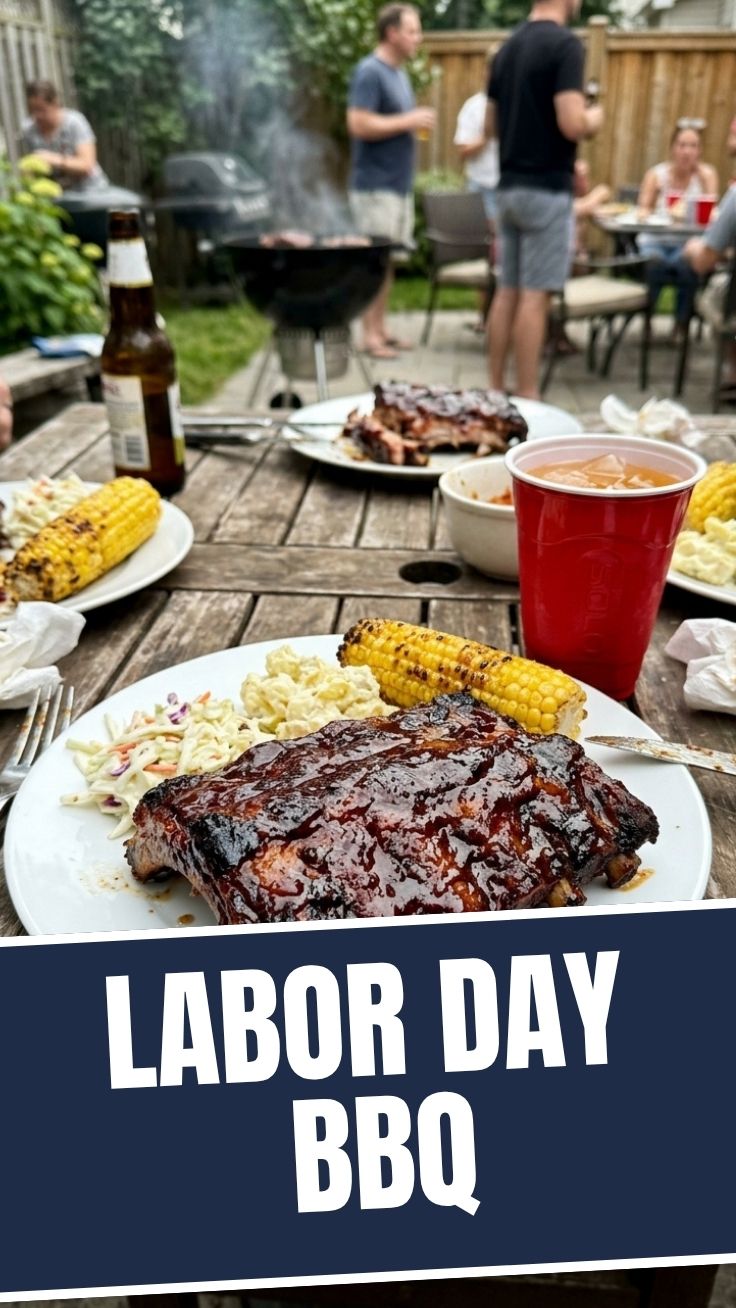
Dreaming of fall-off-the-bone ribs, glazed with smoky sweetness and bursting with flavor? If you’ve ever thought making restaurant-quality BBQ ribs at home was too challenging, think again. This comprehensive guide will empower you to create a culinary masterpiece, turning your backyard into the ultimate BBQ haven. Forget store-bought shortcuts; crafting these delectable ribs yourself is not only more satisfying but also guarantees top-notch taste and ingredients. And let’s not forget the undeniable joy of sharing your perfectly cooked rack with family and friends – especially when you master the art of the Labor Day BBQ Ribs. Whether you’re aiming for a crowd-pleaser or exploring options like Slow Cooker Ribs for a weeknight treat, we’ve got you covered.
Ingredients & Kitchen Tools
Gathering the right ingredients and tools is the first step to BBQ success.
- Pork Ribs (2-3 racks, St. Louis style or baby back): Choose meaty ribs with good marbling for optimal flavor and tenderness. St. Louis style offers a flat, rectangular shape, while baby backs are smaller and leaner.
- Dry Rub:
* Brown Sugar (1/2 cup, packed): Adds sweetness and helps create a beautiful caramelization.
* Smoked Paprika (1/4 cup): Provides smoky depth and vibrant color.
* Garlic Powder (2 tbsp): Essential aromatic for savory flavor.
* Onion Powder (2 tbsp): Enhances the savory profile.
* Black Pepper (1 tbsp, freshly ground): Adds a mild kick.
* Salt (1 tbsp, kosher or sea salt): Elevates all other flavors.
* Cayenne Pepper (1 tsp, optional): For a touch of heat.
* Mustard Powder (1 tbsp): A secret ingredient that adds tang and depth.
- BBQ Sauce (1 1/2 cups, your favorite brand or homemade): For basting and serving.
- Apple Cider Vinegar (1/4 cup): Helps tenderize and adds a subtle tang.
- Apple Juice (1/2 cup): For moisture and sweetness during cooking.
- Water (1/2 cup): To maintain humidity in the cooking environment.
- Foil Pan(s): For easy clean-up and containing juices.
- Basting Brush: For applying BBQ sauce evenly.
- Meat Thermometer: Crucial for ensuring ribs are cooked to perfection.
- Sharp Knife: For portioning ribs.
- Cutting Board: A sturdy surface for prep work.
- Paper Towels: For patting ribs dry.
- Tongs: For handling hot ribs.
Prep Time & Cooking Schedule
Planning ahead is key to achieving tender, juicy ribs.
- Prep Time: 20-30 minutes (includes applying dry rub)
- Marinating Time: 4-12 hours (overnight recommended for best flavor)
- Cooking Time: 3-5 hours (depending on method and rib type)
- Resting Time: 15-20 minutes
Step-by-Step Instructions
Follow these detailed steps to achieve rib perfection.
1. Prepare the Ribs: Pat the ribs dry with paper towels. Carefully remove the thin membrane from the back of each rack. This membrane can be tough and prevents the rub from penetrating the meat. Use a knife to get under it, then grip with a paper towel and pull firmly.
2. Apply the Dry Rub: In a small bowl, combine all dry rub ingredients. Generously apply the rub to all sides of the ribs, pressing it gently into the meat. For optimal flavor and tenderness, cover the ribs tightly and refrigerate for at least 4 hours, or preferably overnight. This marinating process is essential for infusing the meat with flavor, whether you’re aiming for classic Labor Day BBQ Ribs or considering the less intensive prep for Slow Cooker Ribs.
3. Preheat & Prepare Smoker/Oven:
* Smoker: Preheat to 225°F (107°C). Use wood chips like hickory, apple, or cherry for enhanced flavor.
* Oven: Preheat to 275°F (135°C). Place a wire rack over a foil-lined baking sheet to allow for air circulation.
4. First Cook (Smoking/Baking): Place the ribs, bone-side down, in your smoker or on the prepared baking sheet. Cook for 2.5-3 hours until the rub is set and the ribs have a nice color.
5. The “Crutch” (Foil Wrap): This step ensures tenderness. Lay out two large pieces of heavy-duty foil for each rack. Create a liquid mixture of apple cider vinegar, apple juice, and water. Place each rib rack meat-side up on the foil. Pour about 1/4 cup of the liquid mixture over each rack. Tightly wrap the ribs, creating a sealed pouch.
6. Second Cook (Back to Heat): Return the foil-wrapped ribs to the smoker or oven. Increase smoker temperature to 250°F (121°C) or keep the oven at 275°F (135°C). Cook for another 1.5-2 hours, or until the internal temperature reaches 195-203°F (90-95°C) and the ribs are very tender (a toothpick should slide in easily between the bones).
7. Final Glaze: Carefully unwrap the ribs, discarding the liquid. Return the ribs to the smoker or oven (without foil). Increase smoker/oven temperature to 375°F (190°C). Baste generously with your favorite BBQ sauce. Cook for 15-20 minutes, or until the sauce is caramelized and slightly tacky.
8. Rest & Serve: Remove the ribs from the heat and let them rest for 15-20 minutes before slicing and serving. This allows the juices to redistribute, ensuring maximum tenderness.
Nutritional Benefits & Advantages
While often considered indulgent, pork ribs, when consumed in moderation, offer several nutritional benefits. They are an excellent source of protein, essential for muscle building and repair. Pork also provides crucial B vitamins (B1, B2, B3, B6, B12) important for energy metabolism, and minerals like iron and zinc, which play vital roles in immune function and overall health. Preparing ribs at home allows you to control the amount of sugar and sodium in your dry rub and BBQ sauce, leading to a healthier and more personalized meal than many restaurant versions.
Tips, Variations & Cooking Advice
- Spice Level: Adjust the cayenne pepper in the rub to your preference.
- Smoked Flavor (Oven Method): Add a few drops of liquid smoke to your foil crutch liquid for a hint of smoky flavor if not using a smoker.
- Gluten-Free/Dairy-Free: Ensure your BBQ sauce and dry rub ingredients are certified gluten-free if needed. Most rubs are naturally dairy-free.
- Different Meats: This method can be adapted for beef ribs, though cooking times may vary.
- Flavor Boost: For extra flavor, consider injecting the ribs with apple juice or a thin marinade before applying the rub.
- Membrane Removal: If you struggle, ask your butcher to remove the membrane for you.
Common Mistakes to Avoid
- Not removing the membrane: Leads to tough, chewy ribs.
- Cooking at too high a temperature: Results in dry, burnt ribs. Low and slow is the mantra for ribs!
- Not resting the ribs: Leads to juices running out, resulting in dry meat.
- Over-saucing too early: The sugar in BBQ sauce can burn easily. Apply it in the last stage of cooking.
- Impatience: Ribs take time. Don’t rush the process for truly tender results.
Storage & Meal Prep Tips
Leftover ribs store exceptionally well. Allow them to cool completely, then wrap tightly in aluminum foil and place in an airtight container. Refrigerate for up to 3-4 days. For longer storage, ribs can be frozen for up to 3 months. To reheat, thaw if frozen, then place foil-wrapped ribs in an oven preheated to 300°F (150°C) until warmed through, about 20-30 minutes. You can also quickly reheat individual portions in the microwave, but an oven or air fryer will maintain better texture.
Conclusion
Mastering the art of delicious, fall-off-the-bone ribs at home is a truly rewarding culinary experience. By following this detailed guide, you’re not just cooking; you’re crafting an unforgettable meal that will impress everyone at your table. Whether you opt for the classic Labor Day BBQ Ribs on the grill or the convenience of Slow Cooker Ribs, the principles of patience, proper preparation, and the right techniques will lead to smoky, tender perfection every time. So fire up that grill or preheat the oven, and prepare to elevate your home cooking game! Don’t forget to share your rib creations with us in the comments!
FAQs
Q1: How do I know when my ribs are done?
A1: The most reliable way is with a meat thermometer; they should reach 195-203°F (90-95°C). Visually, the meat should have pulled back from the bones, and a toothpick should slide easily into the thickest part of the meat without resistance.
Q2: Can I use different types of wood for smoking?
A2: Absolutely! Experiment with different wood chips like apple (mild, sweet), cherry (fruity, subtle), pecan (nutty, rich), or oak (medium, classic BBQ) to find your preferred flavor profile.
Q3: What if I don’t have a smoker?
A3: No problem! Follow the oven instructions. While you won’t get the same deep smoke ring, you can achieve incredibly tender and flavorful ribs. A few drops of liquid smoke added to the foil step can enhance the smoky perception.
Q4: How important is removing the membrane?
A4: Extremely important! The membrane is tough and will prevent your ribs from becoming tender. It also acts as a barrier, preventing your delicious rub from fully flavoring the meat.
Q5: Can I prepare the dry rub in advance?
A5: Yes, you can mix the dry rub ingredients and store them in an airtight container for several weeks. This makes prep even quicker on cooking day.